The Mountain's Guide

Minecraft Bedrock Guides brought by Mountain Top
- Brewing Guide provided by Mr. Bacon Brew Co.
- Redstone Guide provided by Redstone Solutions
- Banner Guide provided by LoL, LLC
Redstone Guide
Enhance your redstone knowledge with the help of this guide!
General Information
Introduction
Welcome to the Redstone Guide!
A Redstone Guide brings you a deeper explanation of how redstone work and how to use it. Every redstone items explain their uses, with the help of this guide it helps you to understand more redstone it has picture to help you understand better. Building redstone mechanism and contraption is done with a step by step tutorial with pictures so you can understand it clearly. It’s also have some redstone techniques/tricks, to help you for making your own redstone creation.
Work In Progress
This guide is work in progress, that’s why some tutorial are still coming soon. Implenting new features/tutorials are gradually added until it reach all features that I plan to implement and also maybe your suggestion will be added too, so expect for more updates. Keep writing your feedback I always listened to anyone’s feedback.
About
About this guide
This guide let you teach redstone even if your new player it can help you to understand redstone, the guide provide a picture to let you easily understand it. The guide are categorized into category and section to help Redstone Guide user what are they looking for and providing an organize topic.
Definition category
- This category is just like a “help” section of a guide, it provide an explanation to some words that is related to redstone in case you don’t know them.
Redstone Components category
- If you are new player and don’t know how every redstone components work, then this category help you. The redstone components are divided into different section according to their uses each section explain in their section page what components are listed in this topic and then an explanation to each components.
Redstone Tips category
- This category provide a tips to a Redstone Guide user about Redstone it can help you learn and get some tips about redstone. NOTE: The Redstone Tips at loading tips message are different from tips in Redstone Tips category.
There are 3 Major tutorial in this Guide which are Redstone Circuits, Contraption and Mechanism and the following tutorials attempt to categorize that have been useful to the Minecraft community, while this guide describe the specific tutorial of circuits, contraption and mechanism that fall into those categories and sections. And their definition is define in their section.
Definition
Circuits
What is Circuits?
A redstone circuit is a structure that activates or constrols mechanisms.
Circuits are designed to act in response to player activation or to operate autonomosuly either on a loop, or in response to non-player activity such as mod movement, item drops, plant growth, etc. The mechanisms constrolled by Redstone circuits range from simple devices such as automaic doors and light switches, to complex devices such as elevators, automaic farms, or even in-game computers. Understanding how to controll greatly increases the range of what is possible in Minecraft.
The subject of redstone structures is very broad due to the large variety of Redstone circuits that can be created; this guide provides only an overview of some of the different types of redstone circuits that can be built.
Although the number of ways to construct circuits is endless, certain patterns of construction occur over and over again. The following categories and sections attempt to categorize the circuits that have been useful to the Minecraft community, while this guide describe the specific circuits that fall into those categories.
Some example of circuits in this guide might be used by themselves for simple control of mechanisms, but frequently the player will need to combine theme into more complex circuits to meet the needs of a mechanism.
Types of Circuits
- Transmission Circuit
- A transmission circuit is a redstone circuit which allows redstone signals to move from one place to another.
- Some aspects of signals transmission can be helpful to understand: transmission types, vertical transmission, repeaters, and diodes.
- Logic Circuit
- It’s sometimes neccessary to check singals against each other and only output a signal when the inputs meet some criteria. A circuit that performs this function is know as logic gate (a “gate” that only allows signals through if the “logic” is satisfied).
- There are many different kinds of logic gates, each of which can be implement with many different designs. Each desgin has various advantages and disadvantages, such as size, complexity, speed, maintainace overhead, or cost. The various sections will give many different desgin for each gate type.
- Clock Circuit
- Clock Circuit is a circuit that send an endless signal at specific intervals. It produces a clock signal: a pattern of pluses which repeats itself. The time between the signals can be set by the player, either roughtly or very accurately.
- Clock circuit is a pluse generator that produces a loop of specific pluses repeatedly. Some are designed to run forever, while others can be stopped and started.
- Memory Ciruit
- Latches and flip-flops are effectively 1-bit memory cells. They allow circuits to store data and deliver it at a later time, rather than acting only on the inputs at the time they are given. As a result of this, they can turn an impluse into a constant signal, turning a button into a level.
- Devices using latches can be built to give different outputs each time a circuit is activated, even if the same inputs are used, and so circuits using them are referred to as sequential logic. They allow for the design of counters, long-term clocks, and complex memory systems, which can not be created needs to behave differently depeding on previous inputs.
- There are several basic cateogires of latches, distinguished by how they are controlled. For all types, the input lines are labeled according to thier purpose (Set, Reset, Toggle, Data, Clock). There are also more arbitarty labels: The ouput is commonly labeled Q for historical reasons. Some there is also an inverse output labeled as Qi, which is always ON when Q is OFF and vice versa. If both Q and Qi are available, we say the circuit has dual outputs. Most of the following types can be built as a latch that responds to the level of a signal, or as a flip-flop triggered by a change in the signal.
- NOTE: Actually inverse output labled as diabritic maron Q, it is a diacritic character which has line above the letter, we can’t use it everyone like here. So lets use Qi as labeled instead.
Properties
Size
Size describes ciruit size (the volume of the rectangular solid it occupies) with the notation of the shorter width, longer length and height, including support/floor blocks, but not including inputs/outputs.
Another method used for describing ciruit size in the Minecraft commmunity is to ignore non-redstone blocks simply used for support (for example, blocks under redstone dust or repeaters). However, this method is unable to distingush between flat and 1-high circuits, as well as some other circuits differences. But in this guide it describe the size of which includes suppport blocks.
Sometimes it is convenient to compare ciruits simply by the area of their footprint (e.g., 3X4 for a circuit three block wide by four blocks long), or by a single dimension important in a particular context (e.g., length in a sequence of sub-circuits, height in a confined space, etc.).
1-High
A structure is 1-high (aka “1-tall”) if its vertical dimension is one high (meaning it can not have any redstone componets that require support blocks below them, such as redstone dust or repeaters). Also see flat.
Flat
A structure is flat if it generally can be laid out on the ground with no components above another (support blocks under redstone components are okay). Flat structures are often easier for beginners to understand and build, and fit nicely under floors or on top of roofs. Also see 1-high.
Hipster
A structure is hipster if no redstone components are visble both before and after it completes its task (but it’s okay if some are visible during operation). Also see flush and seamless.
Instant
A structure is instant if its output responds immediatley to its input (a circuit delay of 0 ticks).
Seamless
A structure is seamless if it is initially hidden behind a flat wall, floor, or ceiling and can still provide utility to the other side. Seamless is a desirable design goal for piston-extenders, piston door, etc. Also see flush and hipster.
Stackable
A structure is stackable if it can be placed directly next to other copies of itself, and they all controlled as a single unit. Also see tileable.
Tileable
A structure is tileable if it can be placed directly next to other copies of itself, and each copy can still be controlled indepently. Also see stackable.
Structures might be described as “2- wide titleable” (tileable every two spaces in one dimenosion), or “2X4 tileable” (tile in two directions), etc. Some structures might be describe as alternating tileable, meaning they can be placeed next to each other if every other one is flipped or a slightly different design.
Other
Other design goals may include reducing the delay a sub-ciruit adds to a larger circuit, reducing the use of resource-expensive components (redstone, nether quartz, etc.), and re-arranging or redesigning a ciruit to make it small as possbile.
Redstone
Redstone Components
Redstone Components are the blocks used to build redstone structures, such as Transmission Components, Power Componets, Mechanism Compnents including Mobile Components and Miscellaneous Components, these are every items/blocks use in redstone structure.
Redstone Contraption
These are the basic, modular parts which can be combined to form any complex mechanism, these are already redstone structure but it’s just some part of the mechanism, for example is circuit it doesn’t do anything yet combining it into another redstone structures.
Redstone Mechanism
Mechanisms are complex system of blocks used to perform certain tasks, such as opening a door from afar or revealing a hidden staircase. These systems are built from simple components and normall involve some kind of user input, such as breaking a torch, which generates some kind of result, like a door being revealed. Mechanisms can range from simple switches that open and close doors from a safe distance, to complex devices such as combination locks that prevent intruders from entering your fort.
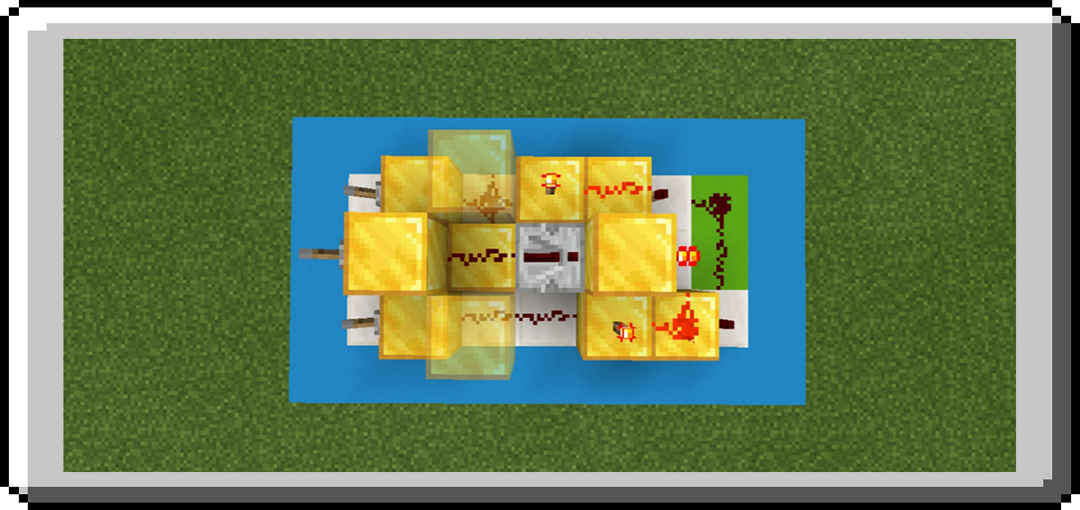
Block Label
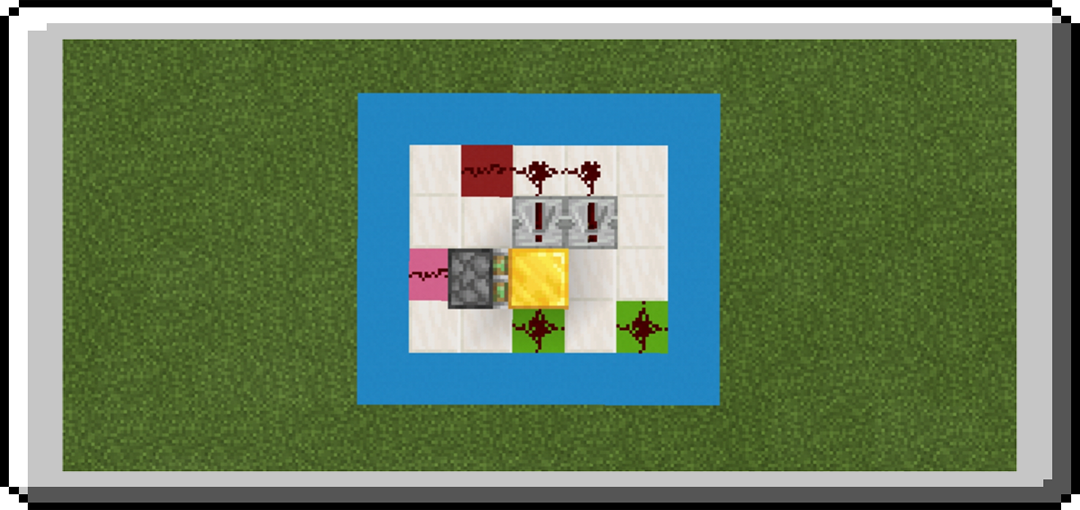
This section gives a basic overview of the new style of redstone schematics. These schematics represent a block uses in tutorial. Contraption represented in different blocks, allowing you to easily understand it.
Most blocks in a redstone ciruit are generic, in that any of serveral solid blocks will do. Therefore, they are shown as blocks chosen for visibility, rather than what you’d normally choose to build a constraption.
Block Label
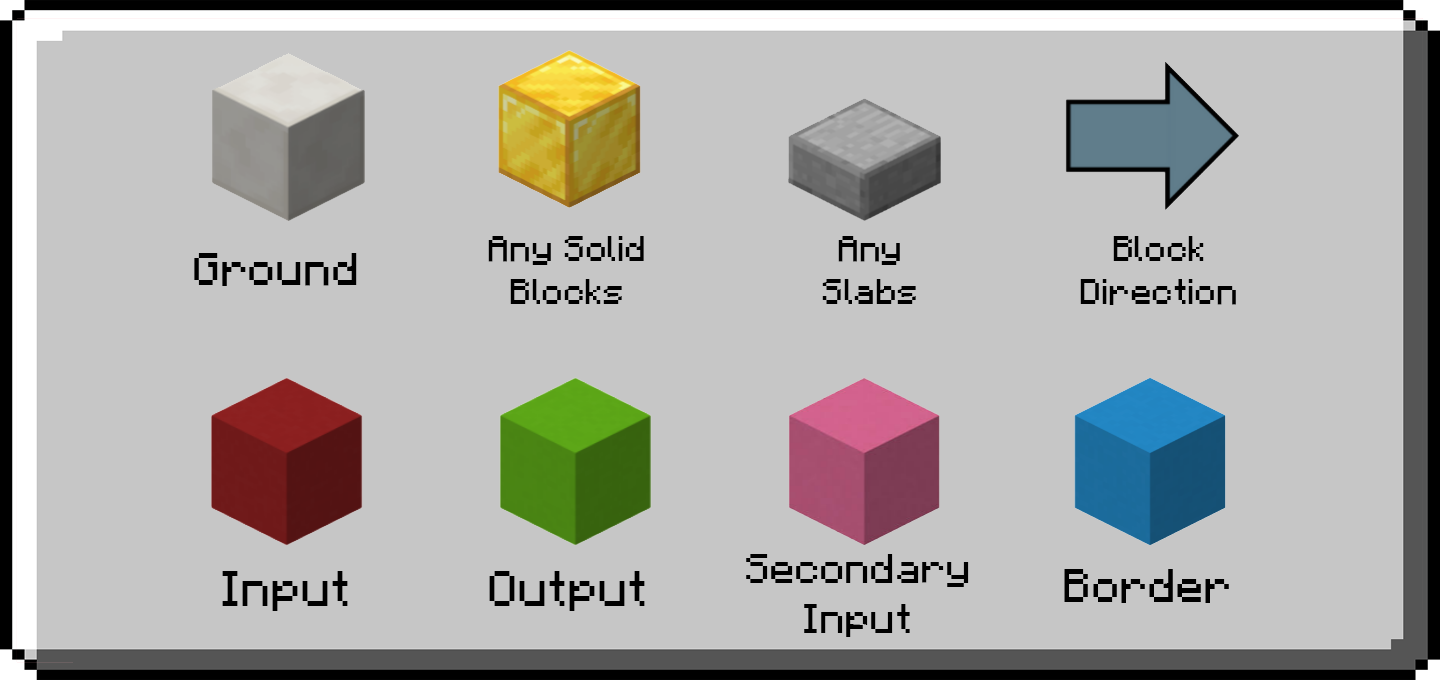
- Block of Quartz is the ground of constrapation, here where contraption is placed.
- Block of Gold represents as generic opaque block which are required by the contraption. It can be replaced by any opaque block which are required by the contraption. It can be replaced by any opaque blocks except falling blocks and/or non-movable blocks.
- Translucent Block of Gold shows what’s beneath or what’s beyond in this block.
- The colored blocks except for light blue shows the input and output location of the contraption.
- Red is for Input, Pink for secondary Input, and Lime is for Output. These maybe labelled differently if there is more than one input or output.
- The secondary Input (Pink) may had had a different purpose depending on the ciruit, what will be mentioned in that section.
- A components with arrow shows it’s direction where this block is facing at, a hopper with arrow shows where it is connected, if they are already visible where they are facing or already obvious if doesn’t need to have an arrow anymore.
- Blue Block is the border of contraption, it doesn’t need in contraption, just showing it’s dimension. It doesn’t need to replace with any block or require to be there.
Redstone Components
Tranmission Components
Transmission components propagate signals and pluses from power components to mechanism components. Complex effects can also be produced by allowing a signal to affect itself or its ciruit.
Redstone Dust
The easy way to understand how redstone dust work is simply just like as wire in real life. From the source wire is need to connect to bulb to turn it on. Redstone dust works exactly like this, from the source of redstone signals (see Power Components section), you will need to connect signals from power components to mechanism components to make them act or toggle..
Redstone are came from redstone ore when mined and it called redstone dust (also known as redstone wire) when it placed on the ground. So the redstone is item and redstone dust is a block.
Redstone signal can reach up to 15 blocks long from the source, while it’s farer from source, signal, or power of redstone is lower or weaker.
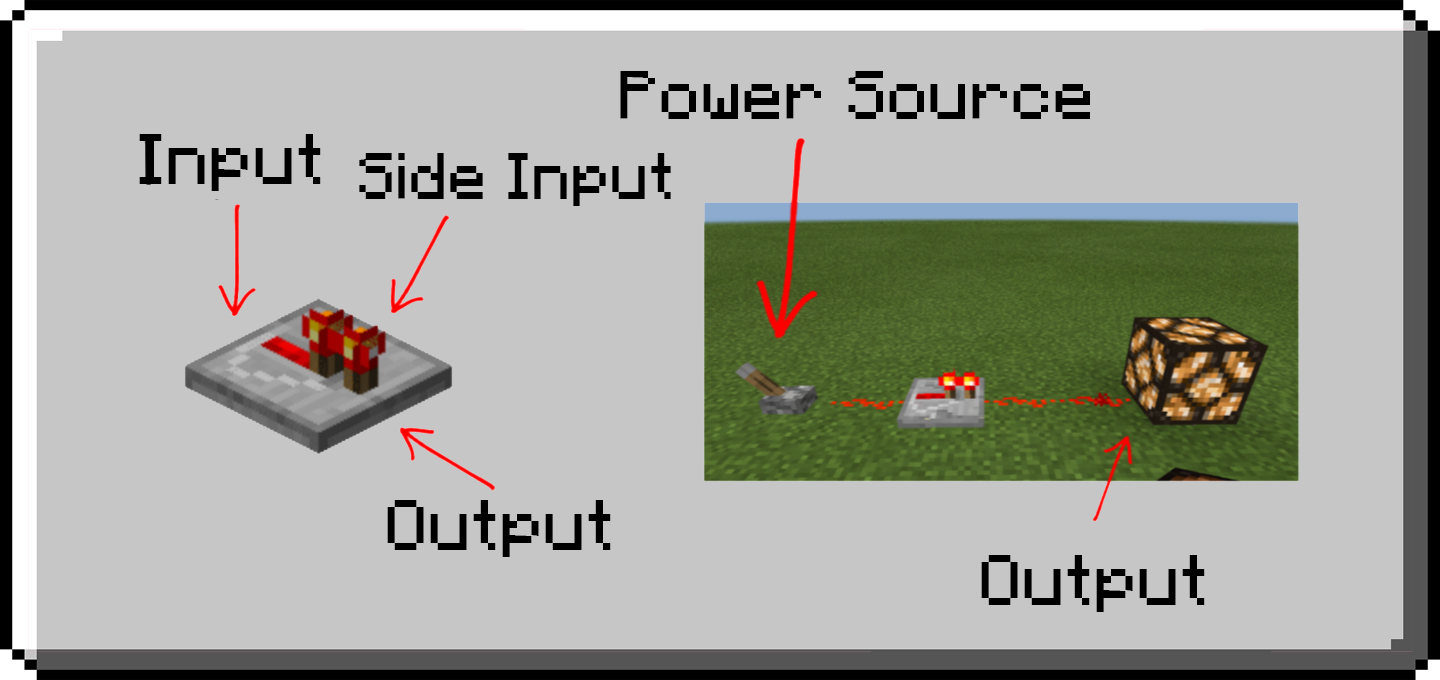
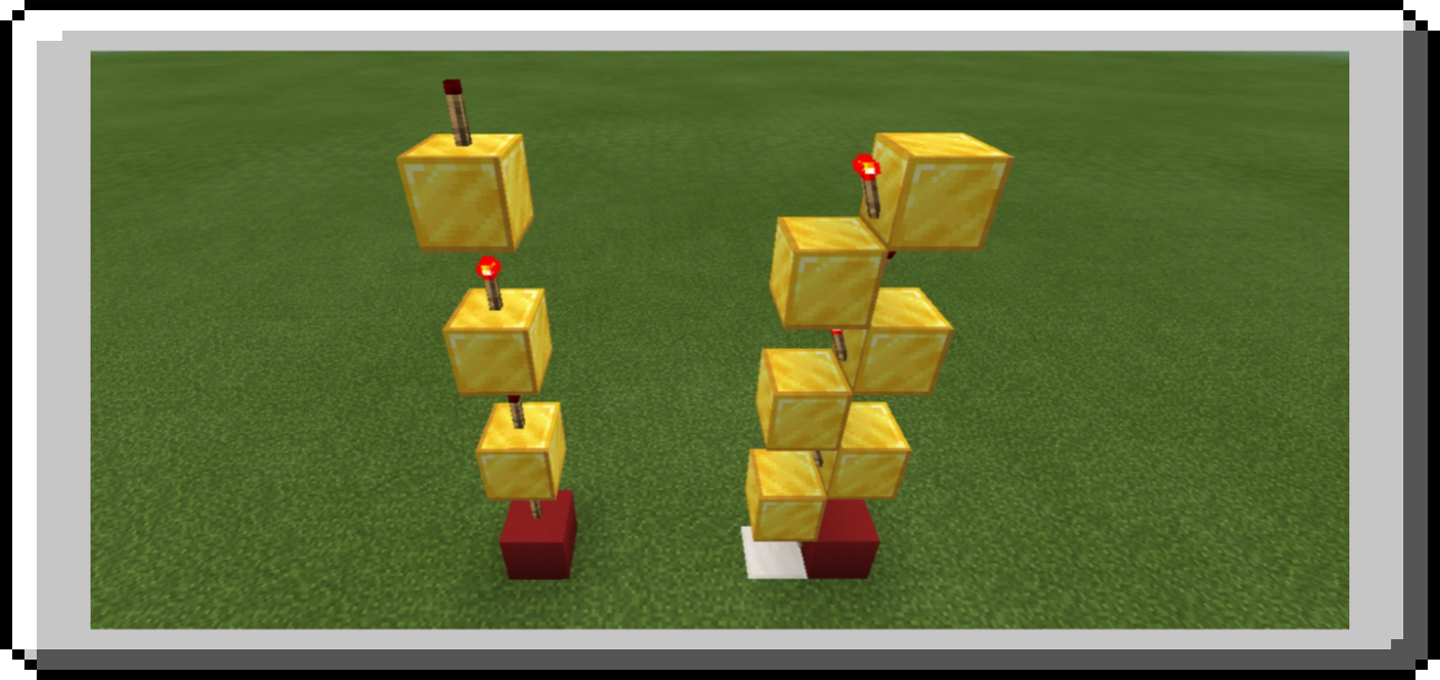
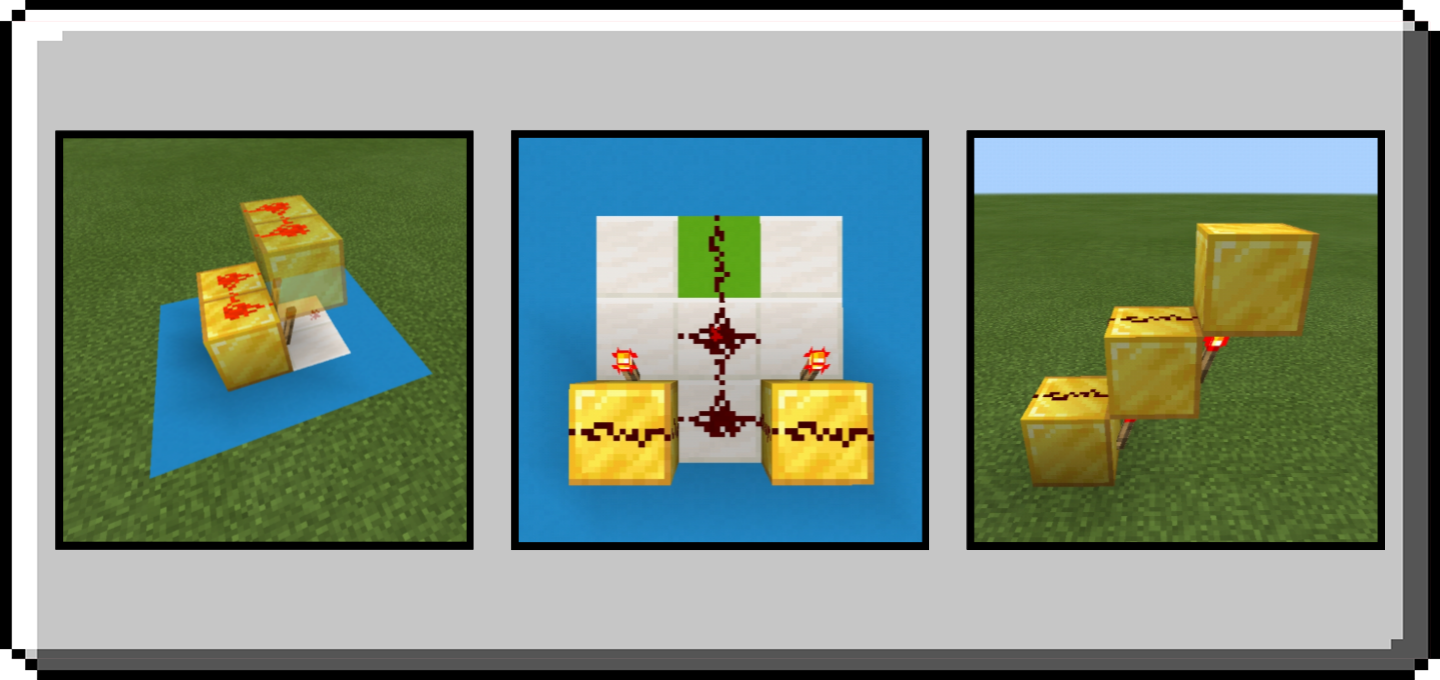
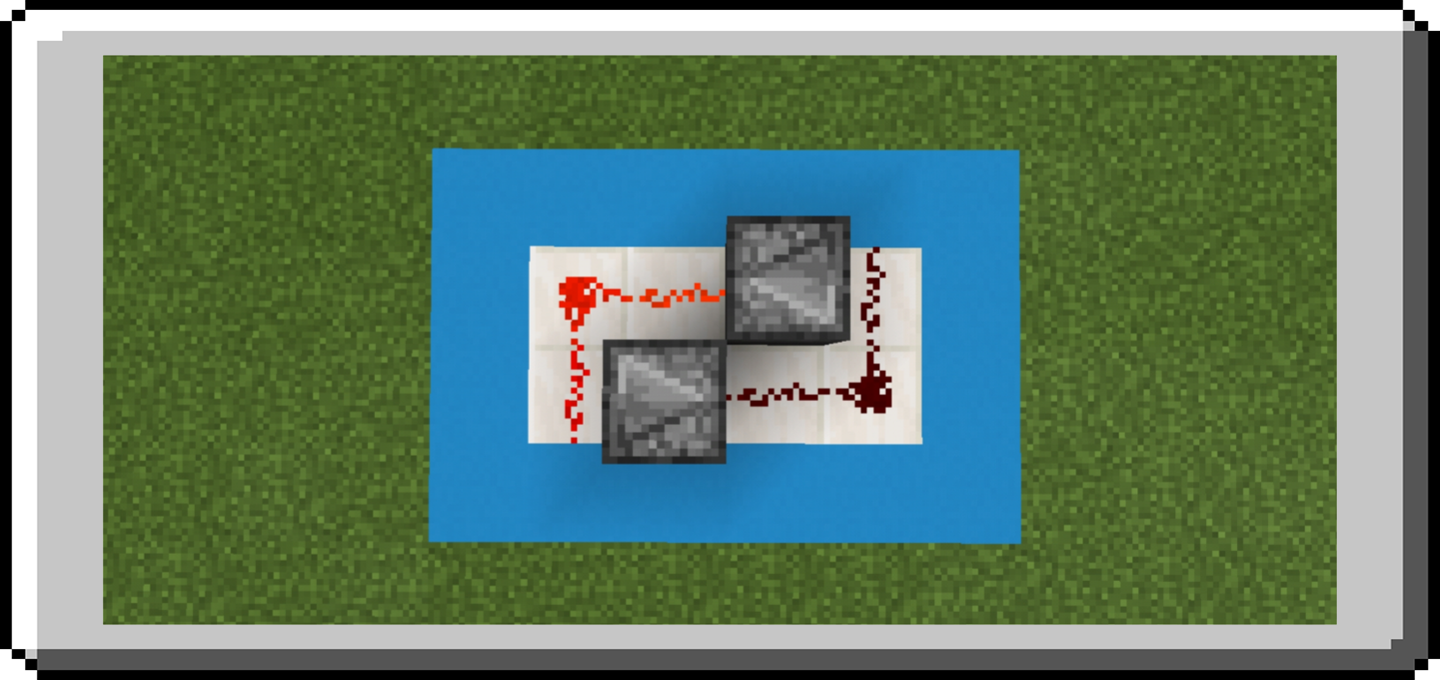
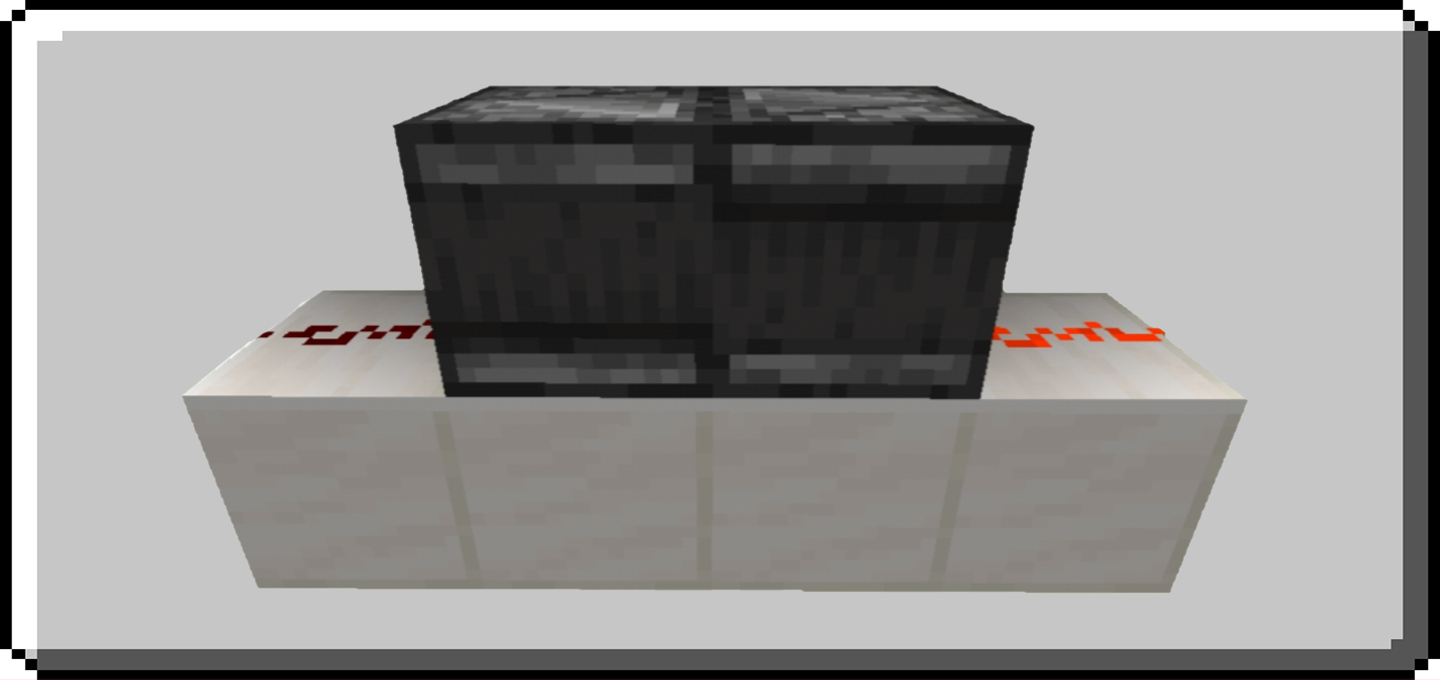
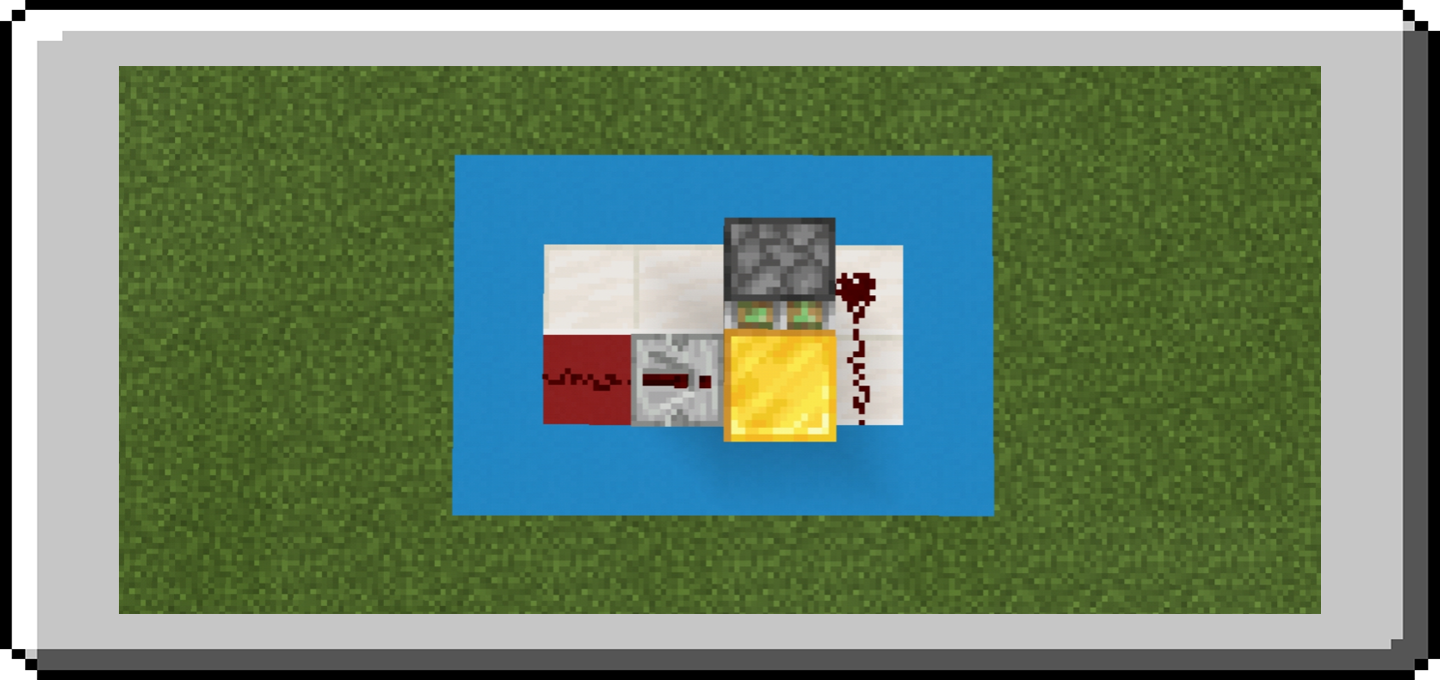
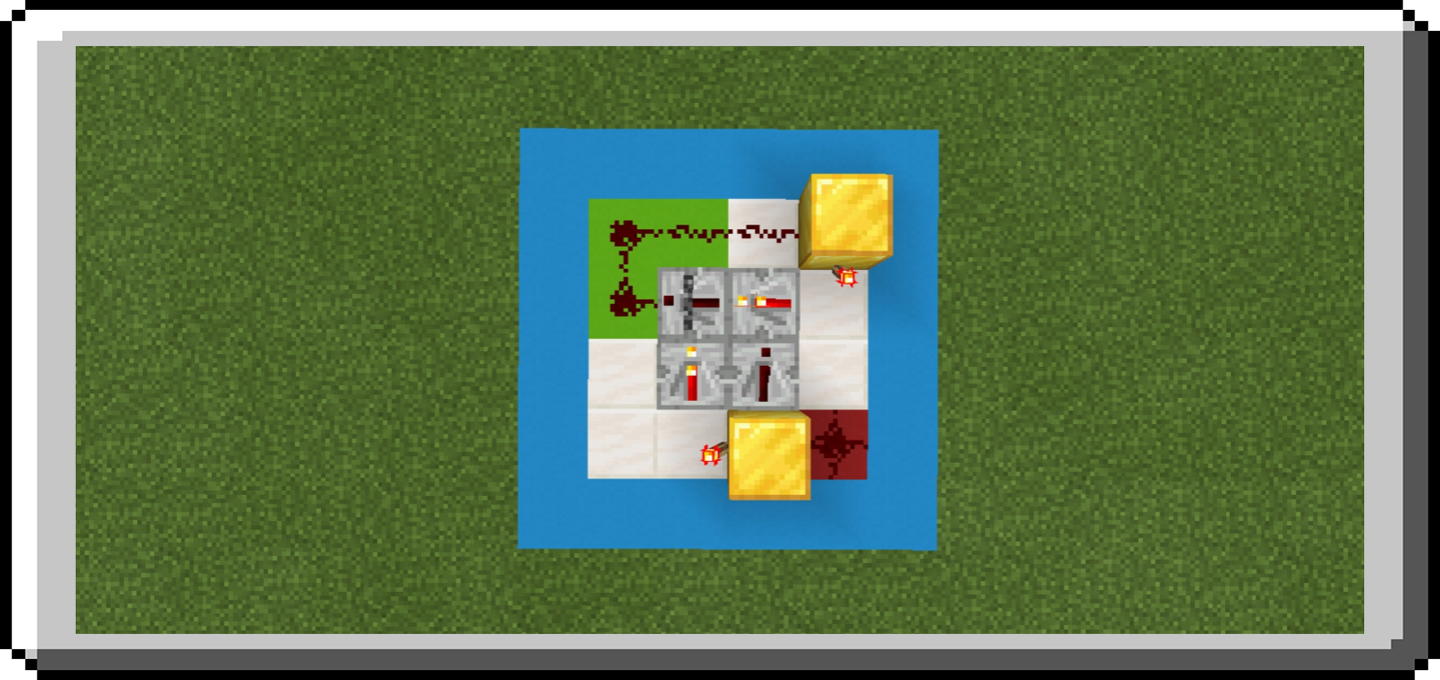
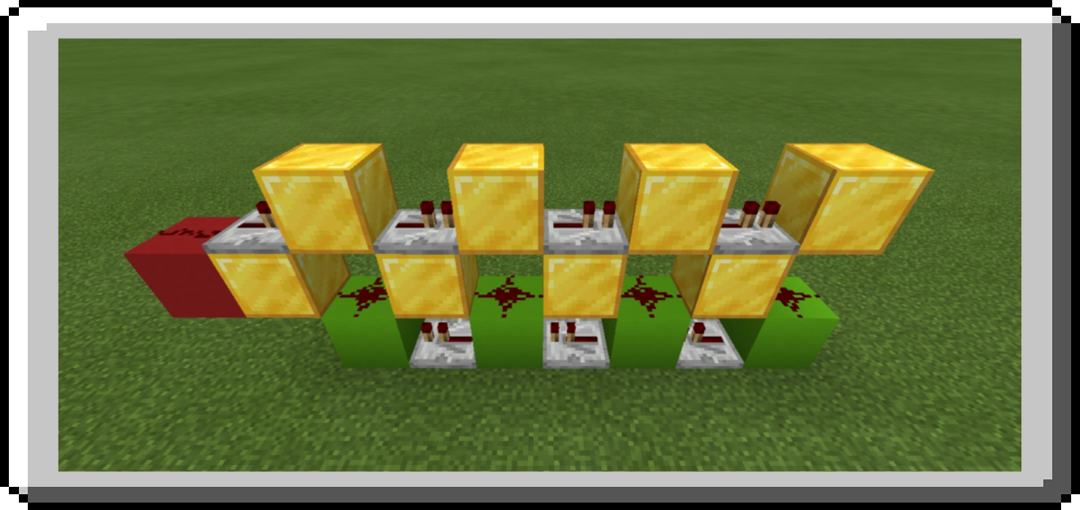
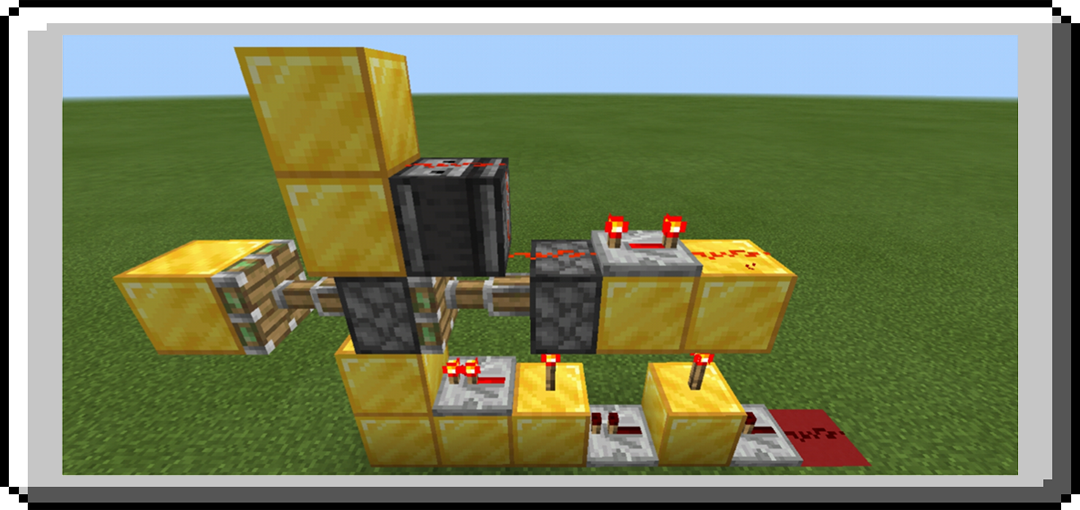
Redstone Repeater
Redstone Repeaters can extend the current of a redstone dust beyond the 15 blocks limit, this makes a weaker signal turn into a strongest signal. It can also use to delay, the minium is 1 tick and maximum of 4 ticks. The more ticks the more delay is, 1 ticks is equal to 0.1 second delay.
See the picture below the model of repeater.
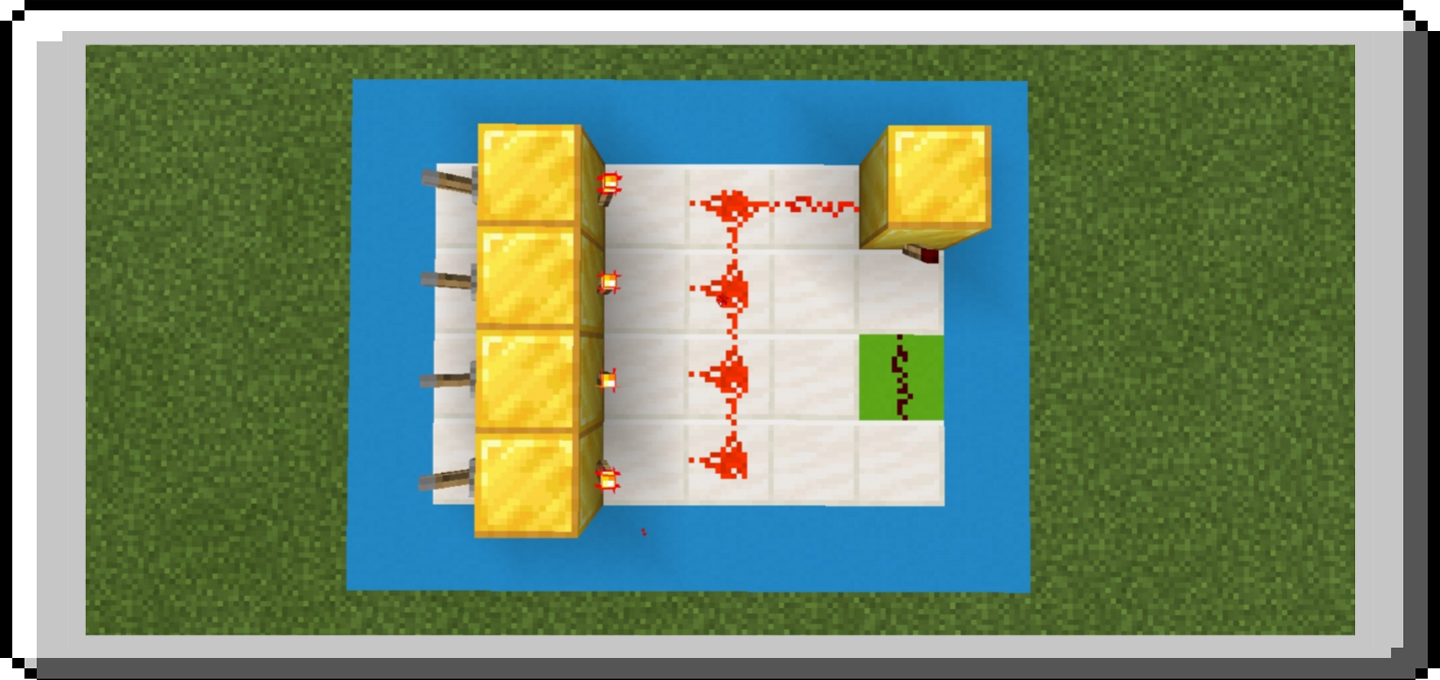
Redstone Repeater has secondary function which you can lock the repeater, can be done using two repeaters. If you place a repeater facing at side input repeater will locked. A locked repeater can not change its state. See picture below.
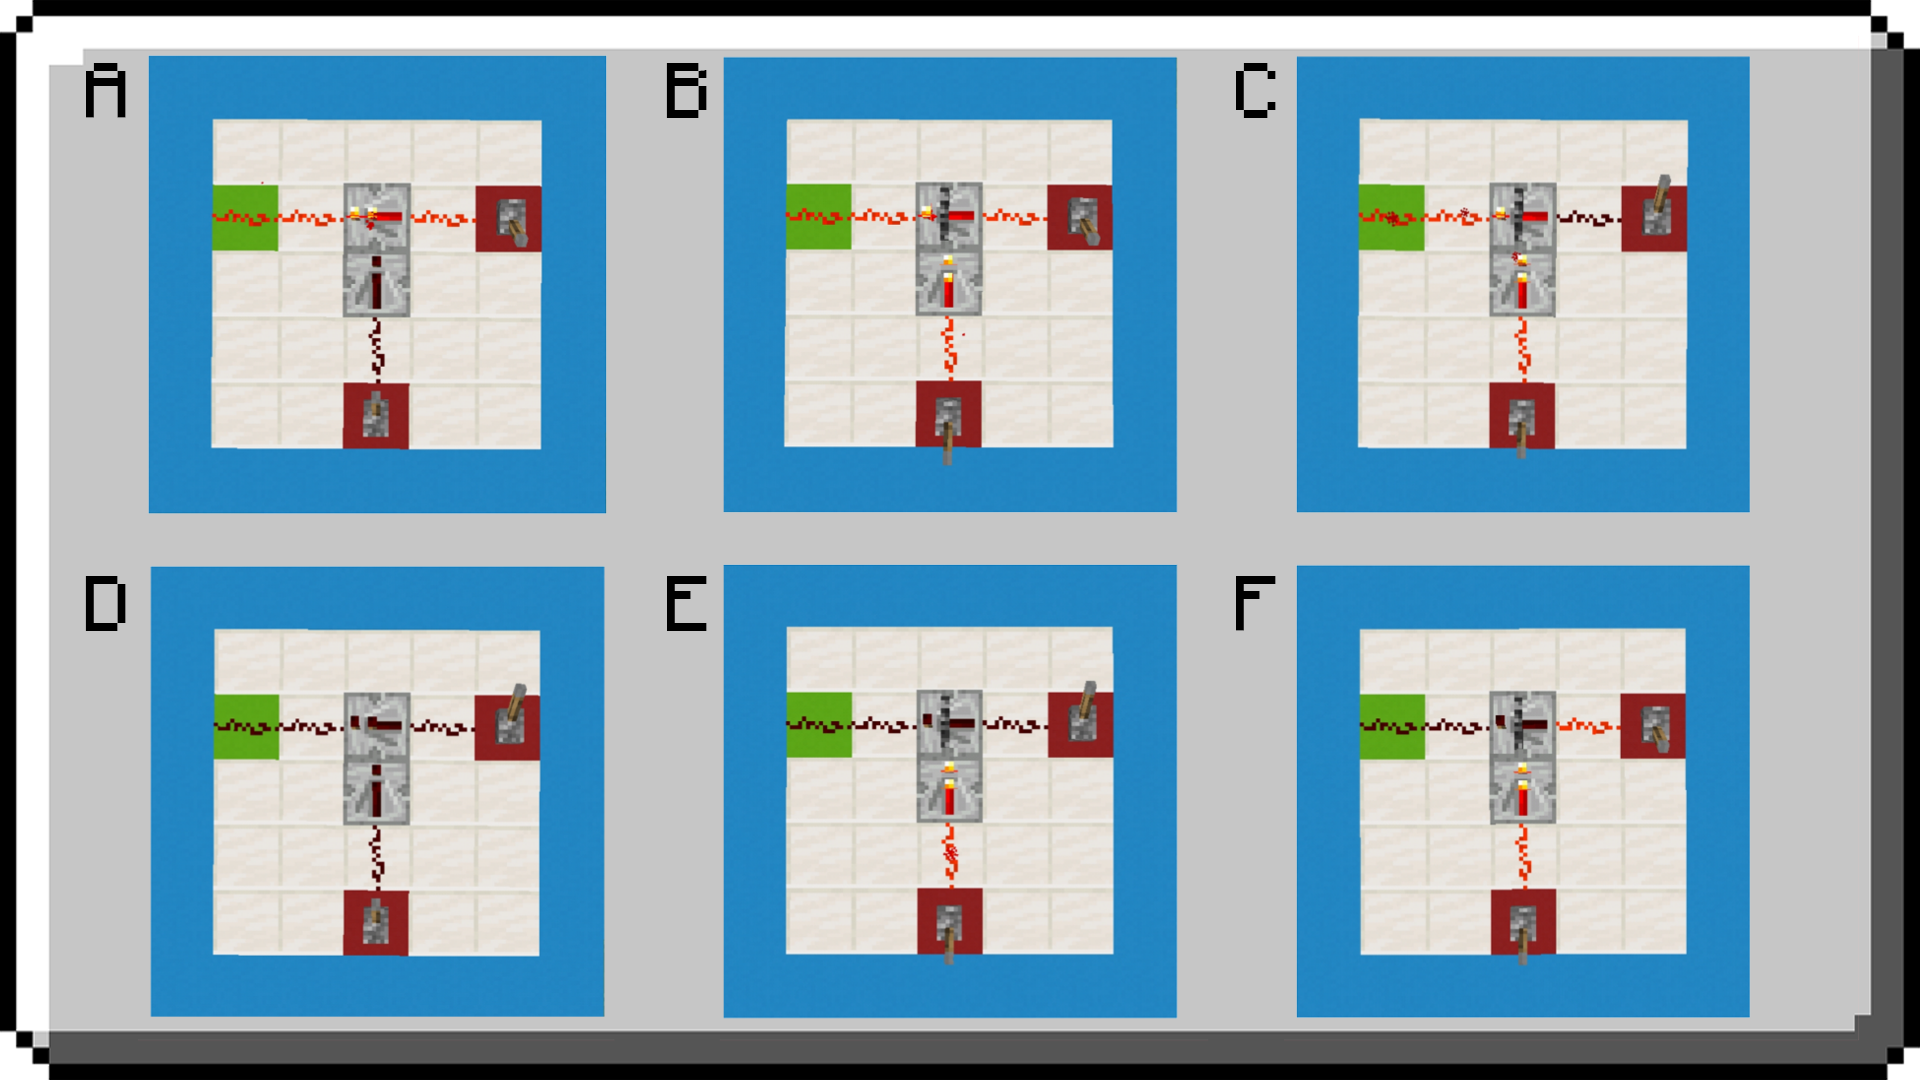
In picture A the input is ON and it’s work as normal, when its side input is turn ON the repeater will lock as you can see in picture B the repeater has dark line that replace the adjustable small torch in it symbolizes that repeater is locked. So now it is lock the states of a repeater can not be change, in picture C you can see its input is already OFF but the output stays ON. In picture D both side input are OFF and when you ON its side input first (see picture E) it’s output will stay OFF and when you ON its side Input is ON or not. As you can see in Picture F the output is OFF even its input is ON because repeater is off when it was lock.
Note: On the side input of Redstone Repeater can only accept is the power of Redstone Repeater only to lock it
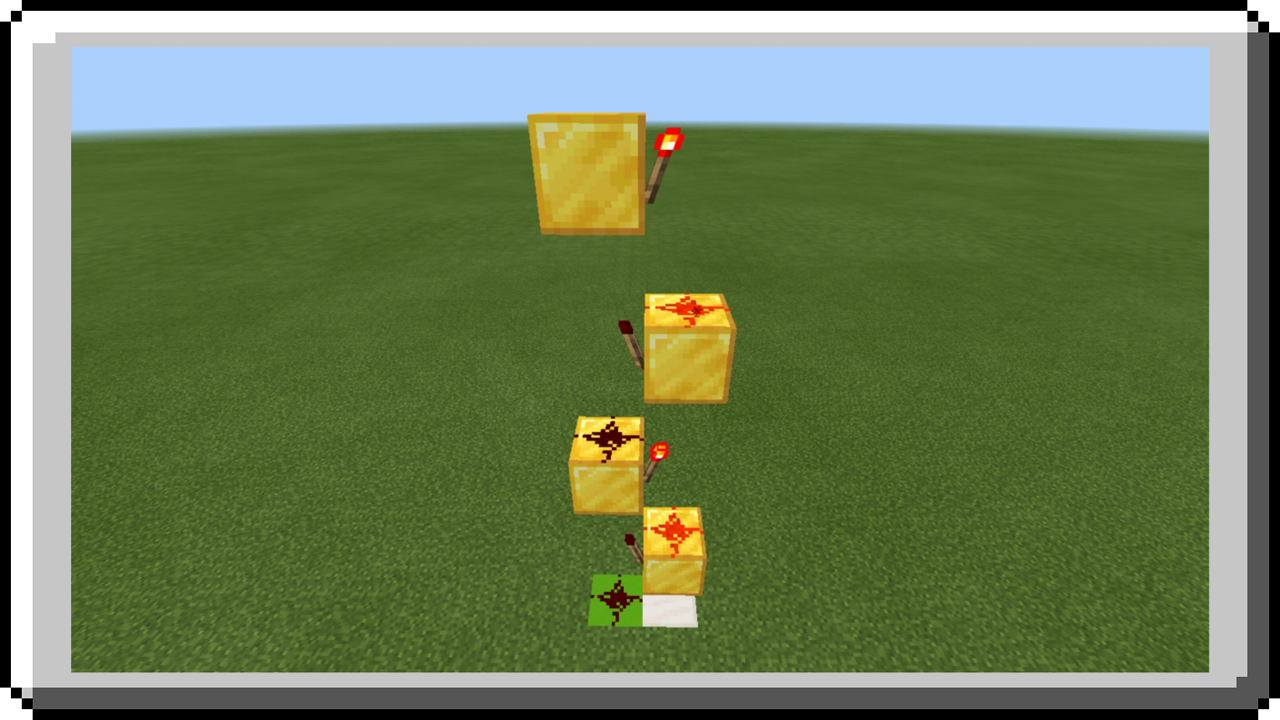
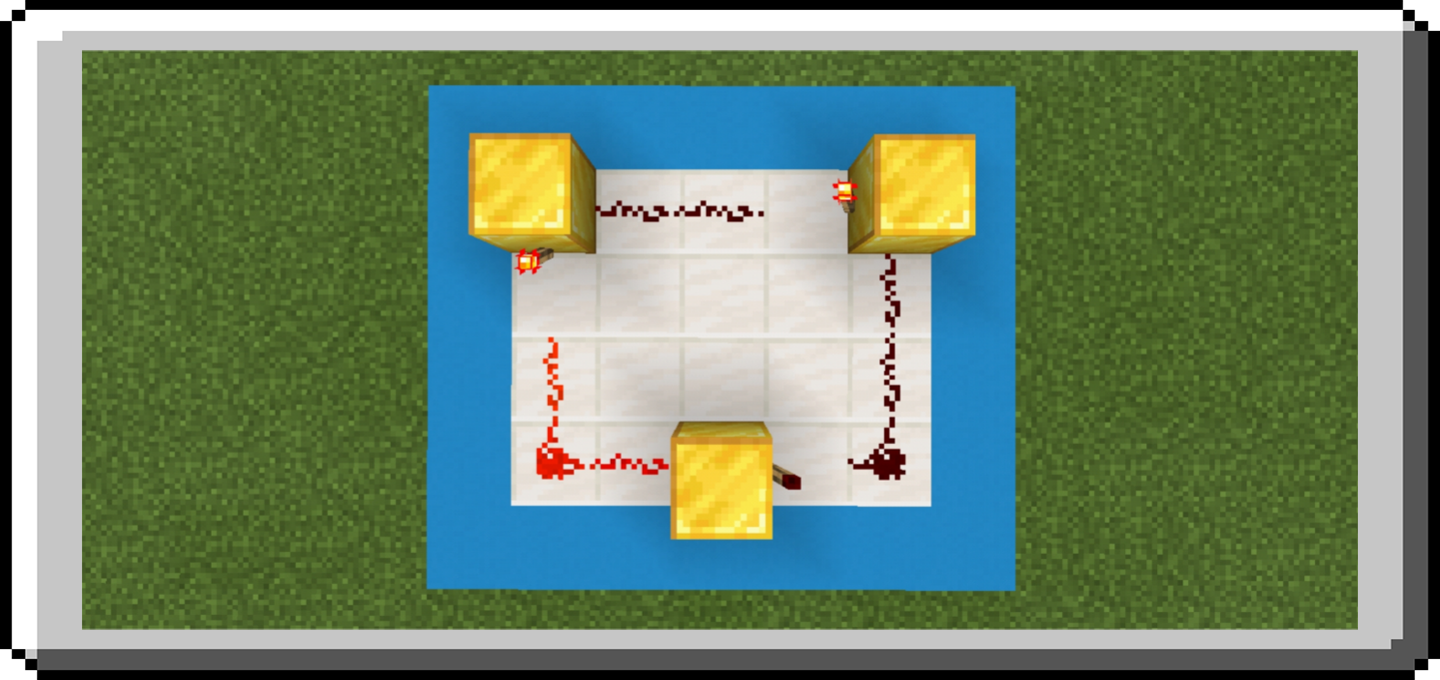
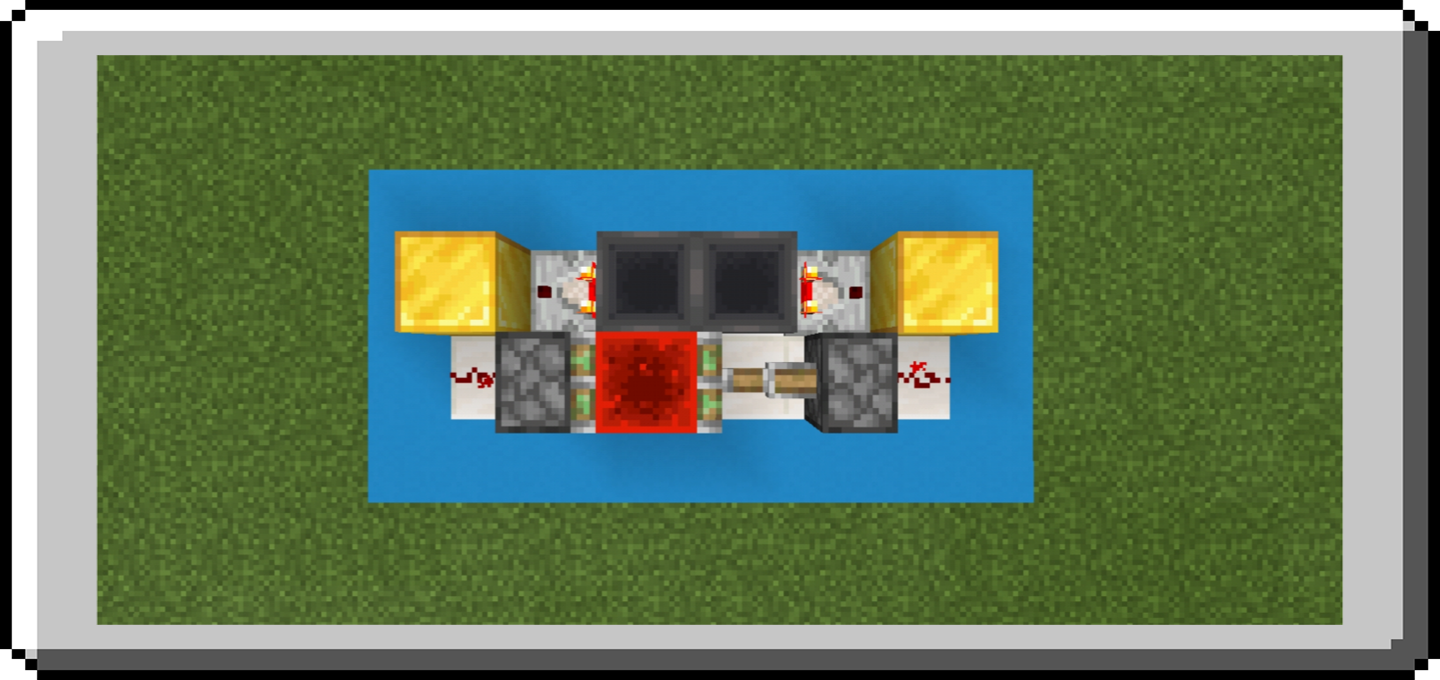
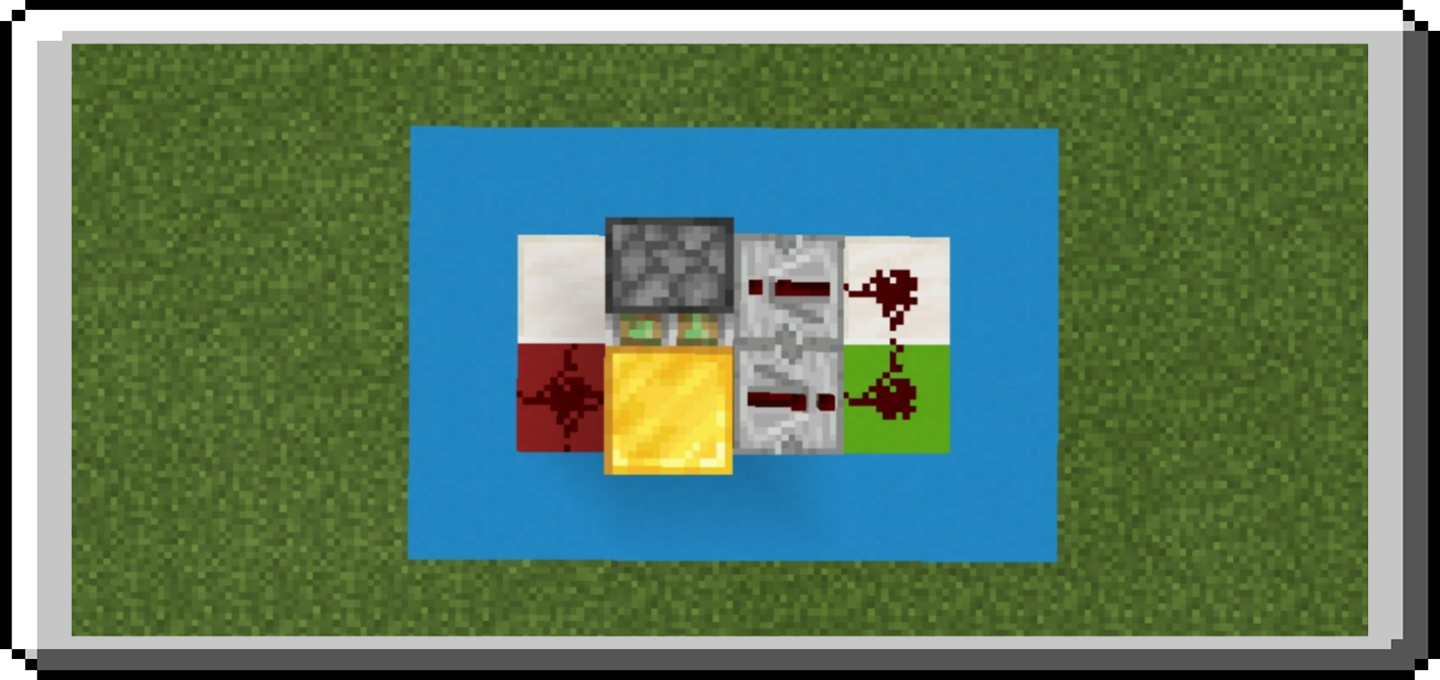
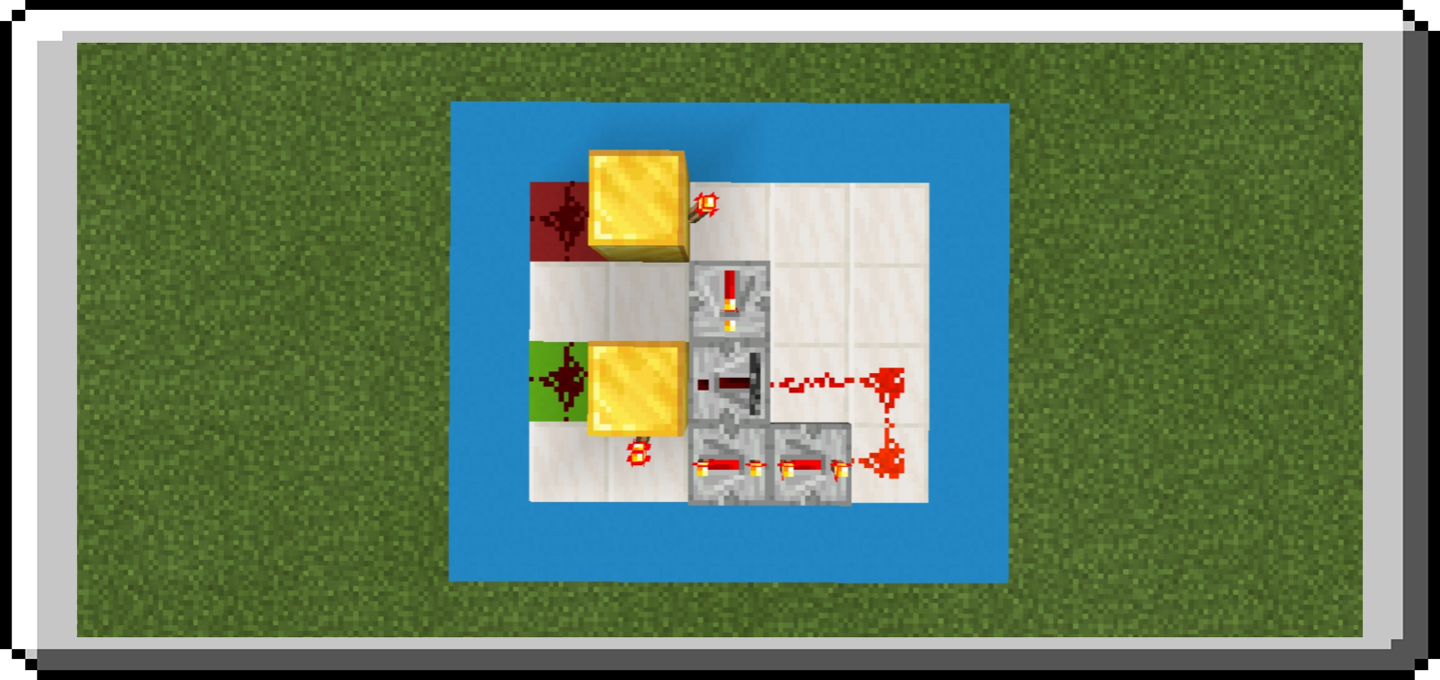
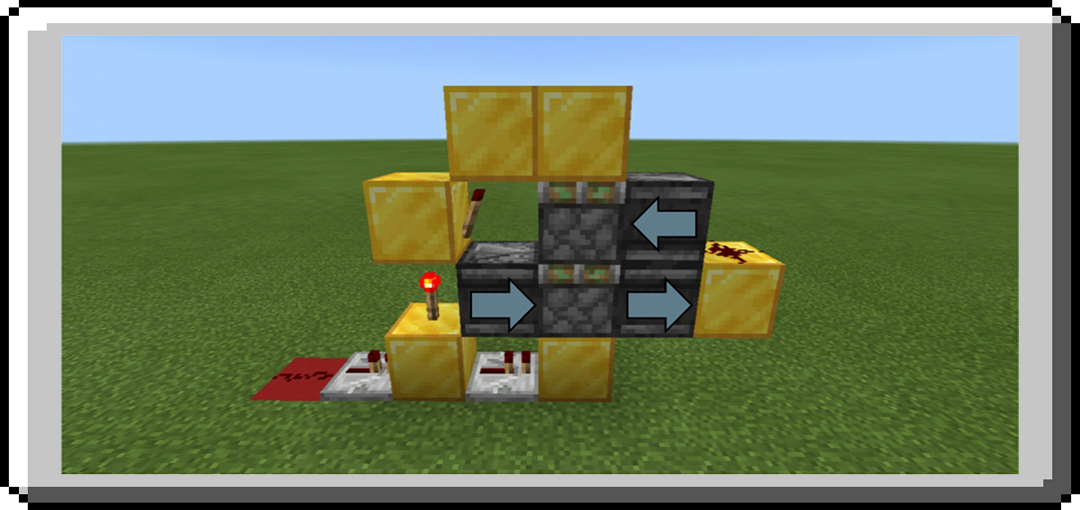
Redstone Comparator
A redstone comparator is the most complicated redstone components, it has four uses. The use of it are to maintain signal strength, to compare signal strength, to subtract signal strength, and to measure certain block states (primarily the fullness of containers).
The redstone comparator has a front and a back, the arrow on the top of the comparator points to the front. When placed, the comparator will face away from the player. The comparator has two little redstone torches at the back (input) and one at the front (output). The front torch has two states which can be toggled to switch between states.

First State: If redstone torch is off, redstone comparator is in “Comparison Mode”.
Second State: If redstone torch is on, redston comparator is in “Substraction Mode”.
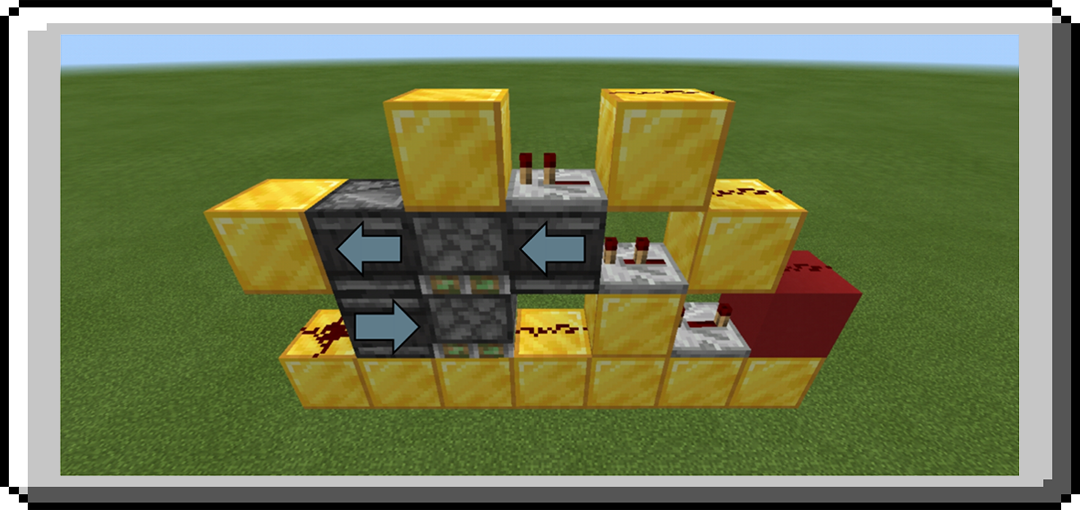
Maintain Signal Strength
A redstone comparator with no powered side inputs will simply, output the same signal strength as its rear input. If weak signal that was sent to the rear of redstone comparator it’s output is also weak as same strength as its input.
Compare Signal Strength
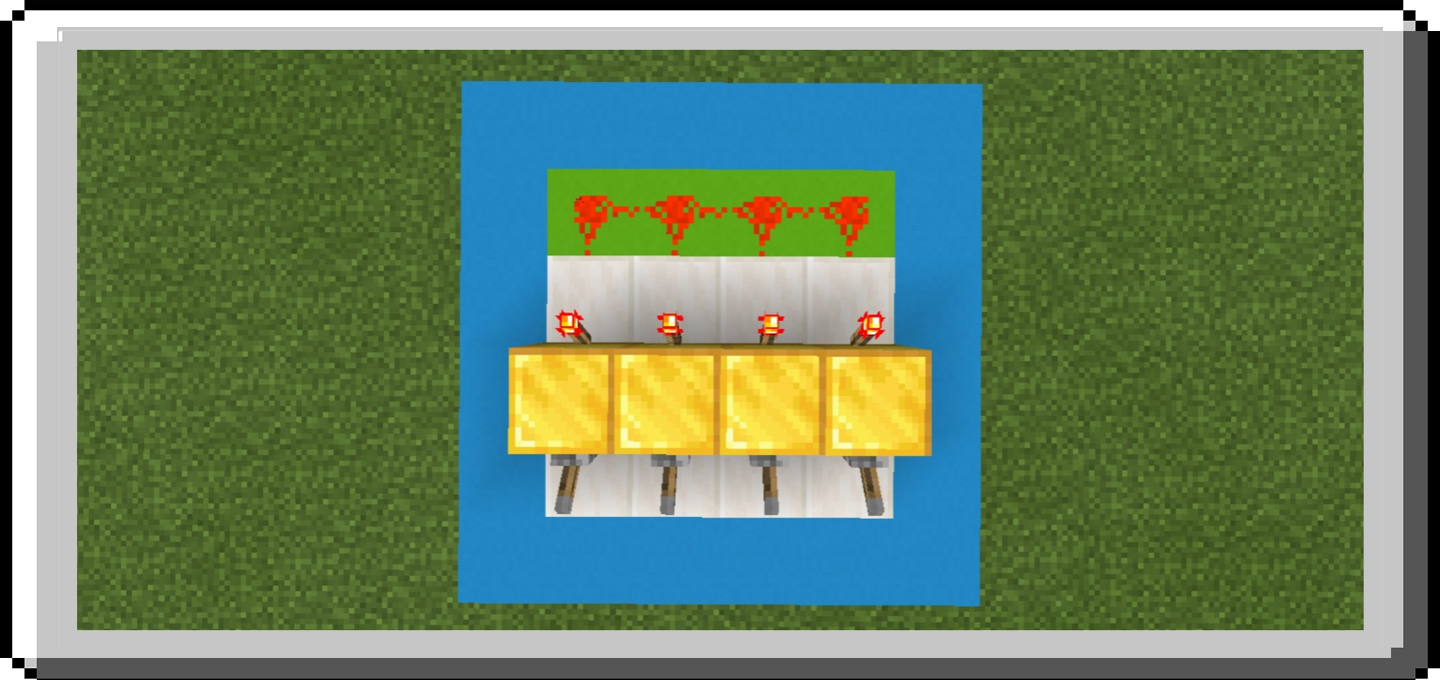
If torch in front is off, a redstone comparator is in comparison mode. Redstone Cimprartor in comparison mode will compare rear input to its two side inputs. If comparator output turns off. If neither side input is greater than the rear input, the comparator simply outputs the same strength as its rear input. (see image below)
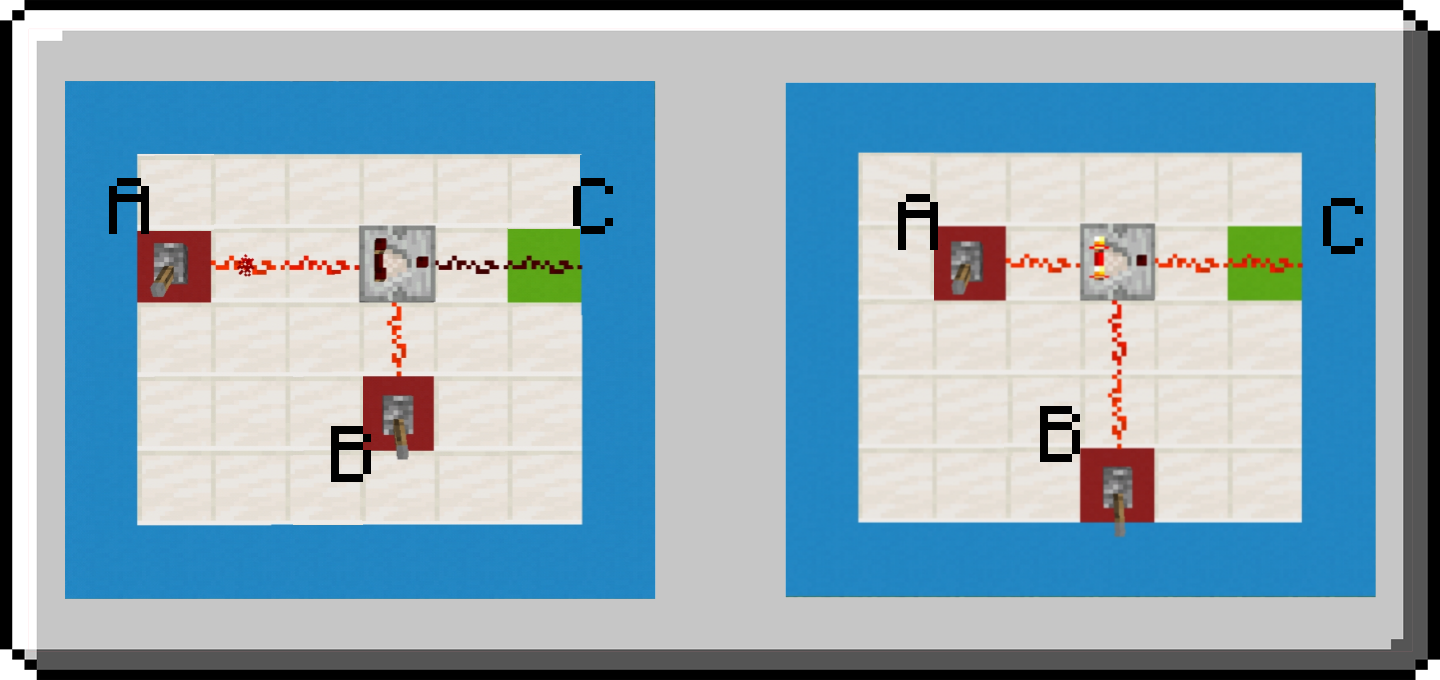
- In the First Sample: B redstone signal is stronger than A therefore there is no output, C is off.
- In the Second Sample: B redstone signal is weaker than A therefore there is output, C is on. It’s output is the same strength to it’s rear input
Subtracting signal strength
If torch is front is on, a redstone comparator is in substraction mode. Redstone Comparator in subtraction mode will subtract the signal strength of the highest side input from the signal strength of the rear input (minimum 0 signal strength).
The signal strength in input minus from signal strength in side input, the answer is the amount of signal strength of output.
Measure Blocks State
A redstone comparator will treat certain blocks behind it as power sources and output a signal strength proportional to the block’s state. The comparator may be separated from the measure block by an opaque block.
Containers - A redstone comparator used to measure the state of a container outputs a signal strength in proportion to how full the container is. The more items inside the strongest the output signal is.
Cauldron - A cauldron outputs different signal strengths depending on how muchh water is inside. From completely empty to completely full, the outputs values are 0, 1, 2, and 3. If fill with lava output is level 3, though the lava in cauldron is always full can’t partially taken unlike water.
Cake - A cake outputs a signal strength relatice to the amount of cake remainging. Each slice is worth 2 signal strength, with 7 total slices, for an output of 14 for a full cake.
Jukebox - A jukebook outputs a signals strength which indicates which record is currently playing. For whioc records produces which signal strengths. Each disc has an equivalent of different signal strength.
End Portal Frame - An end portal frame outputs a full signal of 15 if it contains an eye of ender and zero otherwise.
Item Frame - A comparartor can measure the state of an item frame’s contents. In order for a comparator to measure an item frame’s contents, it must be placed behind the block the item frame. An item frame comparator will output 0 if the item frame is empty. 1 to 8 for any item depending on its rotation (1 at initial placement, plus 1 for each rotation to a maximum of 8, then wrapping back to 1).
Command Block - If a last command successfully execute at command block then the comparator will turn on, that gives signal.
Power Components
Power components create redstone signals, either permanently or in response to player, mob, and environmental activity.
Lever
A lever is a switch which you can use to power any adjacent redstone dust (including beneath the lever) to power level 15, it powers any adjacent redstone comparator or redstone repeater facing away from the lever (must be place on input) to power level 15. Strongly powers its attachment block is a full solide opaque block (see miscellaneous components section). Activates any adjacent mechanism components, including above or below, such as piston, redstone lamps, etc/
While the lever is on, it keeps redstone components active until you turn it off.
Button
A button can be used as a monostable power source, it will automatically deactivate shortly after being activated. It has 2 kind of button, wooden (any wooden button) and stone button.
Wooden can activate by fired arrow while arrow is stucked at button, it keeps push it keeps active redstone components. Unlike stone button it can’t able to push by fired arrows.
Pressure Plates
A pressure plate send a redstone signals when an entity is on top of it, it keeps power redstone components while there is an entity on top of it and when entity gone, it stop to power redstone. There are four variant of it. Wooden, stone, light weighted (gold) and heavy weighted (iron).
Wooden Pressure Plate - Can detect all entities (includes drop items & fired arrow), giving out a maximum signal strength.
Stone Pressure Plate - Can only detect players and mobs, giving out a maximum signal strength.
Light Weighted Pressure Plate - Can detect all entities. The signal strength increases as more entities are added.
Heavy Weighted Pressure Plate - Similar to a light weighted pressure plate but requires much higher quantities to be activated.
Redstone Torch
A redstone torch powers circuits (horizontally and vertically), and can invert signals.
A redstone torch turns OFF when its attachment block receives power from another source and turn back on when the block loses power.
While activated, a redstone torch and any opaque block above it both power adjacent redstone dust (including beneath the redstone torch, or on top of the block), and all adjacent mechanism components (including those above or below it). They also activate all adjacent redstone comparators or redstone repeaters facing away from it.
A redstone torch does not affect the block it is attached to, even if it is a mechanism component.
Observer
Observer can place in any direction, it emits a redstone signal when an adjacent block (output) is updated such as placing blocks, breaking blocks, growth of crops, door, trap door & fence gate that will open/close, when redstone dust powered/unpowered or changes it’s power level, when adjusting repeater or powering/unpowering repeater, It’s also send signal when push or pull by pistons or it’s detect the arm of pistons, etc.
Daylight Sensor
Daylight sensors are used to detect time of day in Minecraft by measuring the level of daylight, then emitting a redstone current equal to the strength of the light. It can also be toggled to switch to night sensor (night mode). So of course if its on night mode the night time will it detects, it will emmits signal current equal to the strength of night.
Tripwire Hook
A tripwire hook is used to detect mobs, items, and other entities in an area where tripwire line is placed.
A tripwire hook can attached to the side of blocks. In order to function correctly, a tripwire hook must be part of a “tripwire circuit”: a two tripwire hook place facing each other with a tripwire line between them.
While activated, a tripwire hook and its attachment block both power any adjacent redstone dust (including below the tripwire hook, or beneath or above the block), and all adjacent mechanism components (including those above or below it). They also activate all adjacent redstone comparators or redstone repeaters facing away from it.
Block of Redstone
A block of redstone provides constant power. It can be moved by pistons.
A block of redstone powers adjacent mechanism components (including those above or below) and adjacent redstone dust. It also powers adjacent redstone comparators or redstone repeaters facing away from it and turns off redstone torch attached to it.
A block of redstone has no effect on adjacent opaque blocks.
Jukebox
A jukebox is a block used to play music discs.
While disc is playing in jukebox, it powers any adjacent mechanism components (including above or below) and adjacent redstone dust. It’s also powers redstone repeater or redstone comparator facing away from it and turns off redstone torch attached to it.
A jukebox has no effect on adjacent opaque blocks.
Detector Rail
A detector rail is used to detect the passage of a minecart
A detector rail turns ON when a minecart passes over it, and turns OFF when it leaves.
While activated, a detector rail and its attachment block (unless attached to a slab or stairs) both power adjacent redstone dust (including beneath the block), and all adjacent redstone comparators or redstone repeaters facing away. They also activate all adjacent mechanism components (including those above or below).
Trapped Chest
A trapped chest can be used to detect when a player tries to take from it or open it.
While trapped chest is open, a trapped chest and any opaque block beneath it both power adjacent redstone dust (including beneath the block), and all adjacent mechanism components (including those above or below it). They also activate all adjacent redstone comparators or redstone repeaters facing away from it, at a power level equal to the number of players simultaneously accessing its contents (maximum 15).
Mechanism Components
Mechanism components are blocks which react to redstone power by affecting the environment; by moving themselves or other entities, by producing light, sound, or explosions, etc.
Door and Trap Door
A door & trap doors can be used as a switchable barrier to entity movements. There are two types of door & trap doors a wooden door & wooden trap door (all wood types) and iron door & iron trap door.
A wooden door/trap door can be opened and closed by redstone power or by a player and villager, while an iron door can only be opened and closed by redstone power.
Pistons
A piston is a block capable of pushing movable blocks when given a redstone signal, it can also pushed any entities.
- Pistons are always placed facing towards the player. When powered, the piston’s wooden surface (head) will start extending immediately, and push at most 12 blocks.
- When a piston loses power, it will retract by simply pulling its head back.
There are two types of pistons: Piston (normal piston) and Sticky Piston.
- PISTON: A normal piston can pushed a blocks when powered by a redstone but cannot pull the block.
- STICKY PISTON: When powered it pushes a blocks and when unpowered it pulls the block.
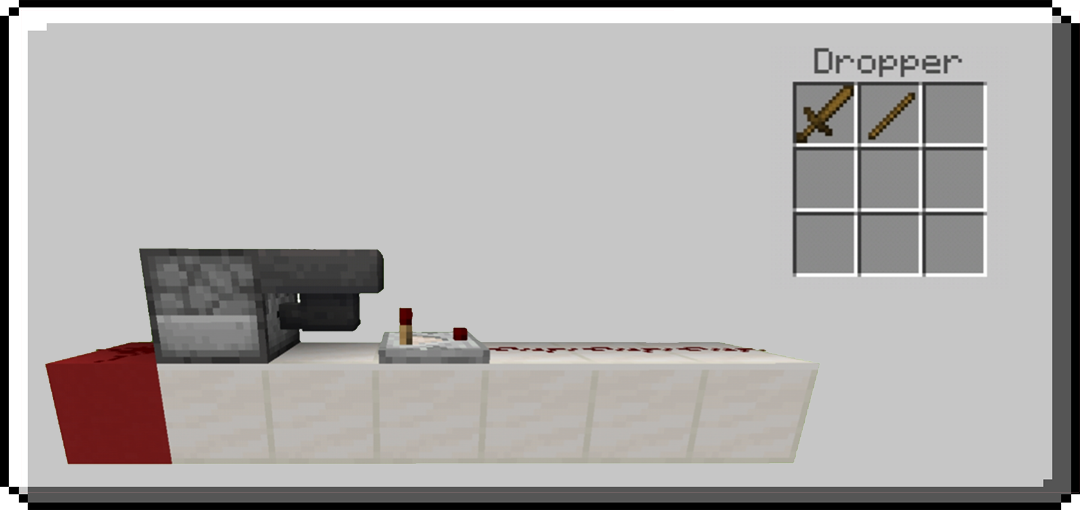
Dropper
Dropper can be used as a container and can be used as redstone contraption, it used to drop or to eject item inside it, it can also be used to move items inside it into another container where it facing at. Every redstone pulse it’s receive it eject one item. It doesn’t continue ejecting while it’s activated.
If you want to make dropper continues ejecting items you should need to power it by a clock circuit.
Dispenser
Dispenser can be used as a container and as a redstone contraption which dispense an item when activated, with results varying on the item dispensed. Every redstone pulse it’s receive it dispense one item. It doesn’t continue dipensing while it’s activated.
If you want dispenser continues dispensing items you should need to power it by a clock circuit.
Dispenser can dispense the following items:
Armors, Elytra, Heads
- Equips on a player or armor stand within the block the dispenser is facing with empty appropriate armor slot
Carved Pumpkin, Wither Skull
- Placed as blocks. If placement completes the construction of an iron golem, snow golem, or wither, the entity will be created as if constructed by a player.
Arrow, Tipped Arrow
- Fired in the direction where the dispenser is facing.
Battle o’ chanting, egg, snow ball, splash potion, lingering potion
- Thrown in the direction where the dispenser is facing, as like as how player throw it.
Bone meal
- Uses bone meal (as fertilizer) on the block the dispenser is facing, if possible. If the block faced does not react to bonemeal, no bone meal is used
Fire Ball
- Launches fireball (as if produced by a blaze) in the direction the dispenser is facing.
Flint and Steel
- It place a fire in front of dispenser and reduce the durability of the flint and steel, If there is TNT it will ignites the tnt.
Firework Rocket
- Launches in the direction the dispenser is facing. Can be used to inflict damage if it was crafted with stars.
All types of Minecart
- Placed as entity in the block the dispenser is facing, if the dispenser is facing a type of rails, otherwise dropped.
Boat
- Placed as entity in the block the dispenser is facing, if the dispenser is facing water or an empty block above water, otherwise dropped.
Spawn Egg
- Summons a mob in front of the dispenser
TNT
- Places and ignites TNT in the block the dispenser is facing.
Trident
- Thrown in the direction the dispenser is facing.
Water Bucket, Lava Bucket
- Places lava or water in the block in which the dispenser is facing (replacing the lava or water bucket in the dispenser with an empty bucket), if the dispenser is facing at block it dropped.
Cod, Salmon, Tropical & Puffer Fish Bucket
- Places a water and summon a fish in the block in which the dispenser is facing, leaving an empty bucket in dispenser.
Empty Bucket
- Collects lava or water source block in which the dispenser is facing, adding the newly filled bucket to an empty slot in the dispenser’s inventory.
Other items should only drop
Hopper
A hopper is used to move items to and from containers (including other hoppers).
A hopper can be placed so that its output (small tube at the end) faces in any direction except up.
- While it’s not activated, a hopper pulls items from a container above it (or drop items in top of it) into its own slots and pushes items from its own slots into a container it is facing.
- While activated, a hopper does not pull items from above or push them out, but may receive items from other mechanism components such as droppers, and may have its items removed by another hopper beneath it.
Redstone Lamp
Redstone lamp emit lights when powered by a redstone. It simply can be use for switch light that can control to turn on and off, can make a lamp post that will automatically open when night using daylight sensor and more.
TNT
TNT is a block that can be used by the player to initiate a controlled explosion. If TNT received a redstone signal it will ignites. In addition, TNT can also be activated by fire and explosions, as well as flaming arrows. This is considered as redstone components because it can react to a redstone.
Noteblock
A note block is used to produce a player’s chosen sound.
After being placed, a note block’s pitch can be adjusted over a two-octave range, and its “instrument” can be adjusted by placing different blocks beneath it.
When activated, a note block produces a sound. A note block must have air above it to activate.
Rail
A Rail in Minecraft can be powered too, this makes a curved rail to changed it’s direction, you can switch between the two way. Activating a rail in another configuration has no effect.
Powered Rail
A powered rail is used to propel a minecart. While activated, a powered rail boosts the speed of a minecart passing over it, or starts a minecart moving away from an adjacent solid block it is in contact with. While not activated, it will acts as a “brake”, reduces the speed or even stop a minecart passing over it.
In addition a powered rail can also be activated by other adjacent activated powered rails. A powered rail can transmit activation up to 9 rails (the first originally-powered powered rail, and up to eight additional activated rails). Activation transmitted in this way cannot power any redstone components except powered rails.
Activator Rail
An activator rail is used to activate a minecart. An activator rail affects certain minecarts passing over it. The effects vary with the type of minecart activated:
Normal Minecart - Minecarts with an entity riding it (mob or player) will eject that entity if the activator rail is active.
Minecart with Hopper - It will deactivate by an activated activator rail (it will stop sucking up items in its path, or transferring items to containers as it passes them), and re-activated by an unactivated activator rail.
Minecart with TNT - It will ignite the TNT by an activator rail.
Minecart with Command Block - It will execute its command every 2 redstone ticks.
Command Block
A command block executes its defined command once. To make a command block constantly execute its command, it must be run on a clock circuit or set it to repeating command block.
Like other mechanism components, an already-activated command block will not respond to other redstone signals. To make a command block execute its defined command more than once it must be deactivated and re-activated repetitively. Or can be activated repetitively by setting the command block to always active.
Mobile Components
Boat
Boat is used to transport a player over water. The boat can place by dispenser on water surface or in air so it can be used in redstone project for some purpose so this is also considered as redstone components.
Minecart
A minecart is used to transport a mob or player over rails.
The player can move a minecart by pushing against it while outside the minecart (whether the minecart is on rails or not), or by pressing the Forward control key while inside the minecart (only while the minecart is on rails). A minecart resting on powered rails configured to point at an adjacent opaque block will be propelled away from the opaque block when the powered rails are activated. A minecart traveling over activated powered rails will have its speed boosted.
Minecart with Chest
A minecart with chest (a.k.a. chest minecart) is used to store and transport items over rails.
A minecart with chest will accept items from a hopper and will allow a hopper underneath it to pull items from it.
Minecart with Hopper
A minecart with hopper (a.k.a. hopper minecart) is used to collect, transport, and distribute items over rails.
A minecart with hopper will pull items from containers above it and push items into hoppers below it (the number of items that will be transferred can depend on how long its velocity allows it to remain within reach of the containers). It will also pick up items that have fallen on the rails. If a minecart with hopper passes over a powered activator rail, it will stop transferring items indefinitely until it passes over an unpowered activator rail.
Minecart with TNT
A minecart with TNT (a.k.a. TNT minecart) is used to create explosions.
A minecart with TNT which passes over a powered activator rail will explode.
Minecart with Command Block
A minecart with command block (a.k.a. command minecart, command block minecart) is used to execute commands.
A minecart with command block will execute its command every 2 redstone ticks while on an activator rail.
Miscellaneous Components
Opaque Blocks
Opaque blocks obstruct light and vision (with some exceptions: for example, glowstone is not considered an opaque block).
Opaque blocks (also known as solid blocks) are used to support redstone components and to transmit power.
An opaque block is strongly powered by an active power component, an active redstone repeater, an active redstone comparator or redstone torch at the bottom of it for examples.
If opaque block is powered by power components and transmission components (except redstone block) it turns OFF any attached redstone torch, turns ON any adjacent redstone repeater or redstone comparator facing away from it, it activates any adjacent mechanism components, and it’s also powered redstone dust except if opaque block is powered by redstone dust also.
A vertical diagonal wiring of redstone dust can be block by an opaque blocks.
Transparent Blocks
Transparent blocks either can be seen through fully (for example, glass) or partially (for example, stairs), or allow light to pass through (for example, leaves).
Transparent blocks cannot transmit power, but are only needed as “insulators”. Some transparent blocks have special properties that make them useful in redstone circuits.
You can use transparent block to prevent redstone dust wiring to power mechanism components at the bottom of it for example, you can use to prevent redstone torch to power redstone wiring at the top if it for example.
Transparent block can’t block redstone vertical diagonal redstone dust wiring.
Immobile Blocks
Immobile Blocks (also known as Non-movable blocks) are blocks that cannot able to push or pull by piston, slime block or honey block it’s special properties can be use building redstone structure, like redstone elevator (see elevator section under Transport Mechanism) it uses obsidian to prevent slime blocks to pull/push it when moved.
Slime Block
When a slime block is pushed or pulled by a piston, it attempts to move all adjacent blocks in the same direction. The types of blocks that can be moved are the same as those that can be pulled by a sticky piston. Blocks that cannot be pulled by a sticky piston stay in place. The blocks that are moved may in turn push other blocks. For example, a slime block sitting on the ground attempts to move the ground block underneath itself, which push additional ground blocks in the direction of motion just as if it were being pushed directly by a piston.
Glazed terracotta and honey blocks are exceptions; they do not move when adjacent slime blocks are moved. When the adjacent block that is moved is also a slime block, that block attempts to move all its adjacent blocks. For example, a 2×2×2 cube of slime blocks may be pushed or pulled as a unit by a single piston acting on any of the blocks in the cube.
A slime block adjacent to a block that cannot be moved by pistons ignores the immobile block. However, if an adjacent block could be moved but is prevented by the presence of an immobile block, the slime block is also prevented from moving. This includes slime blocks being pulled rather than pushed, in which case the piston retracts without pulling anything.
When being pushed by a piston, entities that are ahead are launched into the direction the block is pushed into. When pulled by a piston, no entities are launched.
Honey Block
When a honey block is moved by a piston, it attempts to move all adjacent blocks in the same direction. A honey block can move any block a sticky piston can pull, except for glazed terracotta and slime blocks. The blocks that are moved may, in turn, push other blocks, as if they were being pushed by a piston. For example, a honey block sitting on the ground attempts to move the ground block underneath itself, which pushes additional ground blocks in the direction of motion.
When the adjacent block that is moved is also a honey block, that block also attempts to move all its adjacent blocks. For example, a 2×2×2 cube of honey blocks may be pushed or pulled as a unit by a single piston acting on any of the blocks in the cube.
A honey block adjacent to a block that cannot be moved by pistons ignores the immobile block. However, if an adjacent block could be moved but is prevented by the presence of an immobile block, the honey block is also prevented from moving.
When being moved by a piston, entities on a honey block’s top surface move with it. They are not launched in the direction of the push, as a slime block would do.
Redstone Tips
Preparing
First in Creative Mode
If you want to make a complex redstone project in your Survival world, it’s always best to do it in Creative mode first in different world. When making complex projects, create a creative world, preferably a flat world with cheats on then enabled always day, disabled weather cycle and disabled do mob spawning so all annoying things won’t boder you.
Creative mode is a great for building, because you have an infinite number of blocks, you can break blocks right away, and you can fly around to look all around your structures. So while experimenting you have everything unlike in survival while experimenting you may lack in materials.
Once you have finished your redstone contraption, try to figure out where you can improve the contraption; maybe try to make it a little bit smaller. Then, all you have to do once in survival mode is gather the materials, and just copy what you did in creative mode. Optionally, you can count how many of each material you used when building in creative mode, so that you will know exactly how much of a certain material to gather when in survival.
Construction
Planning
The first step in building a redstone circuit is to decide what it will do and how, in general, it will operate.
- How and where will it be controlled?
- Will the circuit be controlled by the player, by mob movement, or something else?
- What mechanism components will it control? What is an efficient first design?
Although refinement often occurs in later stages of the build, starting off on a strong foot to tackle the idea will be beneficial later on. Allowing an inefficient/flawed design to manifest can hinder development.
How will the signal be transmitted from the controls to the mechanisms?
- Will signals need to be combined from multiple sources?
Construction
It can be helpful to choose a specific set of blocks the player use to construct circuits. Then, when the player run into these blocks when digging out new rooms in the base, the player know he or she are about to damage a previously-built circuit. Common choices include stone brick, snow block, and wool. (Using different colors of wool is also a great way to keep track of different circuits)
Be careful when building circuits near water or lava. Many redstone components will “pop off” (turn into items) when washed over by liquids, and lava will destroy any items it contacts.
Be careful when building circuits to activate TNT (traps, cannons, etc.). Circuits in mid-construction can sometimes briefly power up unexpectedly, which might activate TNT. For example, placing a redstone torch on a powered block, it won’t “figure out” that it should be turned off until the next tick, and can briefly power another part of the circuit until then. Placing TNT after the rest of the circuit is complete will help to avoid such problems and the destruction of the device itself. This also applies to any other features of the circuit that may be accidentally activated with such actions (e.g., activating a dispenser before the circuit is ready).
Problem Solving
When the circuit isn’t working the way it should, take a look at it and try to find the problem. Work through the circuit and test various inputs to find where a signal is “dropped” inadvertently.
- Trying to draw power from a weakly-powered block? Maybe a redstone repeater is needed to strongly-power the block, or to pull power out of the block.
- Trying to transmit power through a non-opaque block? Replace it with an opaque block, or go around it.
- Was a short-circuit created and a redstone torch that should be powered is now burned out? Fix the short-circuit and update the torch to get things going again.
- Are parts of the circuit activating when they shouldn’t be? Maybe accidentally “crossed wires” are allowing a signal from one part of the circuit to activate another part of the circuit, or a repeater’s output is being allowed to cycle into its input.
- Did the behavior that was intended accidentally get removed from the circuit?
- Are pistons, dispensers, or droppers being indirectly powered?
- Are you attempting to follow a tutorial from an older version of Minecraft which no longer works in current updates?
Refining
Once the circuit is working, consider if it can be improved (without breaking it).
Can the circuit be faster?
- Reducing the number of components or distance a signal has to travel through can speed up the circuit. Can the circuit be smaller?
- Can fewer blocks be used?
- Can the redstone dust lines be shortened?
- Can compact logic gates be used in the circuit?
- Are unnecessary components used?
Can the circuit be more robust?
- Will the circuit still work when activated by a very short pulse?
- Will the circuit still work when activated and deactivated rapidly in succession?
Did an update create the opportunity for a better circuit? (e.g., comparators, locking repeaters, observer, etc.)
Can the circuit be quieter?
- Fewer sound-emitting blocks (e.g. pistons, dispensers and droppers, doors, trapdoors, fence gates, and note blocks) will make your device more stealthy around other players.
Can any lag be reduced? Machines with many redstone components frequently changing state can cause light, sound, particle, or update lag.
- Redstone torches and redstone lamps change their light level when they change state. Light changes can cause block light updates in hundreds of block tiles around each component. Concealing the component in opaque blocks or placing permanent block light sources (torches, glowstone, etc.) nearby can reduce lag from block light updates.
- A number of redstone components produce sound when activated or deactivated (pistons, dispensers and droppers, doors, trapdoors, fence gates, and note blocks). Too many sounds at once can overload Minecraft’s sound engine and produce lag.
- A number of redstone components produce particles (redstone torches, redstone dust, but especially fireworks fired from dispensers). Too many particles may overload Minecraft’s particle rendering and then some particles may fail to render until old particles have disappeared.
- Every time a block is moved by a piston it can produce block updates in its neighbors so moving too many blocks at once can produce lag.
- Hoppers and hopper minecarts especially may be trying to do multiple things at once (accept items pushed into them, push items into other containers, check for item entities above them). Powering unneeded hoppers to disable them or placing containers (such as chests and furnaces) above them to disable their item entity checks can help to reduce lag.
Enchancing
Analyzing
Building a mechanism or contraption can help you to enhance your redstone knowledge while you are building you should try to analyze the circuit how it work.
What redstone components are used? Try to figure out why these redstone components is needed
Sometimes repeater is use instead of redstone dust even the delay doesn’t matter in a circuit, but why repeater is use?
- Maybe a diode circuit is required in contraption
- Maybe a repeater is use because it’s need to power the whole adjacent blocks
- Maybe it’s use to make a parallel circuit
- Maybe it’s use because there is redstone torch beneath the block where it place to prevent redstone torch affect the circuit
Do you wonder why this block is need in contraption what’s the uses of this block in the contraption?
Non-Movable Blocks
- Non-movable blocks (i.e obsidian) maybe used to prevent pistons to push it or stick to the slime blocks or honey blocks, example the elevator it’s uses obsidian to prevent slime block to move it.
Transparent Blocks
- Maybe transparent block is used for upwiring circuit
- Maybe it is use for path of redstone dust to make other components shouldn’t affect the wiring (i.e there is redstone torch beneath the block where redstone dust is placed).
- Maybe a diode circuit without delay is required in contraption
Analyze the circuit where the circuit goes when input is trigger, how are every redstone components react to the redstone signals.
- Why repeater ticks are set like this?
- When you trigger the input what mechanism components should be power first and why it’s should need to power first?
Application
After you analyze how mechanism work, your knowledge at redstone will improve, you can have an idea what will to do when building a circuit for your contraption, you will have an idea what’s redstone components should be use for your need and not to be used in your own project.
If your circuit doesn’t work the way it should, maybe the circuit from the mechanism would help you.
- It can give you an idea to make a better circuit or components.
- You can copy some of the parts of mechanism for your own project.
- The redstone techniques used in mechanism you can do that too.
Transmission Circuit
Vertical Circuit
While horizontal transmission can be relatively straightforward, vertical transmission is a transmission circuit that is going from bottom to top or from top to bottom in vertical direction.
Upwiring
Transparent blocks which can support redstone dust do not “cut” redstone wiring, these blocks can be made zig-zagging back and forth upwards. Glass and upside-down slabs are the most commonly used supporting blocks, but other transparent block can be used too, such as hoppers, glowstone and upside-down stairs. A vertical circuit made with glass can transfer signal from bottom to top or from top to bottom unlike with slab that send signal in one direction only which is going up.
Redstone dust on them can propagate signals diagonally upwards. This type of transmission circuit is so called “redstone ladder”.
Redstone torches can power blocks above them, allowing transmission upwards, this transmission circuit is called “torch tower”. And the alternating redstone torch is called “torch ladder”.
Downwiring
Redstone torches can power redstone dust beneath them, allowing transmission downwards.
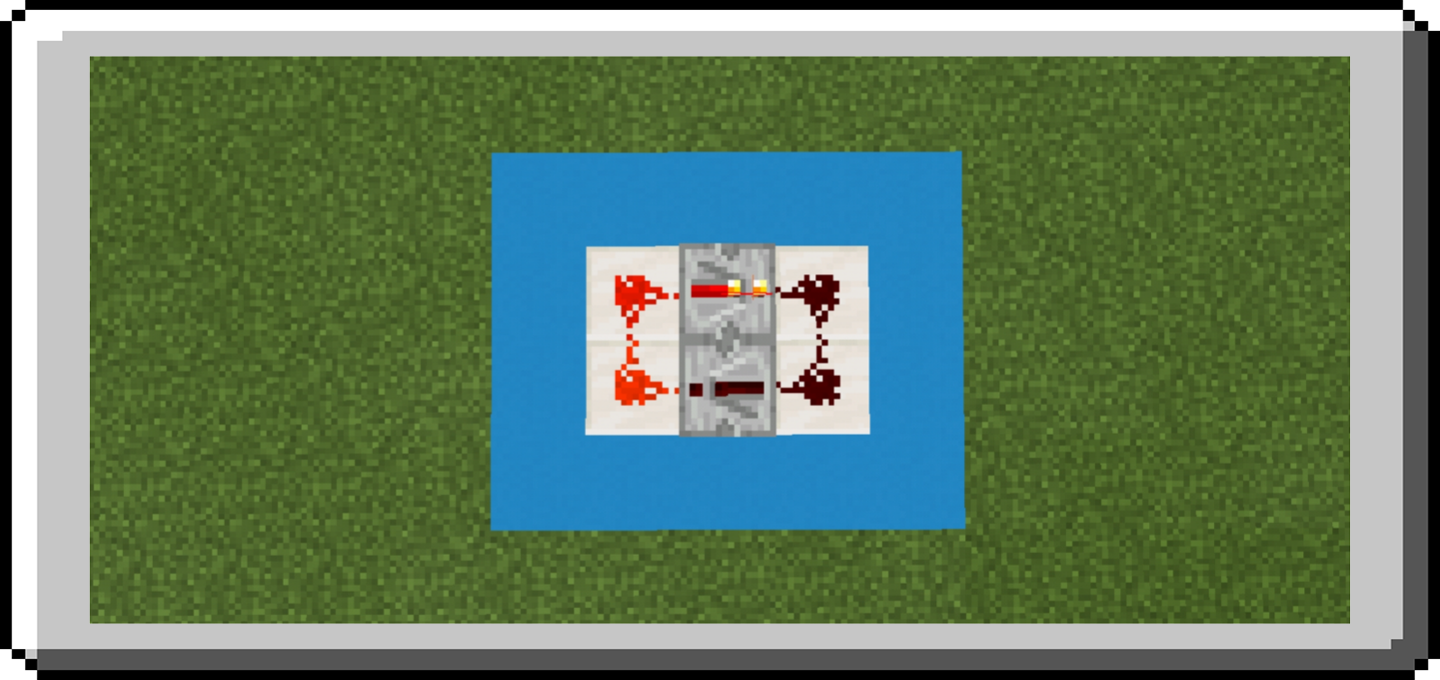
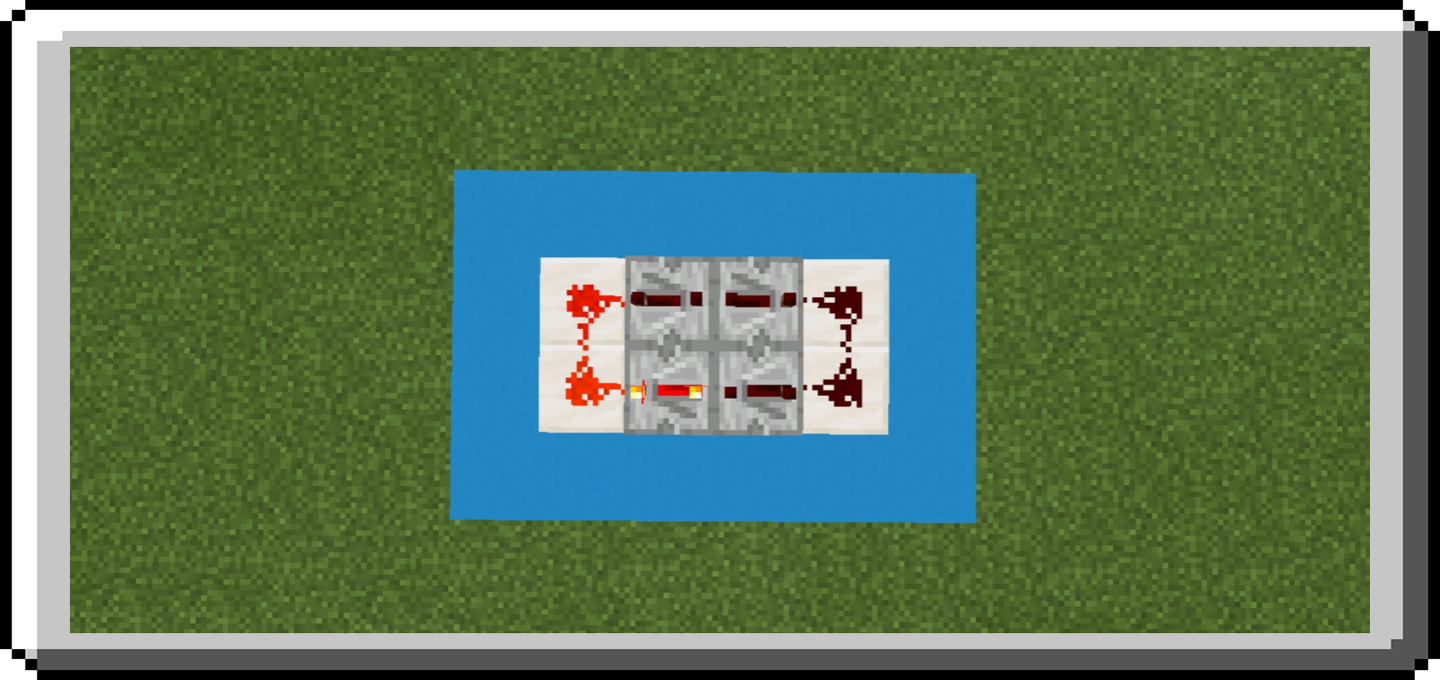
Diode
Another important aspect of signal transmission is making sure a signal doesn’t go the wrong way. A “diode” is a redstone contraption or circuit which allows signals through in one direction but not the other.
Diode Circuit
Repeater Diode - Both the redstone repeater and the redstone comparator transmit signals in only one direction, but add 1 tick of delay.

Block Diode - By powering a block, a signal can transmit in only one direction. None of the output lines can affect each other.
Transparent Diode - Some transparent blocks can support redstone dust: hoppers, glowstone, upside-down slabs, and upside-down stairs. These blocks have the property that redstone dust on them can propagate signals diagonally upwards, but not diagonally downwards (transparent blocks which cannot support redstone dust cannot be used for this purpose). Thus, simply jumping the signal up one block to one of these transparent blocks creates a diode circuit.

Analog
An analog encoding (aka “hex wire”) is a transmission which outputs the same signal strength it receives as input. Because power levels can vary from 0 to 15, an analog transmission can convey 16 states in a single wire.
Analog Comprartor Wire
Best option for short distances and tricky turns
The simplest analog wire is a line of redstone comparators. However, like repeaters, comparators can draw a signal from an opaque block and push a signal into an opaque block, thus it is usually more efficient (in resources, and in signal delay) to place comparators every four blocks.
The signal strength of an analog comparator wire (ACW) can be reduced or suppressed at some point along its length by feeding another signal into one of the comparators in subtraction mode. The signal can be overridden by feeding a stronger signal into one of the opaque blocks.
Because the redstone dust is not adjacent to any power or transmission components, only opaque blocks, it will not configure itself to point in any particular direction. This will cause the dust to also power any opaque blocks or mechanism components to the side of the analog wire. Transmission components (redstone dust, redstone comparators, etc.) should not be placed adjacent to the wire’s dust because that would cause the dust to configure itself in a way where it doesn’t power the rest of the analog wire.
Analog Repeater Wire
Fastest option for long distances
Signal strength can also be retained by using repeaters to repeat every possible signal strength at the correct distance from the output to convey the correct signal strength.
A single segment of analog repeater wire (ARW) consists of exactly 15 repeaters connecting an input line to an output line. To connect multiple segments together without additional comparators, the segments must be arranged so that the output dust of the last repeater is the same as the input dust of the next segment (i.e., block B of the previous segment is block A of the next segment). This causes the segments to overlap in distance by one block and causes each segment to be offset to the side from the previous segment by two blocks.
Variations; To keep the segments in-line, or to turn against the direction the repeaters are facing, raise the final repeater by one block and drop the next segment underneath it.
Another option is to use a comparator and an opaque block between the segments, and alternate the direction the repeaters are facing. This keeps the height to 2 blocks but increases the circuit delay to 2 ticks per 17 block.
Analog Substraction Wire
Complicated, infrequently useful
If fewer than 15 states need to be transmitted, it may be more efficient to encode those N states in the higher levels of signal strength, and then repeatedly subtract the transmitted value from 15 after (17-N) dust, an even number of times.
*Variations;* The chests can be replaced with any other full container. The chests can also be replaced with regular power components (redstone torches, powered levers, etc.) if the redstone dust next to them is raised or lowered by one block, or if the subtraction comparator and its power source are moved so that the redstone dust runs straight into the comparator’s side with the comparator perpendicular to the line still facing into the same block.
Logic Circuit
Logic Gates
Logic Gates are a way of using redstone circuits in a manner that a certain combination of inputs, or redstone signals, achieves a certain output.
Logic Gate Diagram
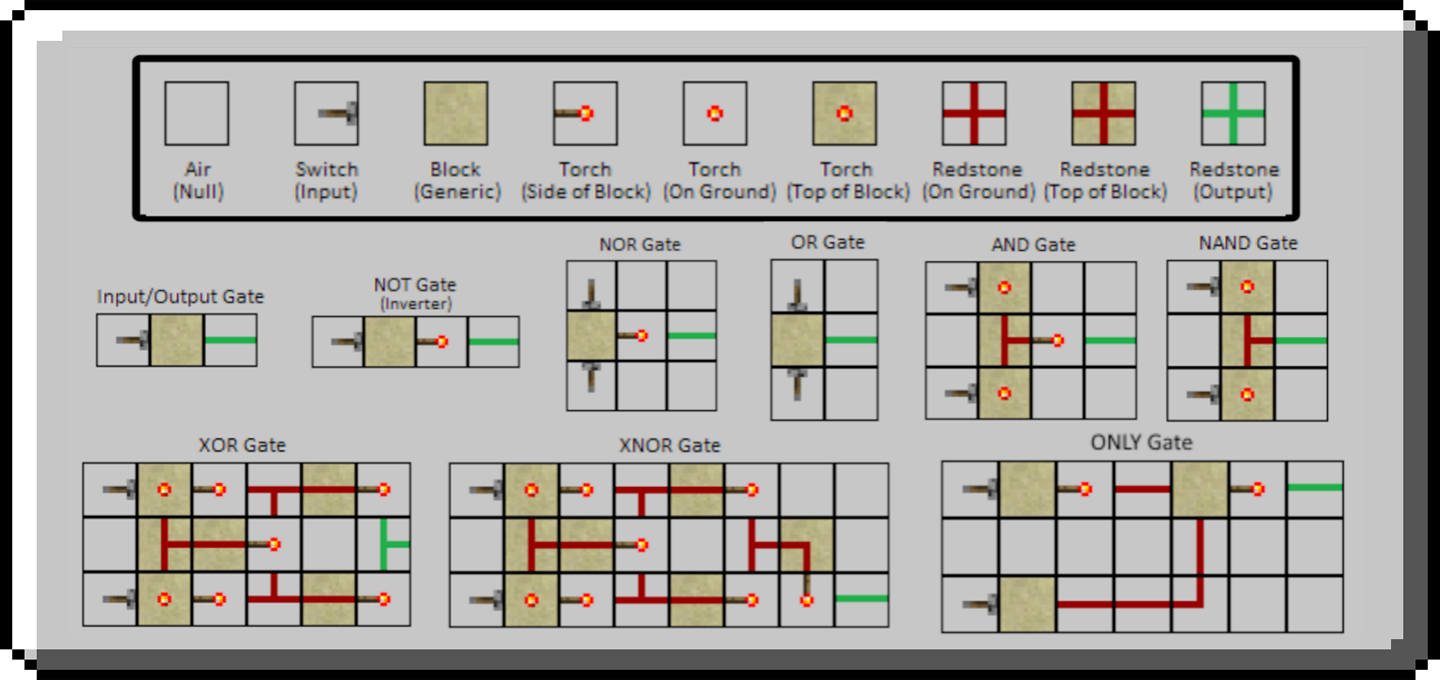
How These Gates Work?
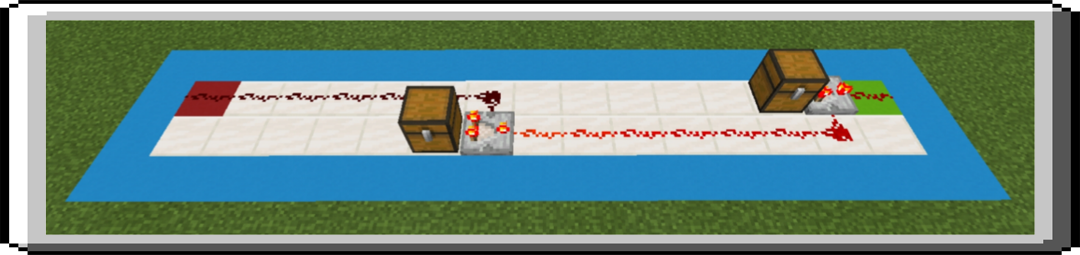
Input/Output Gate - The most basic gate you can have. When the input signal is on, the output signal is on, and vice versa.
NOT Gate - NOT Gate also known as an inverter, is a gate used when you want an opposite output from the input you give. For instance, when the switch, or input, is set to “on”, the output will be toggled to “off”, and when the switch is toggled to “off”, the output will be toggled to “on”.
OR Gate - OR Gate uses two or more inputs. Whenever any input is “on”, the output is to “on”. The only time the output is “off” is when all inputs are “off”.
NOR Gate - Output is on, only if none of it’s input are on.
AND Gate - It is used with two or more switches or other inputs. The output is toggled to OFF only when both switches, or inputs, are toggled to ON. Otherwise, the output will remain OFF.
NAND Gate - NAND Gate is the opposite to the AND gate. The output is toggled to OFF ONLY when both switches are toggled to ON. Otherwise, the output is set to ON. This gate also requires two or more inputs.
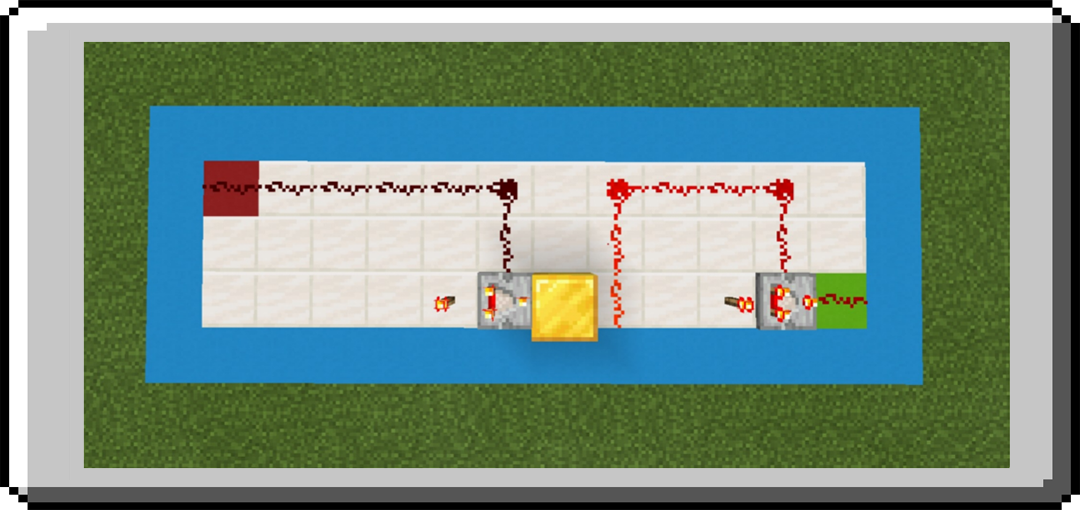
XOR Gate - This gate uses two inputs. In this gate, the output is toggled to ON when one switch is ON and one switch is OFF. If both switches are in the same states, the output is toggled to OFF. Because of these properties, XOR gates are commonly found in complex redstone circuits. In some cases, it is possible to get an OR gate output and an AND gate output on different channels.
XNOR Gate - XNOR Gate is the opposite of an XOR gate. It uses two inputs. When both switches are in the same state (both switches are ON or both switches are OFF), then the output is toggled to ON. Otherwise, if the switches differ, the output is toggled to OFF.
ONLY Gate - In this gate, the output is toggled to ON only when input A is ON and input B is OFF. If input A is OFF and input B is ON, the output will remain “off”. If both inputs are OFF or ON, the output will remain OFF. This makes this gate useful when needing a specific order of inputs to trigger the output.
NOTE: This gate is just a special case of a NOR gate where one of the inputs is inverted.
Advance Gates
These Logic Gates have more than two input. It is called advance gates because these examples have multiple input unlike examples in Logic Gates section, but it work the same and still called Logic Gates it just categorize as Advance Gates. These are stackable so you can add more input.
For an explanation of each gates see Logic Gates section.
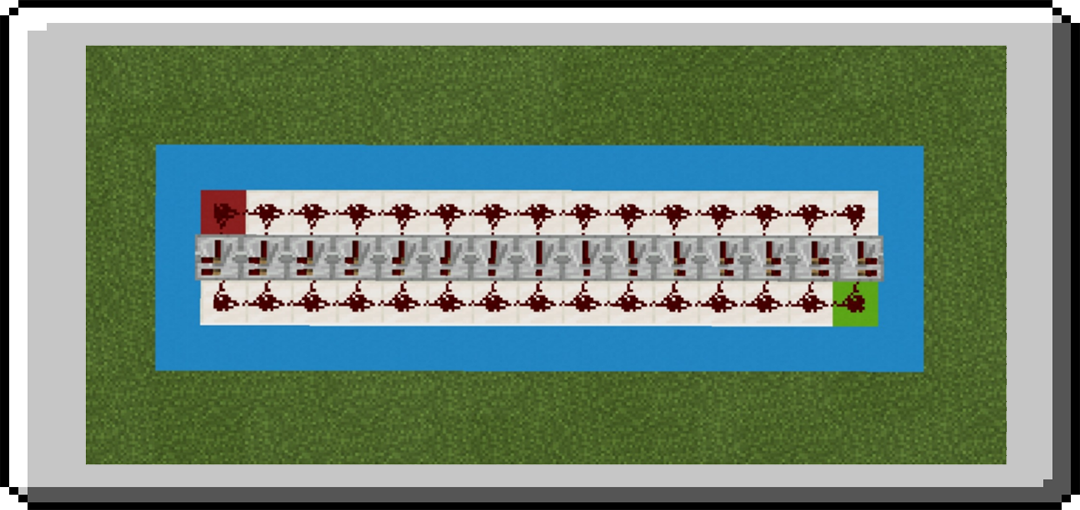
Multi-Input AND Gate
Multi-Input NAND Gate
Multi-Input XOR Gate
Multi-Input XNOR Gate
Clock Circuit
Rapid Clocks
Clock Circuit is a circuit that send an endless signal at specific intervals. It produces a clock singal: a pattern of pluses which repeats itself. The time between the signals can be set by the player, either roughly or very accurately.
Redstone Clock that are listed in this section are clocks that repeat itself very fast, some of these can adjust the clock cycle or make it slower.
Rapid Pulsar
Rapid pulsar is redstone clock use a redstone torch it repeat signals very fast. Redundancy can be used to maintain a 1-clock, even as the torches burn out; the result is the so-called “Rapid Pulsar”. However, the signal may not be consistent.
Although “pulser” is the correct spelling for any general circuit which produces pulses, the traditional spelling of a clock circuit created from short-circuited redstone torches is “rapid pulsar”.
Redsone Torch Loop
The Redstone Torch Loop Clock is the oldest clock circuit in Minecraft, simply an odd number of inverters (NOT gates) joined in a loop.
Repeater Loop
A clock signal can be generated by introducing a pulse into a loop of repeaters.
To send a pulse signal you need a lever or any other power components to power it and quickly switch it off or break it, or else signal will stucked, you can easily use observer to power it if you have. If signals stucked you need to break anything in it and fixed it again then power it again.
Adjust the ticks of repeater to slower the pulse signal or add more repeater.
Observer Clock
As like other loop clock, observer can also be used to make a loop clock which produce a clock signal.
Variation: You can connect the output and input of the observer with redstone dust to make a clock signal, another thing is you can also add repeater between them allowing a slower pulse signal. Make sure when making this clock, redstone dust at the input of observer or the oberver is the last thing you placed otherwise will not produce clock signal.
With two observer placed facing away into each other can also produced a clock signal, this variation cannot adjust the pulse signal and their outputs are inverted to one another. You can use one of the output or both.
Long Term Clocks
Clock Circuit is a circuit that send an endless signal at specific intervals. It produces a clock singal: a pattern of pluses which repeats itself. The time between the signals can be set by the player, either roughly or very accurately.
A Long Term Clock is clock which repeat a signal occasionally. Creating very long repeater loops can be very expensive. However, there are several sorts of clocks that are naturally quite long, or can easily be made so.
Ethonian Hopper Clock
Properties:
Size: 2 x 6 x 2
Clock Period: 8 to 256 seconds (4m 16s)
Flat
Place 1 or more item in either of the hopper, the more item the longer period of clock is.
When the items finish moving in one direction, the empty hopper’s comparator turns off, allowing the associated sticky piston to pull the block of redstone to the other hopper, reversing the direction of item movement. The movement of the block of redstone also updates the other sticky piston (which has been powered for a while) causing it to extend and prevent the first sticky piston from extending again when its comparator turns back on.
Powering the hoppers will freeze the clock. Powering one of the blocks or the redstone dust will allow the clock to finish its current cycle before halting.
With a single item in the hoppers, the clock has a period of 7.5 ticks (0.75 seconds). Each additional item adds 8 ticks (0.8 seconds) to the clock period.
There are a number of useful outputs from this clock:
- Clock: A regular on/off clock signal can be taken from one position of the block of redstone. The signal will last for half the clock period.
- Cycle Off-Pulse: Either block faced by a comparator stays powered most of the time, but will turn off for 3.5 ticks every full cycle (but at half-cycle intervals from each other). The power level of the block may vary, so an output repeater may be needed to keep the power level constant.
- Cycle Pulse: By placing a torch on one of the blocks powered by a comparator, the off-pulse is turned into a regular 3.5-tick on-pulse, once per cycle.
- Half-Cycle Off-Pulse: By placing two redstone dust alongside or under the positions of the block of redstone, a 1.5-tick off-pulse is generated every half-cycle when the block of redstone moves.
- Multi Clock: by attaching 4 interconnected hoppers next to the redstone block, every full cycle will run an item(s) through these hoppers once, before stopping by the redstone block. Attaching a comparator and then a repeater to the other end of these added hoppers makes a signal that is 1 tick on, Nx2-1 tick off, where N is the amount of items in the Ethonian clock. The amount in the clock x 2 equals your total clock ticks. The amount of items in the 4 hoppers determines how much of that time is powered.
More Ethonian Hopper Clock Design
Smoothed Ethonian Hopper Clock
Variations: For highly precise hopper clocks, the missing half-tick of the first item can be smoothed out with a repeater set to 3 ticks or more. Additional repeaters can change the clock period to something other than a multiple of 8 ticks.
Hopper-Latch Hopper Clock
Properties:
Size: 2 x 4 x 3
Clock Period: 8s to 256s (4m 16s)
Silent
Place one item only in lower hopper loop and 1 or more in upper hopper loop.
A silent multi-item hopper clock which uses a hopper latch to control the direction of item movement.
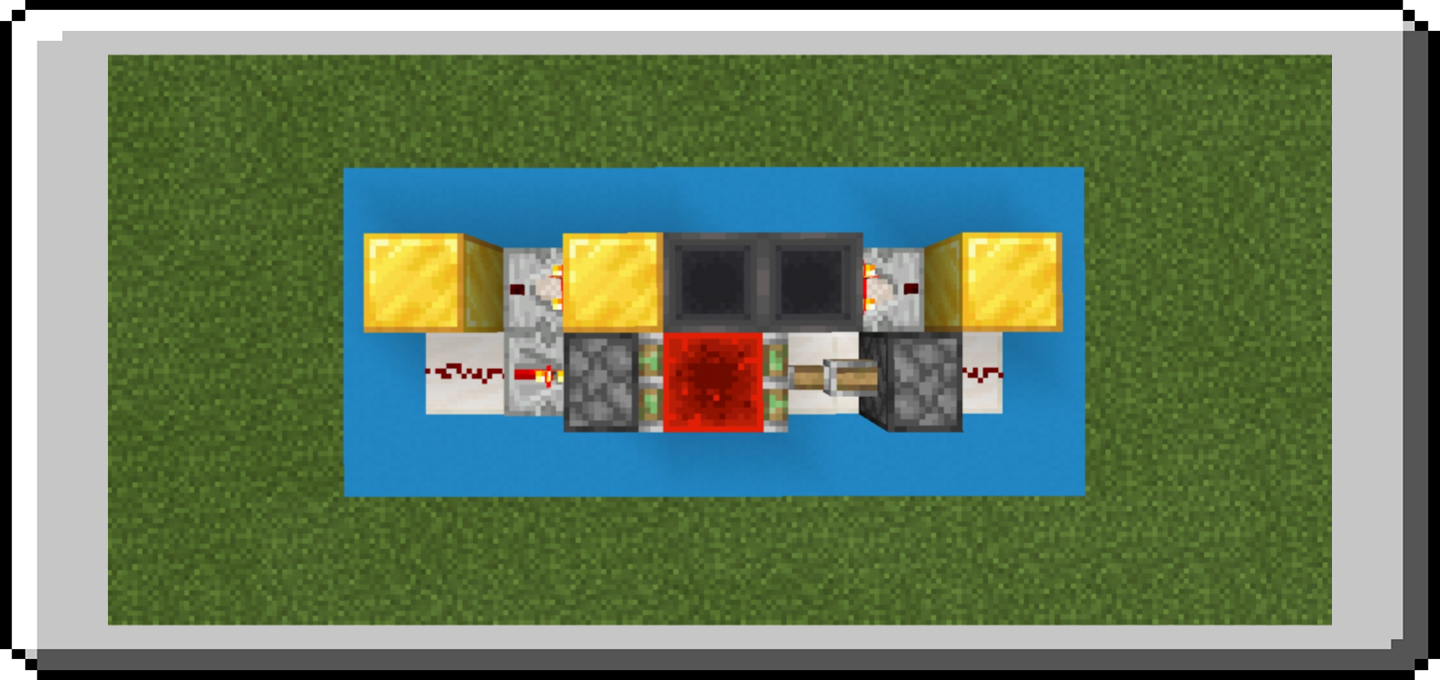
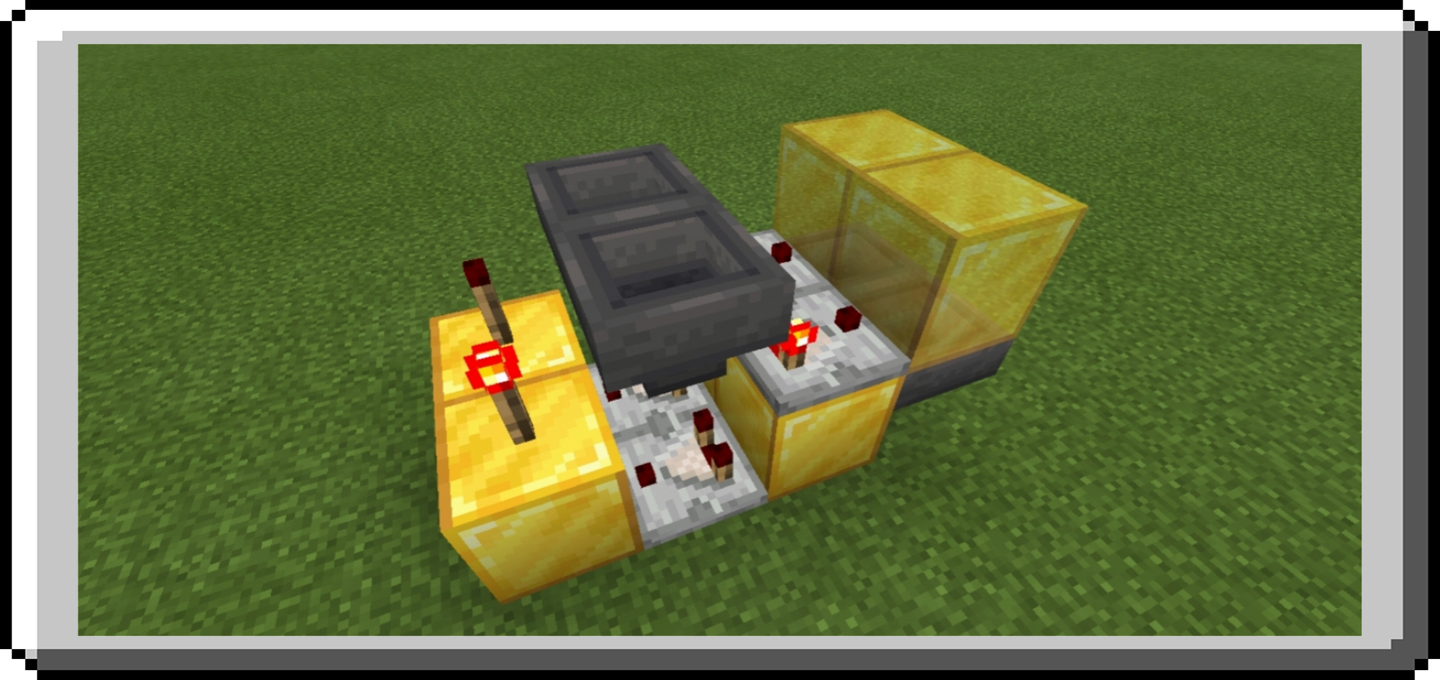
SethBling’s Hopper Clock
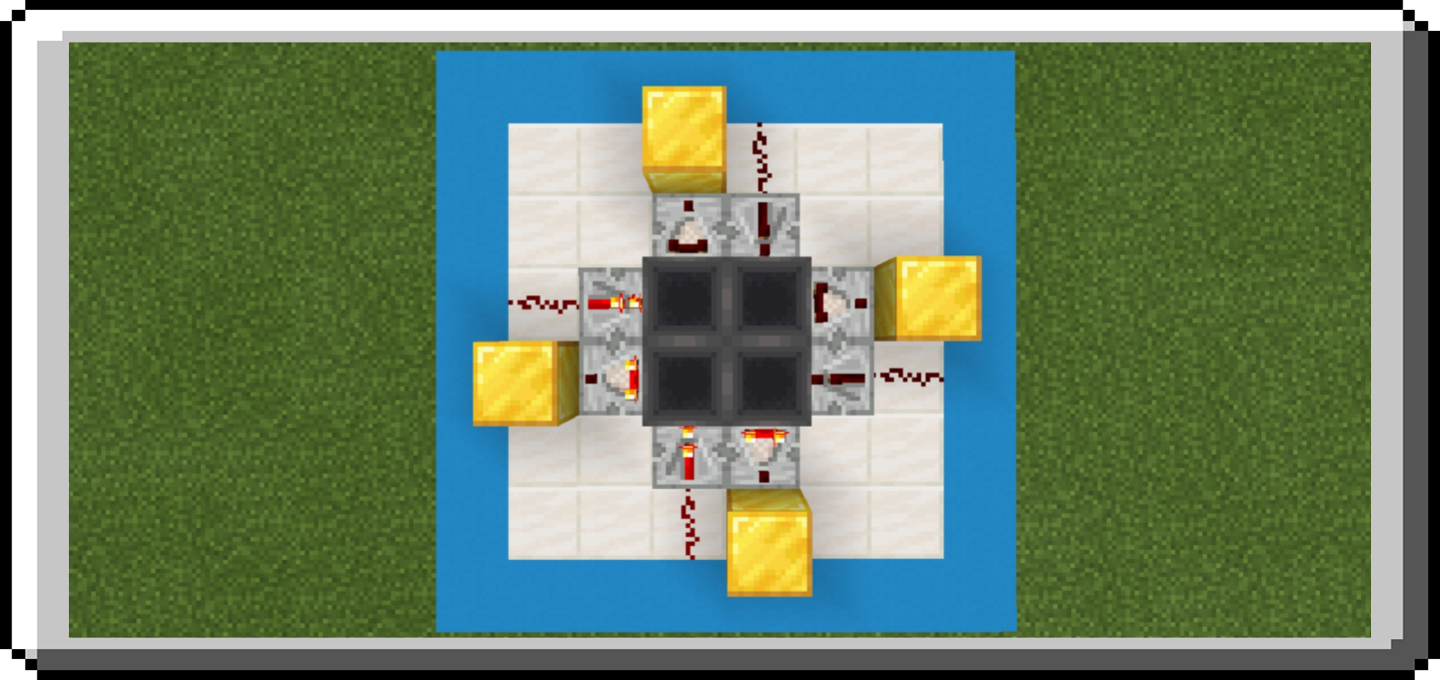
Properties:
Size: 6 x 6 x 2
Clock Period: 1.6s to 512s (8m 32s)
Flat, Silent
A loop of hoppers with multiple items, where each hopper prevents the next hopper from pushing items further until the previous hopper has emptied.
This clock can create a clock signal twice as long as the other multi-item hopper clocks.
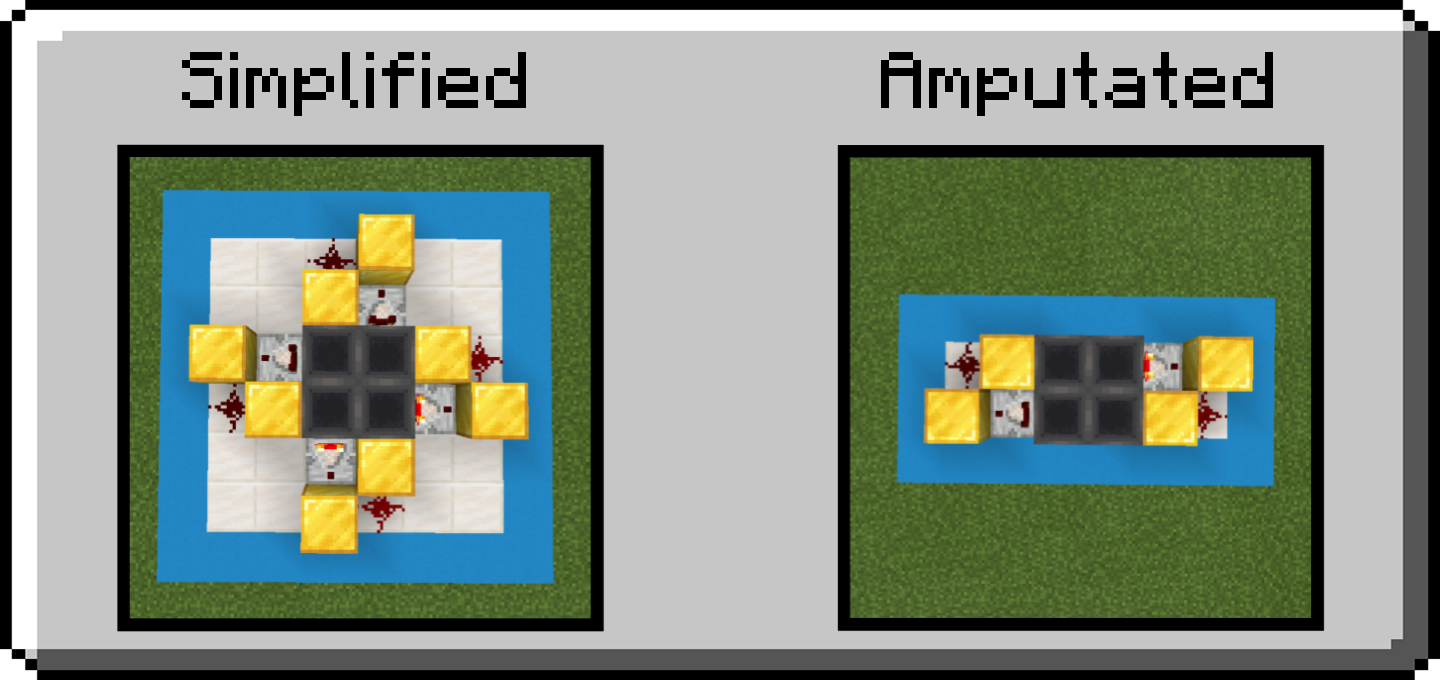
Variations: The simplified version uses slightly fewer resources, by simply replacing the repeaters with blocks. The amputated version (two “arms” have been removed) only goes up to 256 seconds, but is one-third the size.
Switchable Clock
Clock Circuit is a circuit that send an endless signal at specific intervals. It produces a clock singal: a pattern of pluses which repeats itself. The time between the signals can be set by the player, either roughly or very accurately.
Switchable Clock are redstone clock that can be toggle to ON and OFF. These clocks run while the input is ON, and turns its clock signal output off when the input turns OFF.
Comparator Clock
Properties:
Size: 2 x 2 x 2
Clock Output: 1 Tick on, 1 Tick off
Flat, Silent
A Comparator Clock toggles on and off every tick. It uses a redstone comparator in subtraction mode, with the output feeding to the comparator’s side input.
Switchable Repeater Clock
Properties:
Size: 4 x 3 x 3
Clock Output: 1-4 Ticks on 1-4 ticks off
Flat
Switchable repeater clock uses piston to pull the block and cut the loop of repeater to stop the clock signal and when turn ON the piston pushed the block and make observer detect an update to it’s back and send an output signal to repeater loop and make the clock starts run a clock signal.
Another variation of switchable repeater clock is you can add more repeater to slower the pulse signal.
Properties:
Size: 5 x 3 x 3
Flat
Hopper Clock
Properties:
Size: 4 x 2 x 2
Clock Output: 4 Ticks off, 4 Ticks on
Clock Period: 8 Ticks
Flat, Silent
A Hopper Clock simply moves a single item in a loop of hoppers. This clock just bounces an item back and forth between the two hoppers every 4 ticks.
Variations: Another comparator can be added to the other hopper to get another clock signal inverted from the other.
Piston Clock
Properties:
Size: 3 x 2 x 2
Clock Output:
Flat
A piston clock produce clock signal by pushing and pulling blocks repeatedly. The block that push and pull by a piston use to connect the redstone wire from input to piston, when piston powered it will push a block and disconnect signal causing the piston to turn OFF and pull the block and then signal will connect again and repeat the process.
You can add repeater to slower the clock cycle.
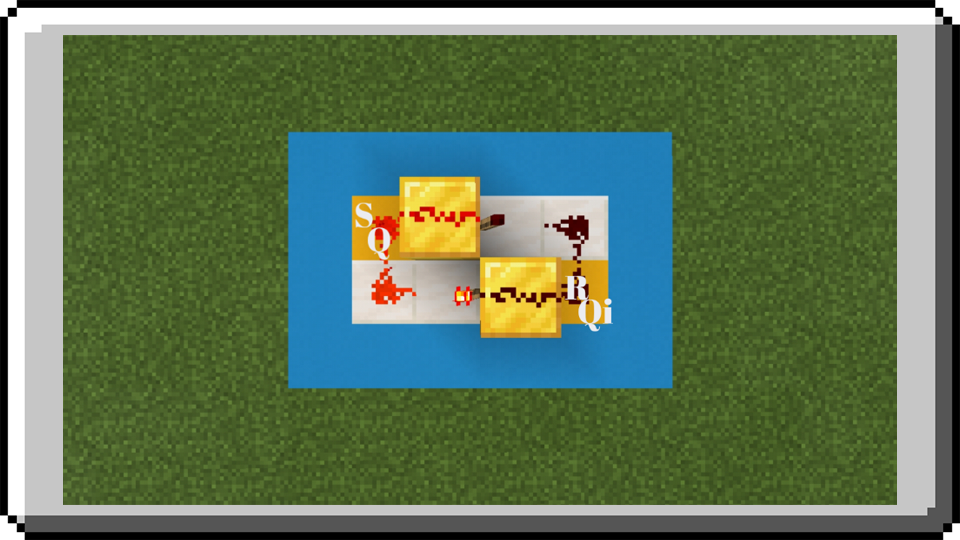
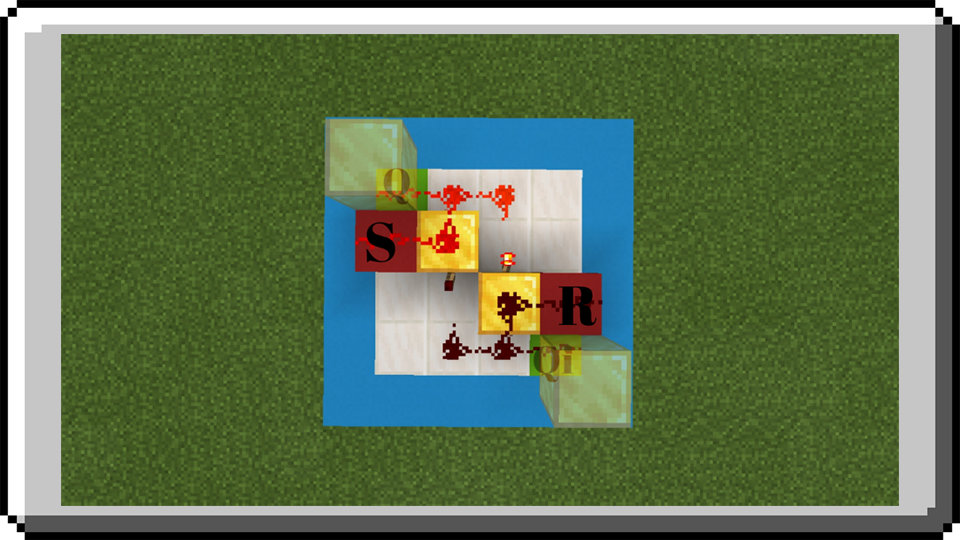
Memory Circuit
RS Latches
A RS latch has separate control lines to set (turn on) or reset (turn off) the latch. Many also have dual outputs. The oldest form of RS latch in Minecraft is the RS-NOR latch, which forms the heart of many other latch and flip-flop designs.
Setting both inouts high simultaneously is a forbidden condition, generally something to avoid. In the truth table, S=1, R=1 breaks the inverse relationship between Q and Qi. If this happens, the player will get undefined behavior - various designs can be different things, and especially Q and Qi can be high or low at the same time. If the forbidden state is co-opted to toggle the output, the circuit becomes a JK latch, described in its own section. Of there is instead a third input which toggles the output, the circuit becomes an RST latch.
Any RS latch with dual outputs is functionally symmetrical: pulsing each input turns on “its” output, and turns off the other one. Thus R and S are interchangeable, if the outputs is swapped: Which input players pick as S chooses which of the outputs is Q, then the other input will be R and the other output will be Qi. (If the original circuit only had a Q output, then swapping the inputs will turn it into Qi.) In several designs (A, B, C, D, E, F, I) the functional symmetry is reflected by the circuit’s physical symmetry, with each input energizing the torch it leads to, while turning off the other.
RS latches can be built in a number of ways:
- Two NOR gates can be linked so that whichever is lit, the other will be off. The RS NOR latch is the “original” RS latch, and still among the smallest memory devices that can be made in vanilla Minecraft. While they can be built with just torches and redstone dust, repeaters can also be used. Many of these designs have “duplex I/O” - the same locations can be used to read or set the latch state.
- It is also possible to construct an RS NAND latch, using NAND gates instead of NOR gates. These will be larger and more complex than an RS NOR latch, but may be useful for specialized purposes. Their inputs are inverted (see below for details).
- Other RS latches can be created by fitting an “input sustaining circuit” with a reset switch, say by adding a pair of NOT gates or a piston, placed so as to interrupt the circuit when triggered. Such a construction can be nearly as compact as an RS NOR latch (and often with better I/O isolation and/or timing), but they will usually not have a natural Qi output.
- Other devices can also be involved. Pistons can be used to physically toggle a block’s location, while hoppers or droppers can pass around an item entity. These circuits can be very fast and small, with little redstone dust.

RS-NOR Latches
Designs A and B are the most fundamental RS-NOR latches. In both cases, their inputs and outputs are “duplex” -the latch state can be read (Q) or set (S) on one side of the circuit, while on the other side, the latch can be reset (R), or the inverse output read (Qi). If separate lines for input and output are needed, opposite ends of B can be used, or A can be elaborated into A’ with separate locations for all four lines.
Design A:
Design B:

Design A’:
D LATCH
WIP - COMING SOON
This is what I have so far:
A D latch has a data input and a clock input. When the clock is triggered, the data input is copied to the output, then held until the clock is triggered again.
JK Latch
WIP - COMING SOON
This is what I have so far:
A JK latch has three inputs: A clock input, and the jump and kill inputs. When the clock is triggered, the latch's output can be set, reset, toggled, or left as is, depending on the combination of J and K. While these are common in real-world electronics, in **Minecraft** they tend to be bulky and impractical — most players would use an SRT latch instead
T-Flip Flop
The letter “T” is for “toggles”. Whenever the input changes from OFF to ON, the output will toggle its state. A useful way to use T flip-flops in Minecraft could, for example, be a button connected to the input. When you press the button the output toggles and does not toggle back when the button pops out. Basically it makes the button work as lever.
Repeater T-Flip Flop
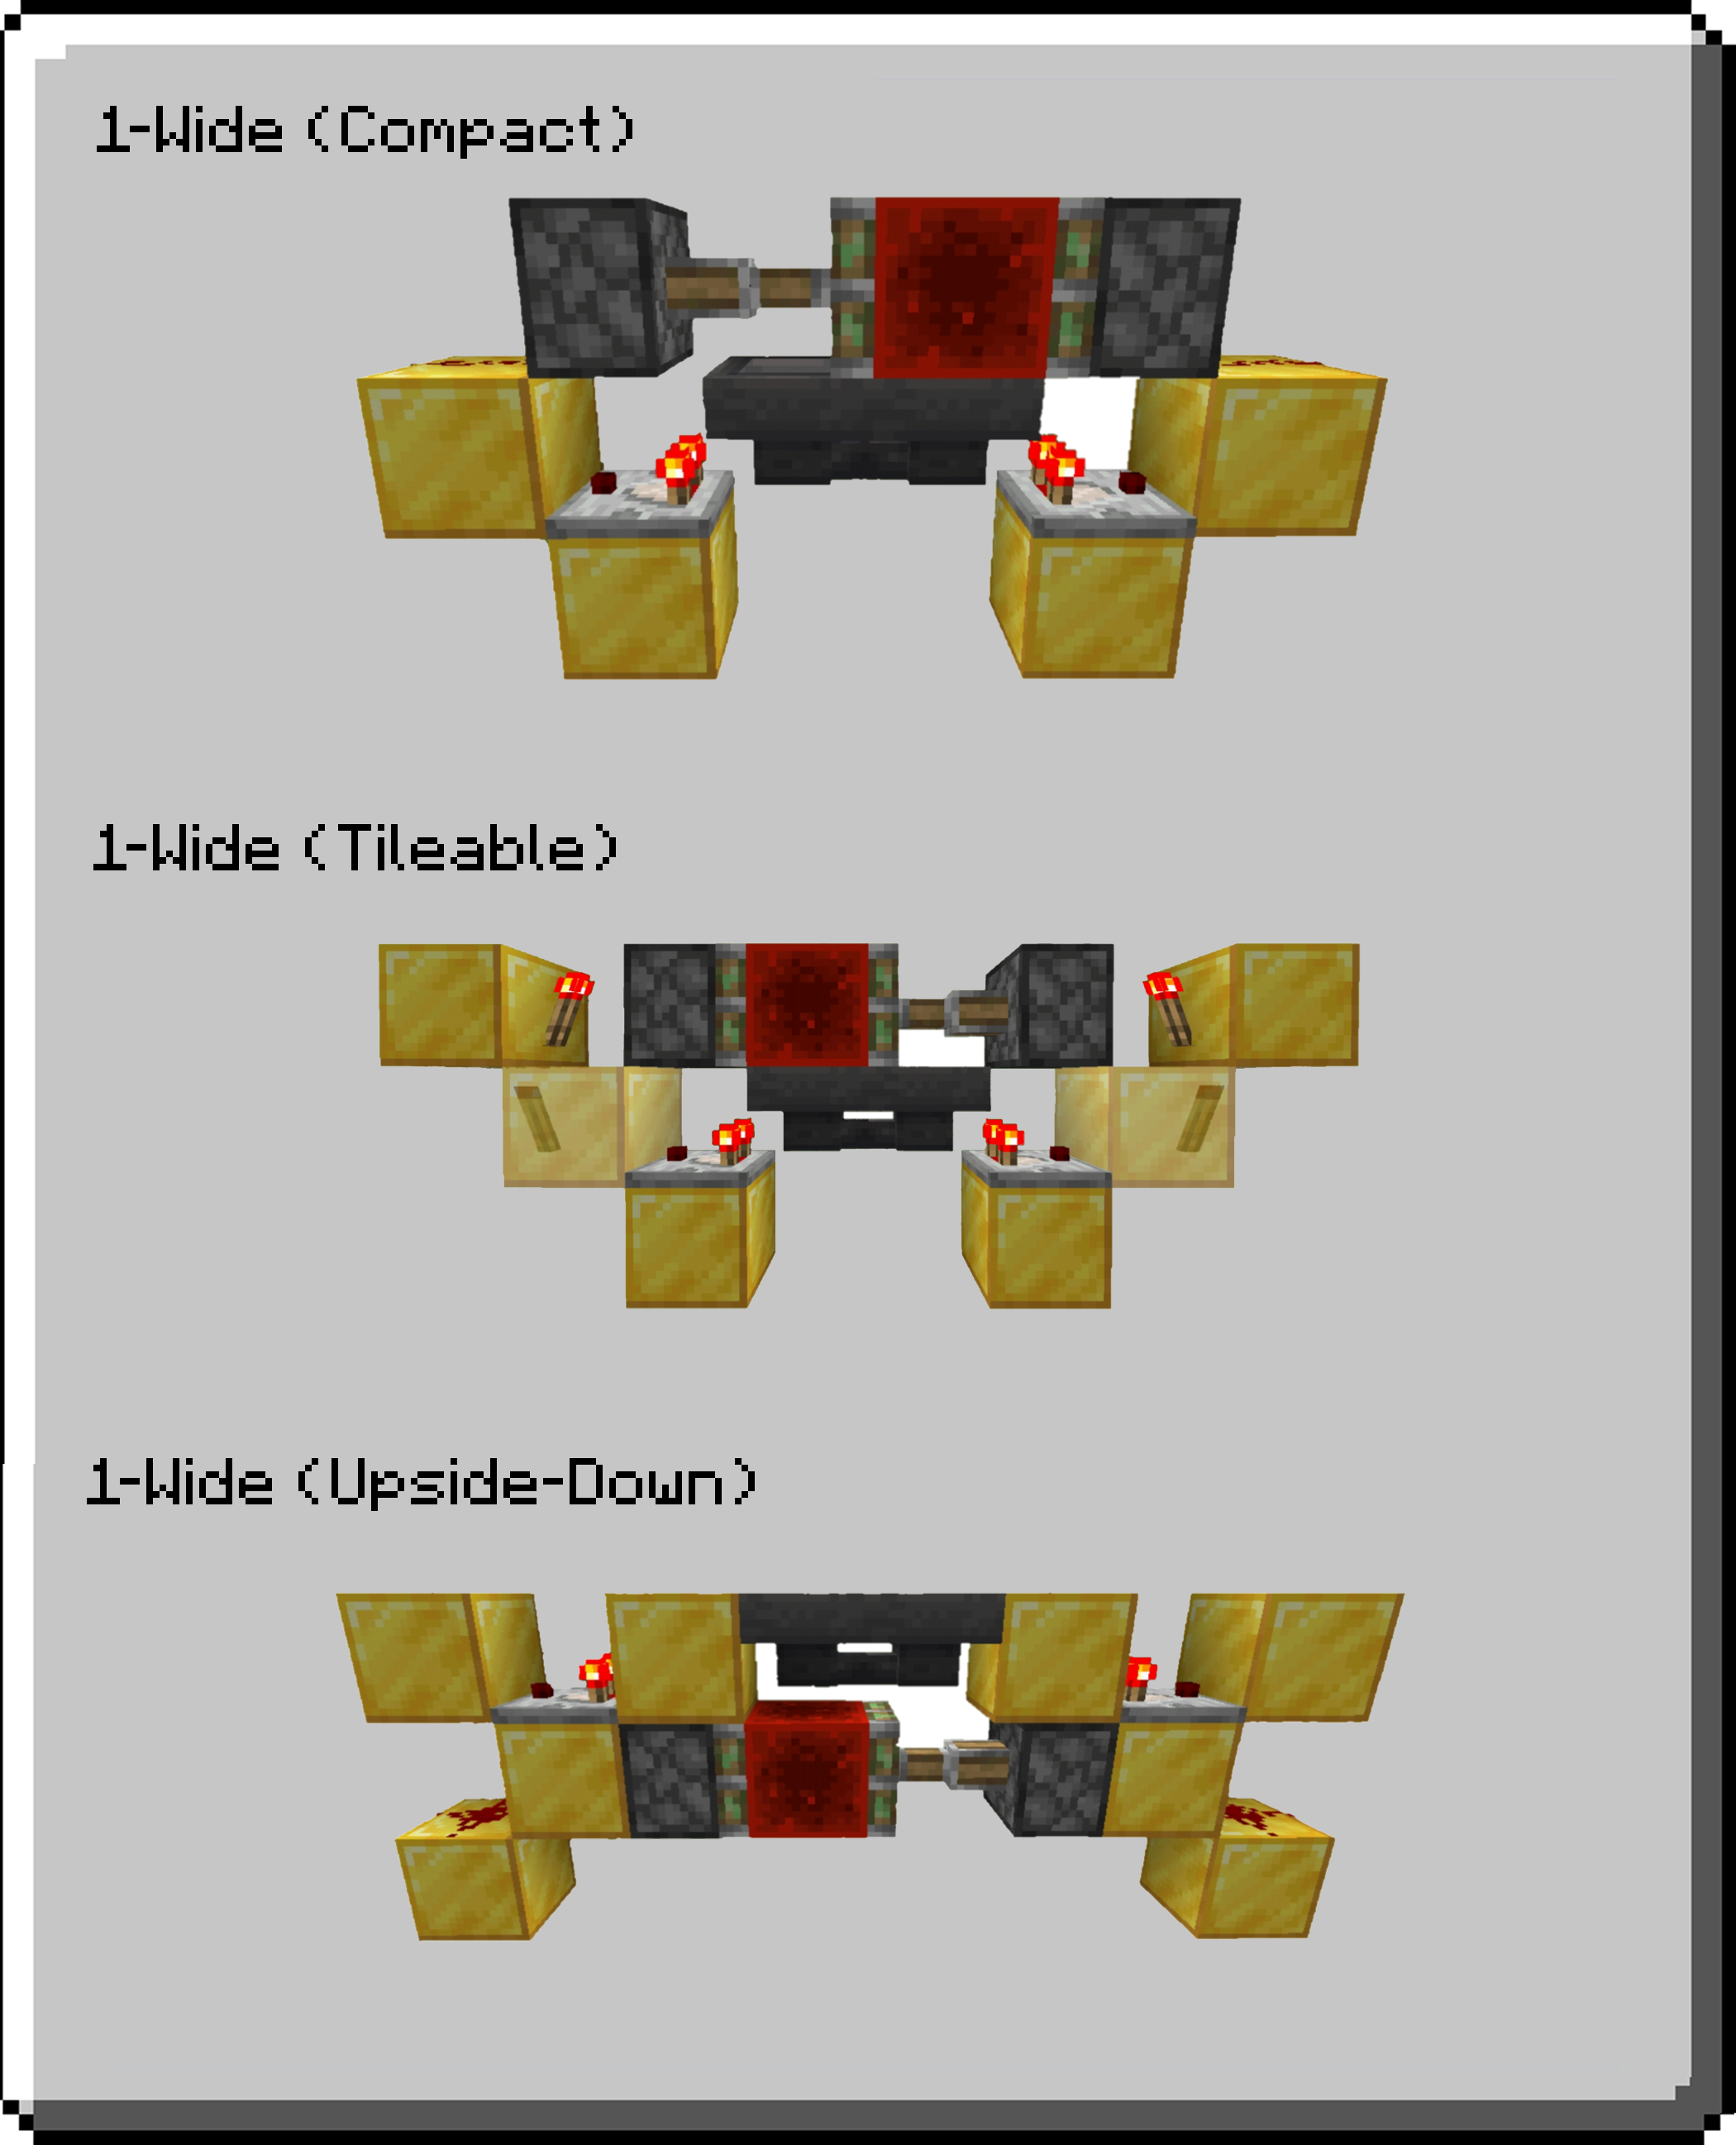
These examples is a repeater locking method, since it uses a repeater they are completely silent. These example work the same but with different properties.
Properties:
Size: 4 x 5 x 1
Circuit Delay: 5 Ticks
Properties:
Size: 4 x 4 x 1
Circuit Delay: 3 Ticks
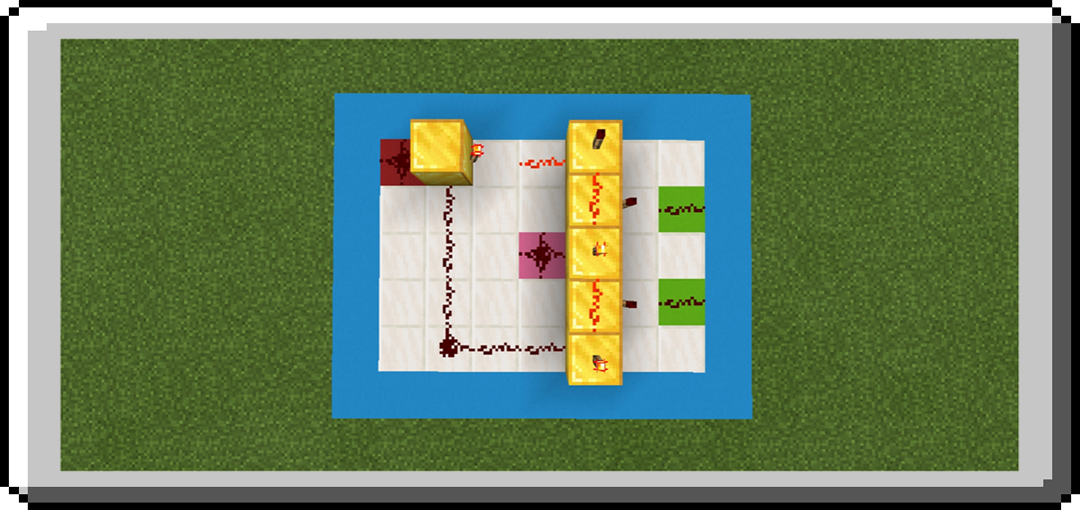
Grizdale’s T-Flip Flop
Redstone Torch is the output. Dropper at the bottom is facing upward, dropper at top facing at comparator and hopper is connected at lower dropper. Once built, place a single item inside of either containers and it will work as a T Flip-flop, with the item cycling between the two droppers.
In the picture above the item is in lower dropper if input is powered, the repeater will power the two dropper causing lower dropper to transfer item at the top dropper and make comparator to turn on and output will off. If it’s powered again the dropper throw item and hopper will take it and bring back at bottom dropper causing the comparator turn to off and output is on.
Properties:
Size: 5 x 1 x 2
Circuit Delay: 5 Ticks
1-Wide, Compact
Variation: Redstone torch can replace with repeater or redstone dust, if redstone dust is used it only send an output power level 1. Repeater can replace with comparator or observer as long as it powers the two dropper, you can also place redstone dust on top of dropper and make it input.
Miscellaneous Circuits
ABBA Circuit
An ABBA circuit has one input and multiple outputs. When the input turns on, the outputs turn on in order (e.g., A then B), but when the input turns off, the outputs turn off in reverse order (e.g., B then A).
ABBA Circuit
All of these designs can be extended indefinitely. Horizontal ABBA
Vertical ABBA
Multiplexer
A multiplexer (mux) is a device that selects one of two or more inputs and outputs the selected input. This multiplexer can be chained together, allowing for multiple bit multiplexing.
For these designs, the inputs are labeled A and B. X is the “control” input: whether A or B passes through depends on whether X is powered or not.
AND-Gate Mux
If X (control input) is off, A input can control the output to toggle on or off but the B input is suppressed meaning you can’t use this input to control output.
If X is on, B input can control the output but A is suppressed.
Properties:
Size: 3 x 5 x 3
Circuit Delay: 2 Ticks
Silent
Dust-Cut Mux

While the block is moving, both A and B can pass through at the same time; in practice, this just means the transition takes 1.5 ticks when going from a high signal to a low, and instantly for all other cases.
Properties:
Size: 3 x 3 x 3
Circuit Delay: 0 Ticks
Piston Mux
If X (control input) is off, A can control output but B is suppressed. If X is on, B can control output but A is suppressed.
Properties:
Size: 2 x 3 x 2
Circuit Delay: 1 Ticks
Flat
Repeater Lock Mux
his multiplexer control input split into two with inverted circuit that connected to A and B input allowing one repeater output to lock but do not lock both repeater output at the same time.
Properties:
Size: 5 x 2 x 1
Circuit Delay: 1 Ticks
Flat, Silent
Demultiplexer
The demultiplexer (demux) is the reverse of the multiplexer. It allows you to have one input be sent to either of one of two or more different outputs.
For these designs, the red block is your input and pink block is the selector. The selector can switch to which output will be trigger by input.
AND-Gate Demux
If the selector is OFF, the input can trigger the output B, if selector is on the input can trigger the output A.
Properties:
Size: 5 x 5 x 3
Circuit Delay: 2 Ticks
Silent
Piston Demux
Properties:
Size: 4 x 3 x 2
Circuit Delay: 1 Ticks
Flat
Radomizer
Randomizer (also known as RNG short for Random Number Generator) is a circuit that can generate numbers with no recognizable pattern. This is usually used to roll the probability of various outcomes.
2-RNG
Outputs either power level 1 or 3 while on, power level 0 while off.
See image below to build this, the dropper contain 1 stackable item and 1 non-stackable item.
When the input turns on, the dropper will randomly choose to push either the stackable item or the non-stackable item into the hopper, causing the comparator to output either power level 1 or 3.
2-Way Selector
The redstone block will pull either by left sticky piston or right sticky piston, causing the redstone block to power either left repeater or right repeater.
Contraptions
Piston Extender
The Piston Extender will push and pull a block with two or more spaces instead of one. These examples are stackable ready so you can expand them indefinitely.
Horizontal Double Piston Extender
Properties:
Size: 1 x 6 x 6
1-Wide, Stackable, Tileable, Seamless
This extender will push and pull a block with two block spaces in a horizontal direction.
Vertical Double Piston Extender (Upward)
Properties:
Size: 1 x 6 x 6
1-Wide, Stackable, Tileable, Seamless
Variation: You can replace obsever on top in the right side with any opaque block but will not become stackable so if you don’t need to exapand it you can replace that.
Vertical Double Piston Extender (Downward)
Properties:
Size: 1 x 7 x 4
1-Wide, Stackable, Tileable, Seamless
Variation: You can replace observer at the bottom in the left side with any opaque block but will not become stackable so if you don’t need to exapand it you can replace that.
Control Panel
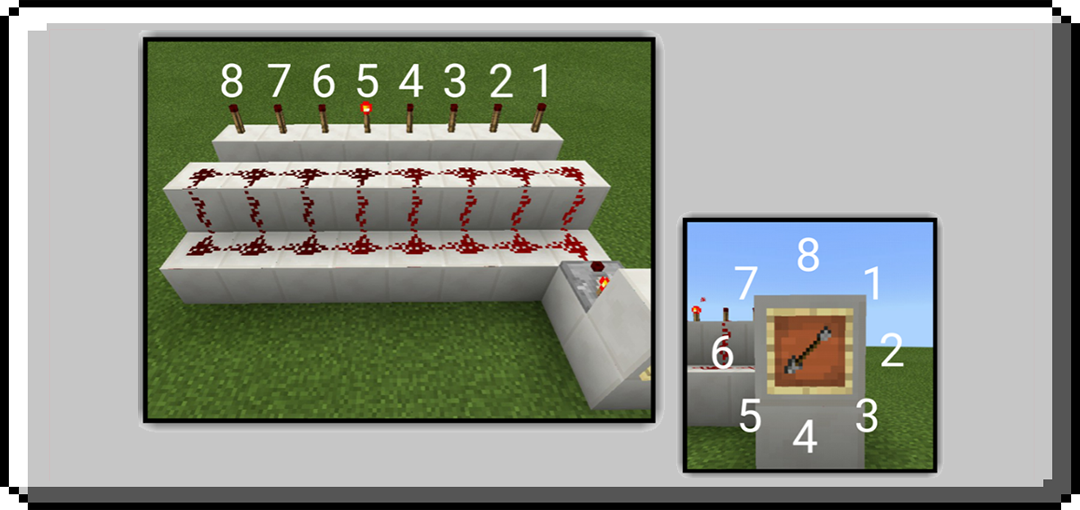
Item Frame Selector
Item frame selector is used to select 8 different output, the ouput is depend on the rotation of item in item frame. At initial placement, output 1 is turn ON rotate it and output 2 is turn ON upto output 8 and then wrapping back to ouput 1.
STEP 1: Place a block then item frame in it and place item on item frame (I prefer arrow though it’s like pointing in it’s rotation), and then place comparator behind facing away from item frame.
STEP 2: Place 8 blocks 1 block below the front of comparator.
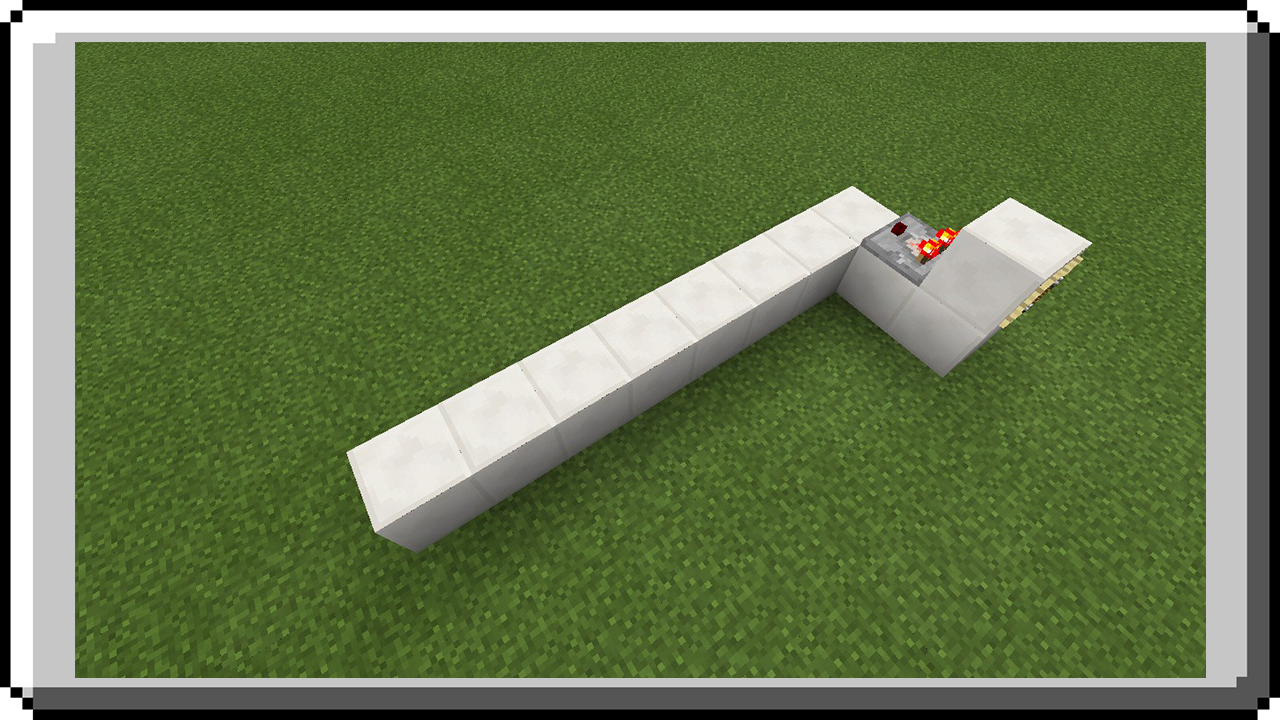
STEP 3: Place a redstone dust in all blocks then a row repeater facing away from blocks.

STEP 4: On top of all repeater place a block then redstone dust on top of these blocks.
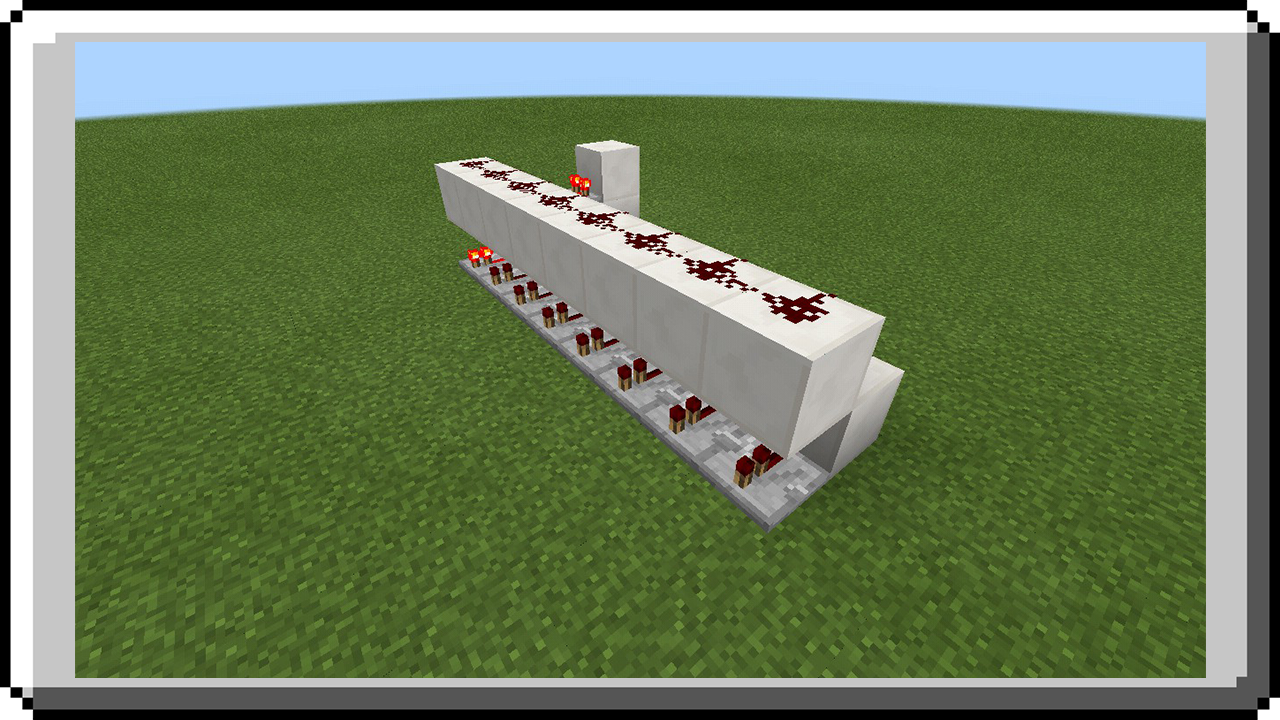
STEP 5: Place another block in front of repeater then another repeater on top of these blocks facing away from blocks.
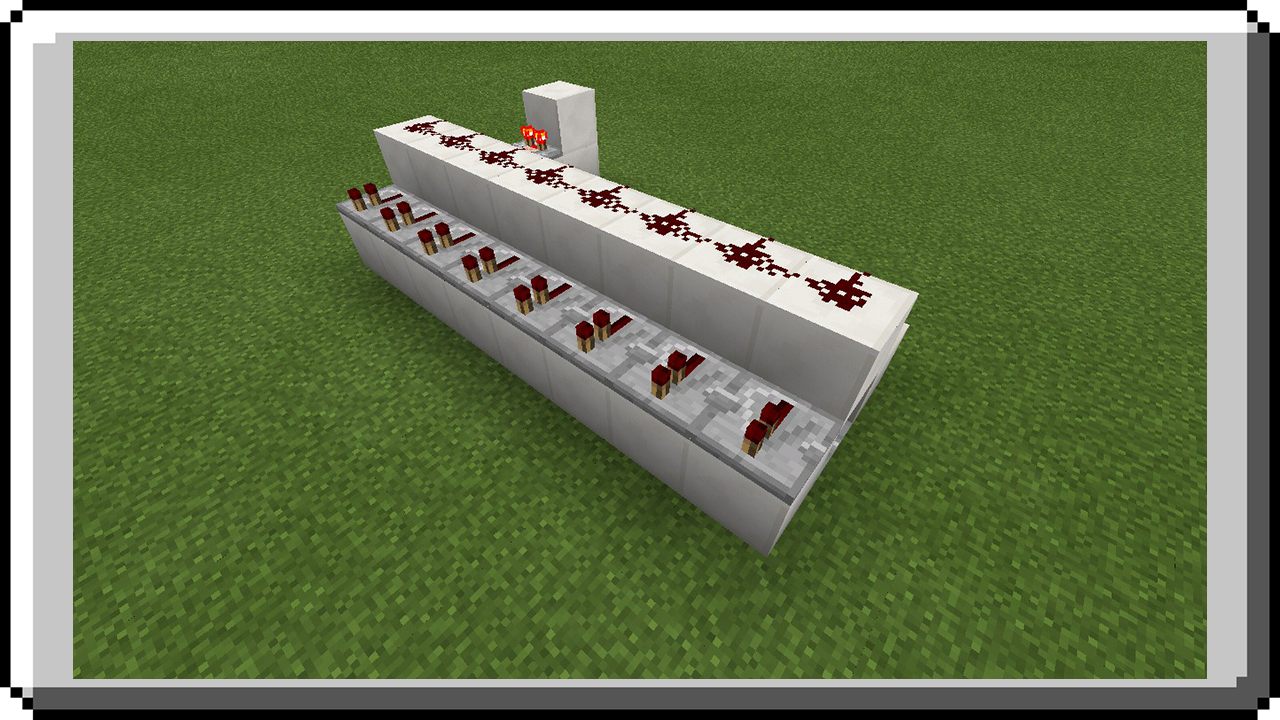
STEP 6: At the front of repeaters place a row block then on top place a row of redstone torch and another row of redstone torch at bottom attached to block.
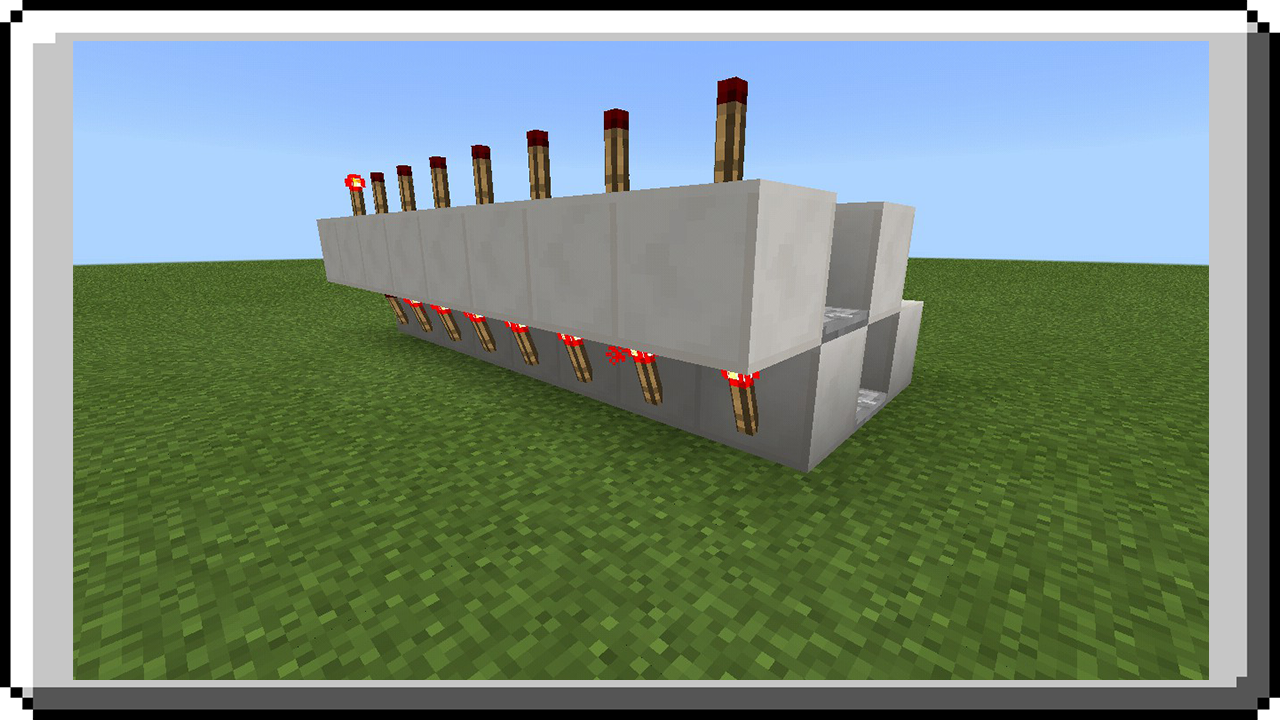
The redstone torch above are your outputs, as you see the first redstone torch is ON because item frame is at initial placement or in the first rotation.
The image below show the labled of the selector.
Hidden Input
Hidden input is redstone contraption that let you trigger the output without a visible switch such as button & lever. Instead of using button or lever you can use this to make other won’t see your input to prevent others to use that too. This is the best thing to use in building hidden doors to make it fully hidden.
Redstone Dust Input
This hidden input uses a redstone dust in order to send a signals to output.
Assume that this is part of your room lime block is where wall of room is placed. Build a thing like picture below, the piston is sticky and the block in front of it is your input.
Now build a wall, place a redstone torch attached to a block directly where your input is.
After you place redstone torch, at inside the sticky piston will retract.
Now it’s done your hidden input will trigger output with short pulse, work like a button, if you want to make it work as a lever add a T-Flip Flop at output.
Lever Input
A hidden input using a lever should need to place it and flicked it to trigger the output then the lever will automatically drop itself.
Dig 2 block depth where your input is, then place a sticky piston facing upward with redstone dust and a repeater.
Place a block in top of sticky piston and build your wall to cover redstone. And now it’s done it’s send a short pusle signal to output.

Redstone Torch Input
This hidden input uses a redstone torch, when place it will trigger the output and automatically drop itself. This can be place only at below the ceiling.
Red block is your input here where you should place redstone torch, lime is output, block of quartz represent as ceiling and stone brick represent as wall.
This hidden input already have T-Flip Flop so it should work as a lever. If you want to make this hidden input should work as a button you should remove T-Flip Flop.
Hoe Input
This input uses hoe to hoe the dirt and trigger the input.
STEP 1: Build like shown in picture, redstone torch place on red block is output and redstone torch place on ground is input
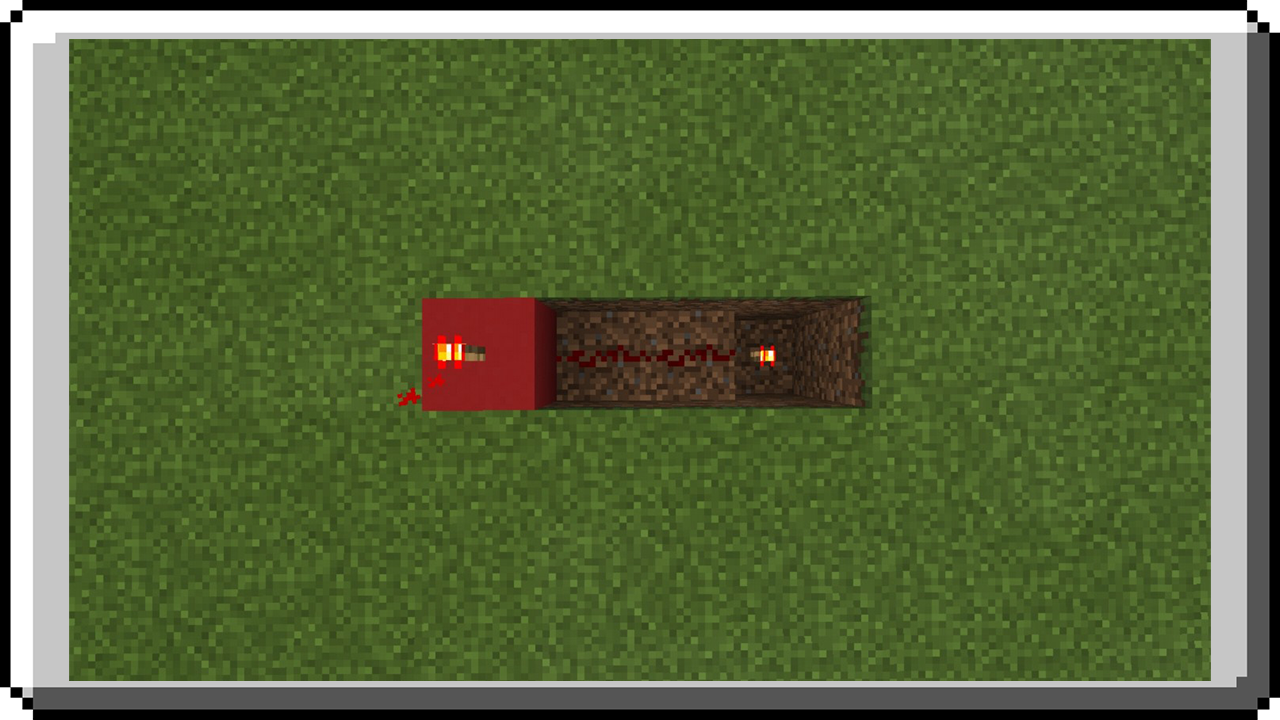
STEP 2: Place a dirt on top of redstone torch input, this is where you need to hoe to trigger output. Then place sticky liston on top of redstone dust near redstone torch facing to input then a block in front of it.
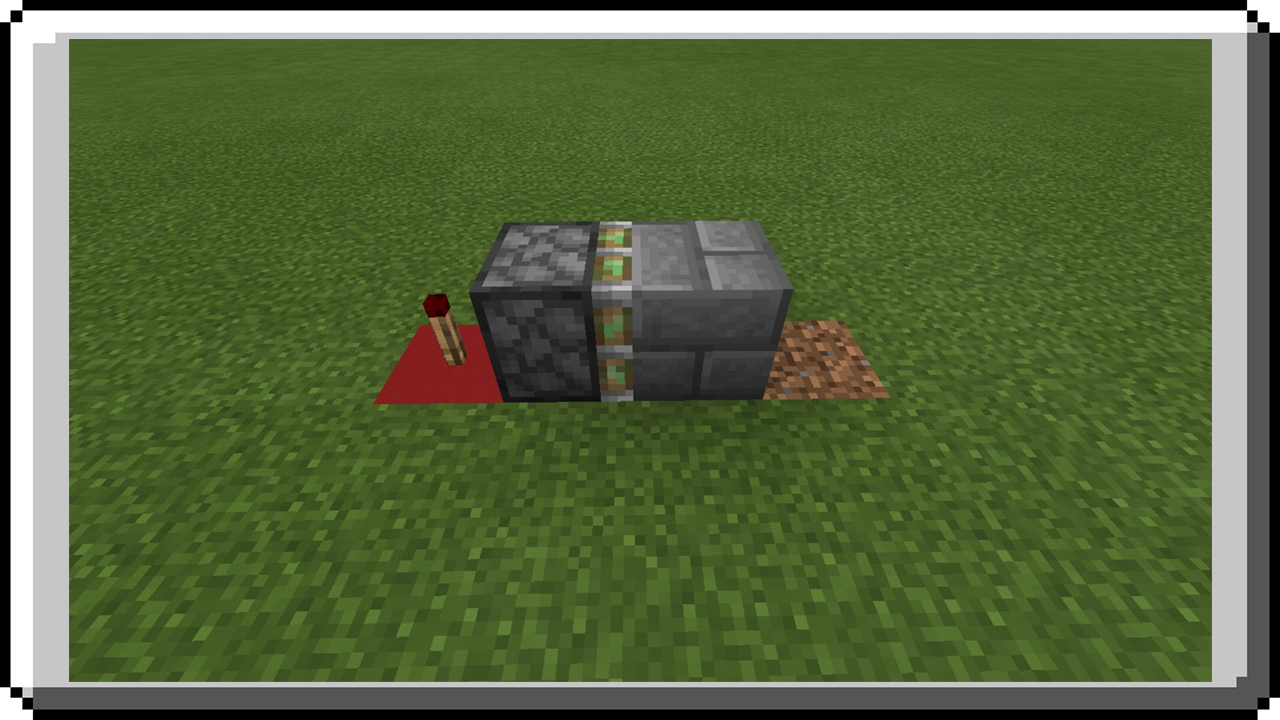
When you hoe the dirt it will turn into farm plot, farm plot is considered as transparent block as a result the redstone torch placed underneath it will not power the redstone dust causing the redstone torch ouput to ON then it power sticky piston and push a block above farm plot causing the farm plot to become dirt again. In this state it will send a short pulse to your output.
STEP 3: Now build a wall to cover redstone components and optionally build a T-Flip Flop in your output to make your input work as a lever.
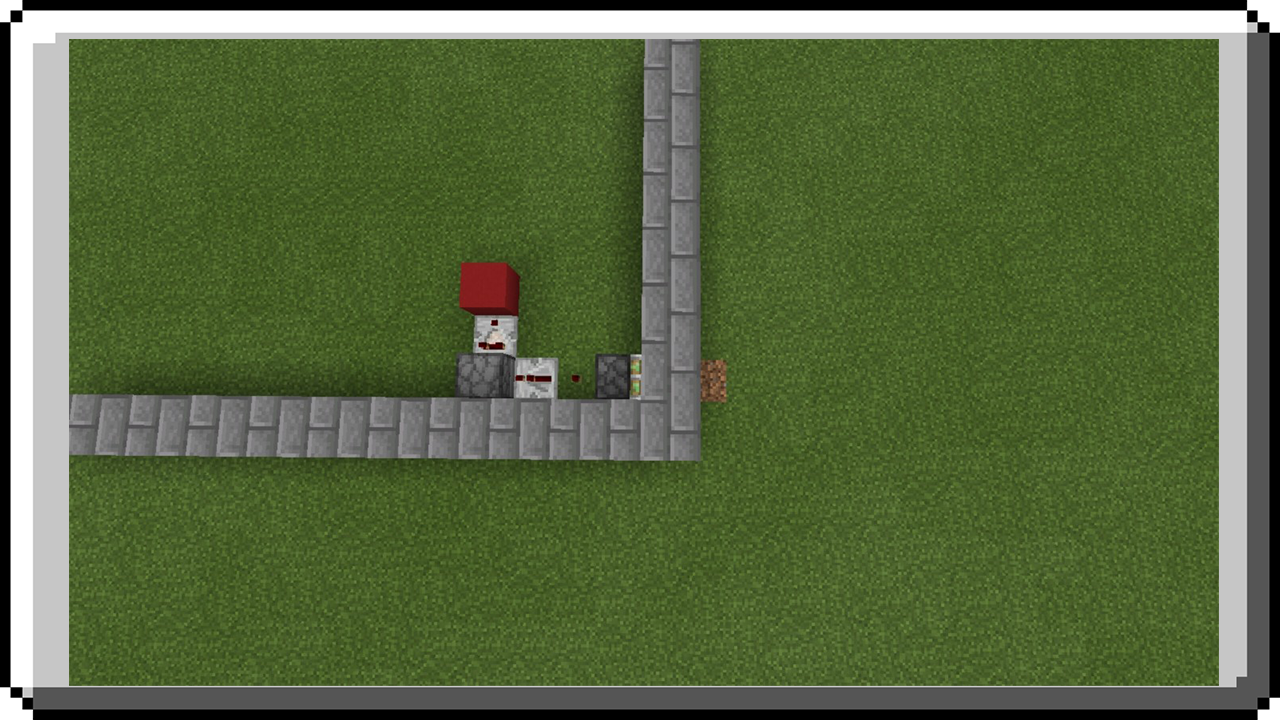
Traps Mechanisms
Mob Traps
Traps are a common mechanism in Survival Multiplayer built by players to kill other players or mobs automatically. The following is a list of traps for mobs with a short tutorial that often assumes the reader has a working understanding of the basic concepts required to build the traps.
Door Cage Trap
This trap will automatically lock or stuck mob in a door cage when they step on.
To build this simply place pressure plates on ground and place 4 iron doors in a spiral pattern around the pressure plate.
Piston Trap
Any mob won’t get out and stucked in area when step on the area where trap is, you can also lure some mobs to chase them alive.
STEP 1: Dig an outline of square or rectangular shape with 1 block depth. Don’t dig a block in corner.
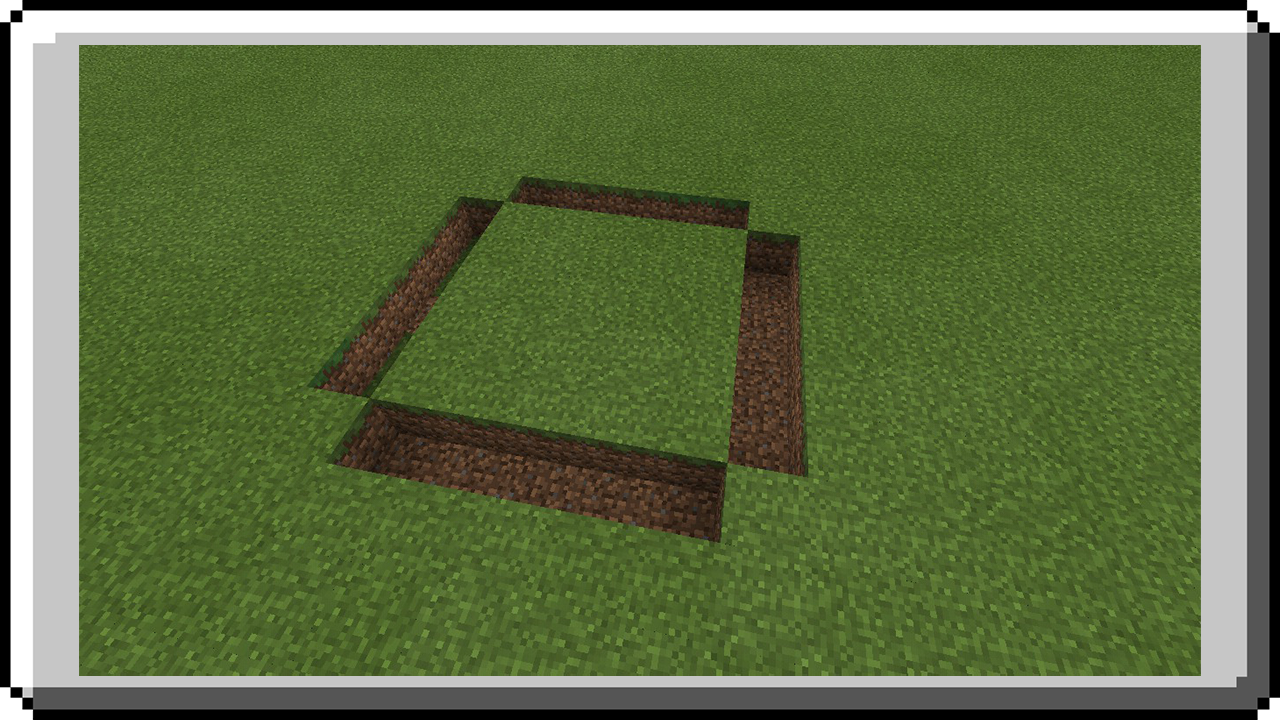
STEP 2: Place piston facing upward in all hole.
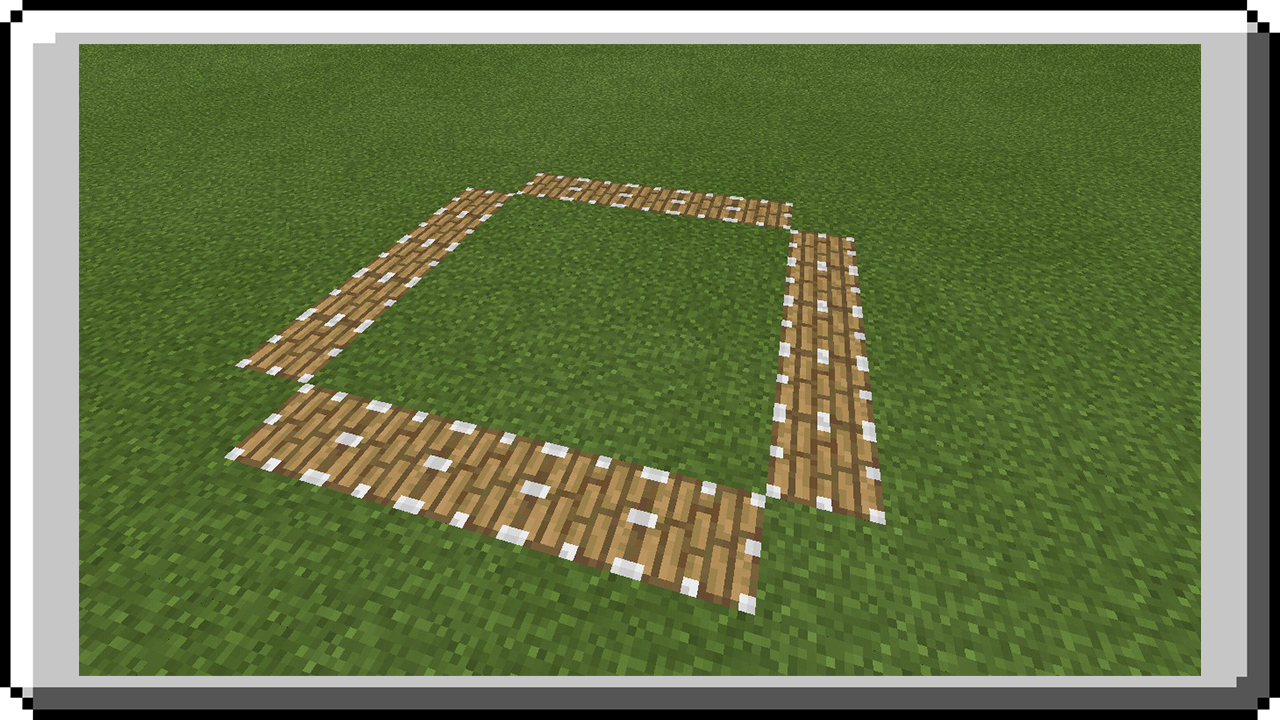
STEP 3: Place a pressure plates at inner side of pistons.
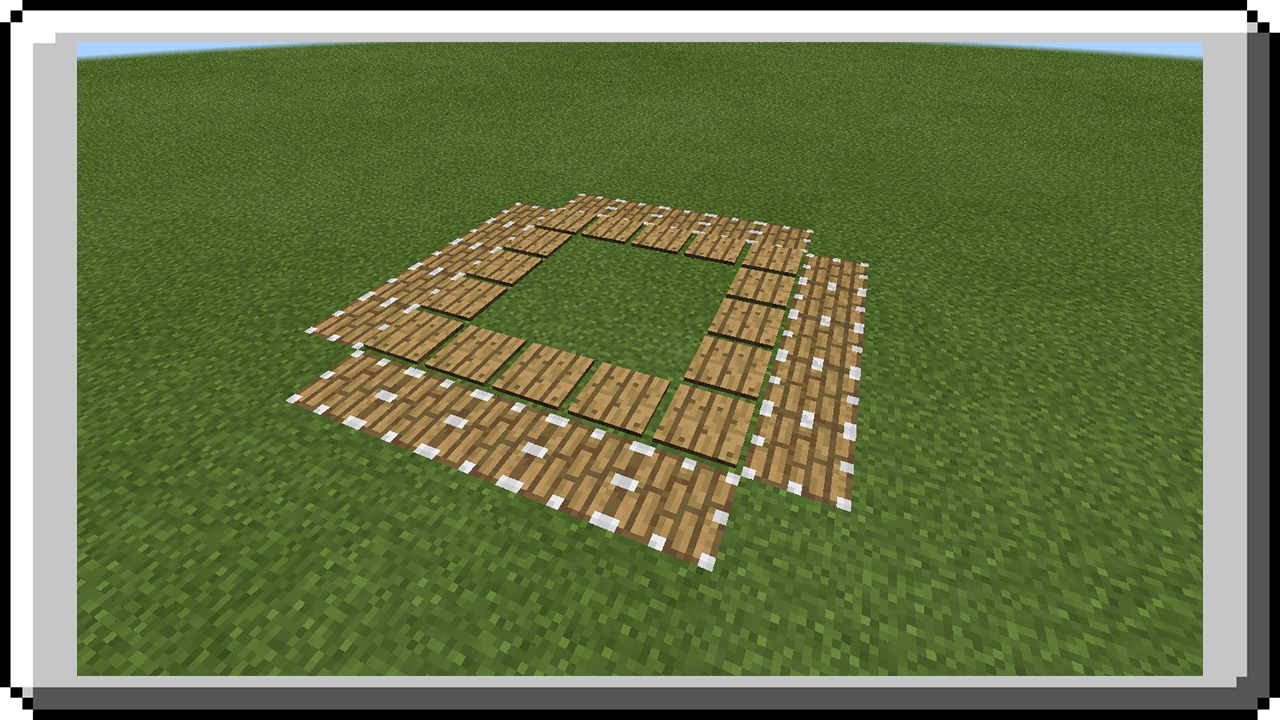
STEP 4: Place a slabs or blocks in top of all pressure plates with 1 block gap from pressure plates.
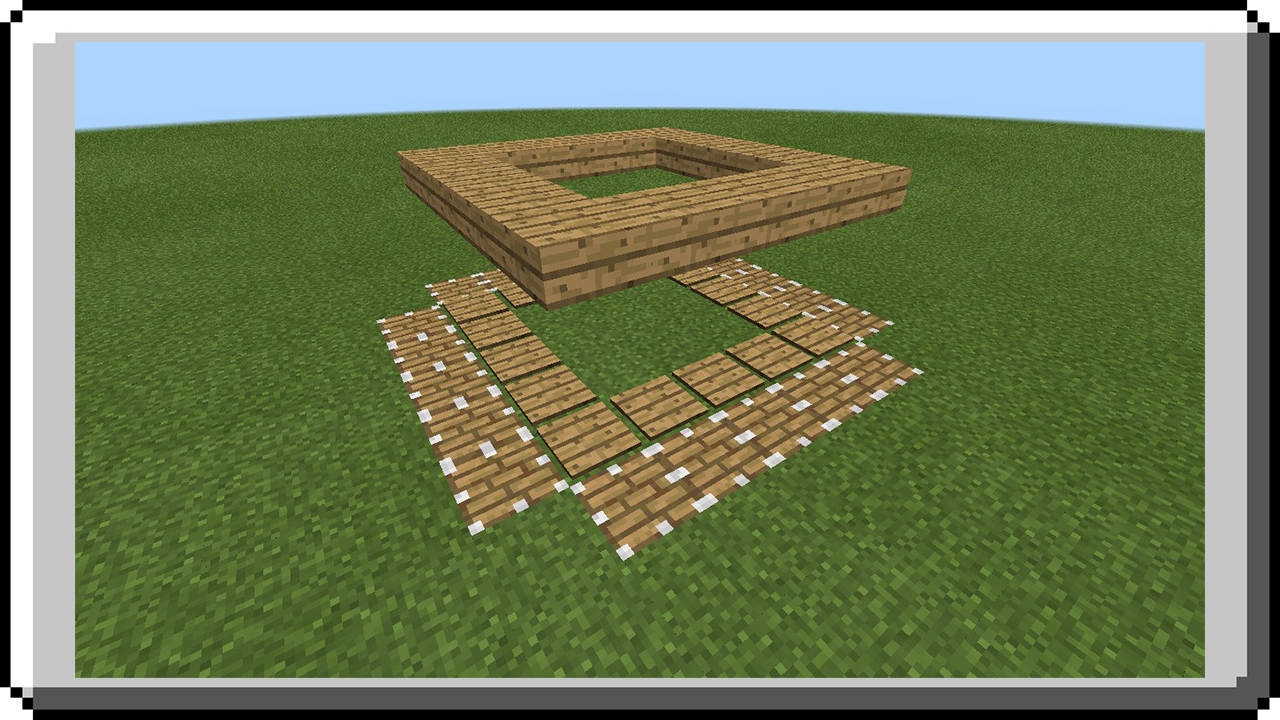
If mob get inside of this area they will never get out because of pressure plate make piston to extend and block their way out.
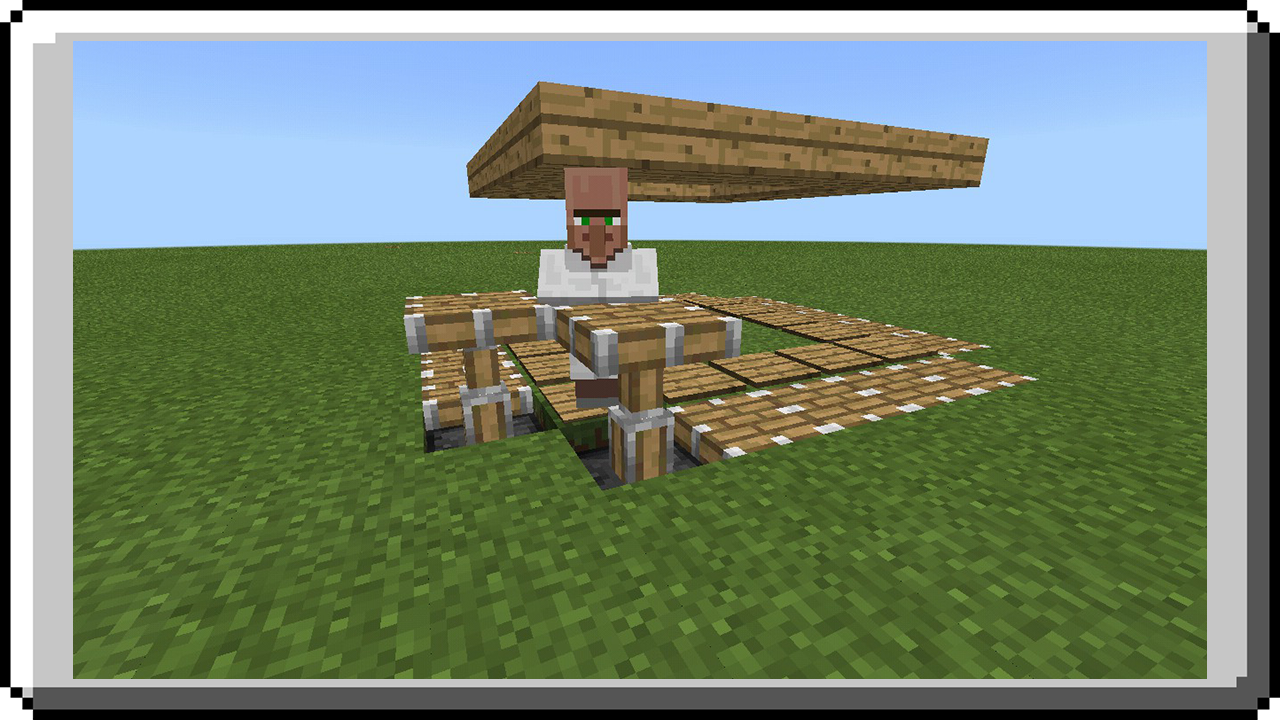
Single-use Traps
Traps are a common mechanism in Survival Multiplayer built by players to kill other players or mobs automatically. The following is a list of traps that can be use one time only with a short tutorial that often assumes the reader has a working understanding of the basic concepts required to build the traps.
TNT House Trap
This traps will blown up with tnt whose anyone walk or go inside the house. Build it in a house with iron door that use pressure plate to open door.
Players won’t think it’s a trap they will think that pressure plates is use for opening iron door, that’s why iron door is required for this.
Place a TNT under the block where pressure plate is placed, you can place how many TNT you want but make sure all will explode.
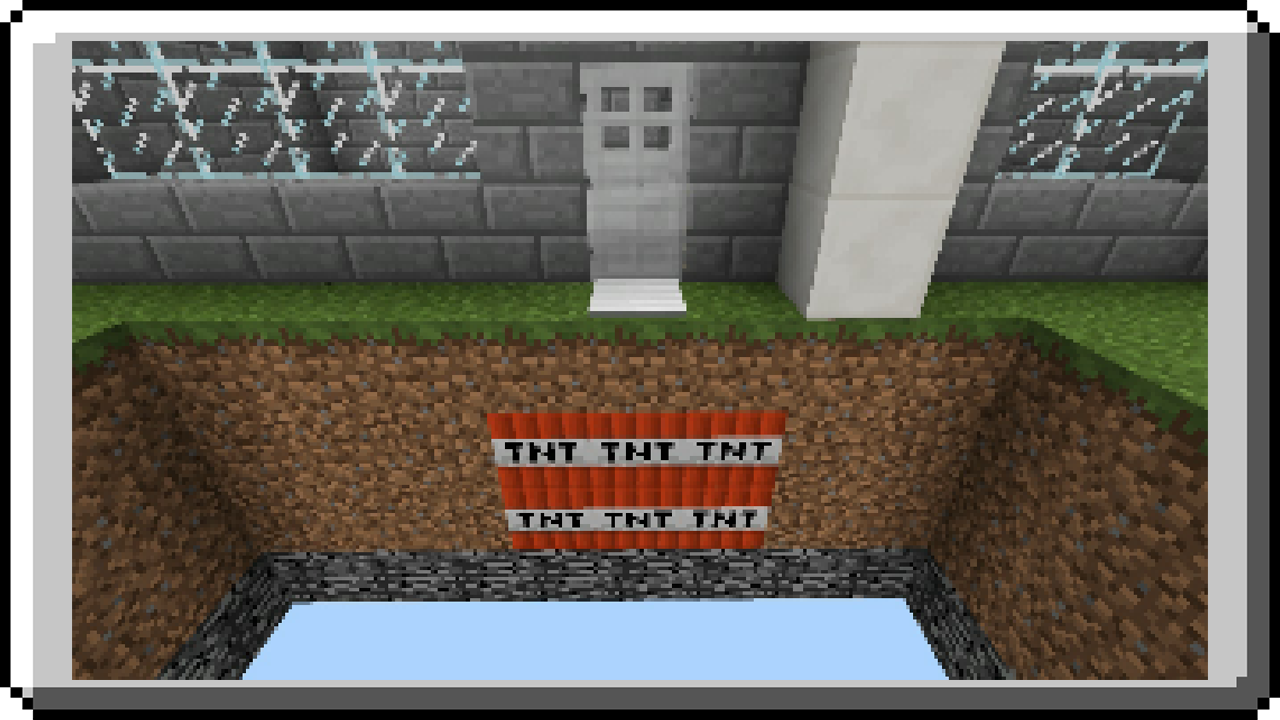
Ore TNT Trap
This trap will blown up a player who will mine an ore. If ore is completely mined TNT will activate.
STEP 1: Find a cave you want to build this.
STEP 2: Place ore (i.e diamond ore), replace it in any stone.
STEP 3: At the back of ore place a redstone torch attached to ore.

STEP 4: Connect a redstone torch to your output use another redstone torch to invert signal, your output should be off.
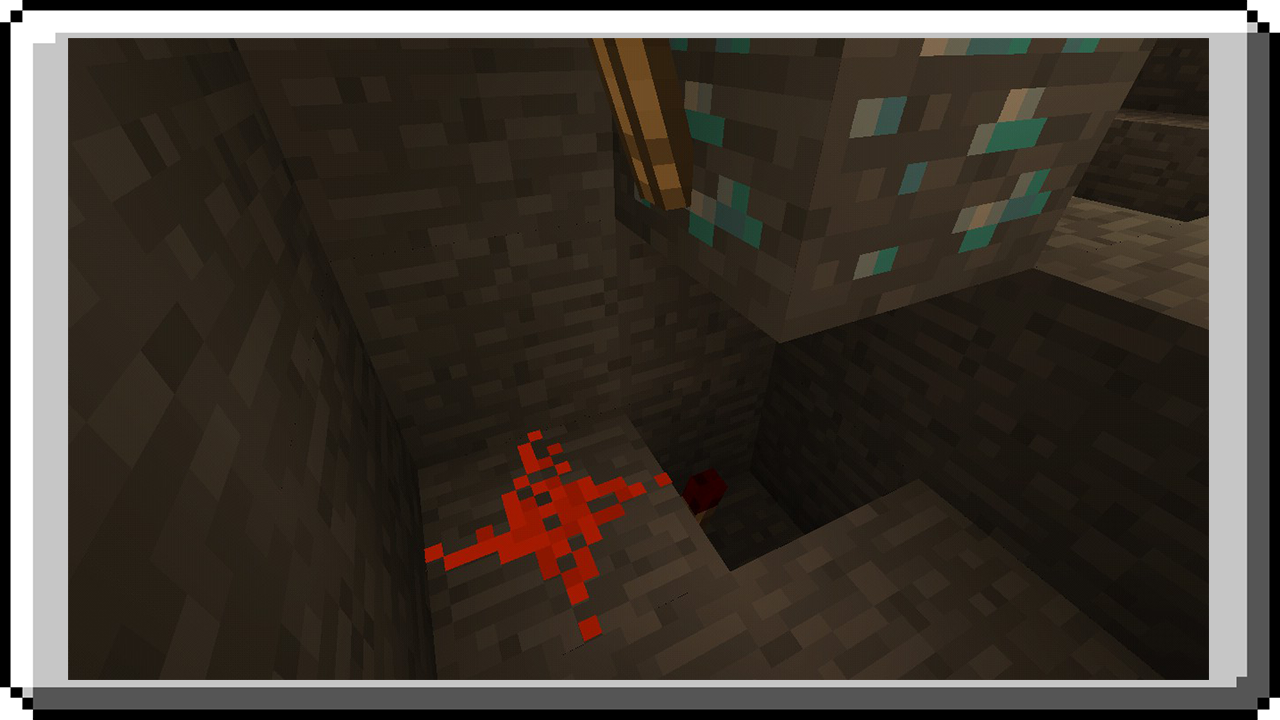
STEP 5: Now place TNT connected at output under the ground where a player will stand when mining ore.
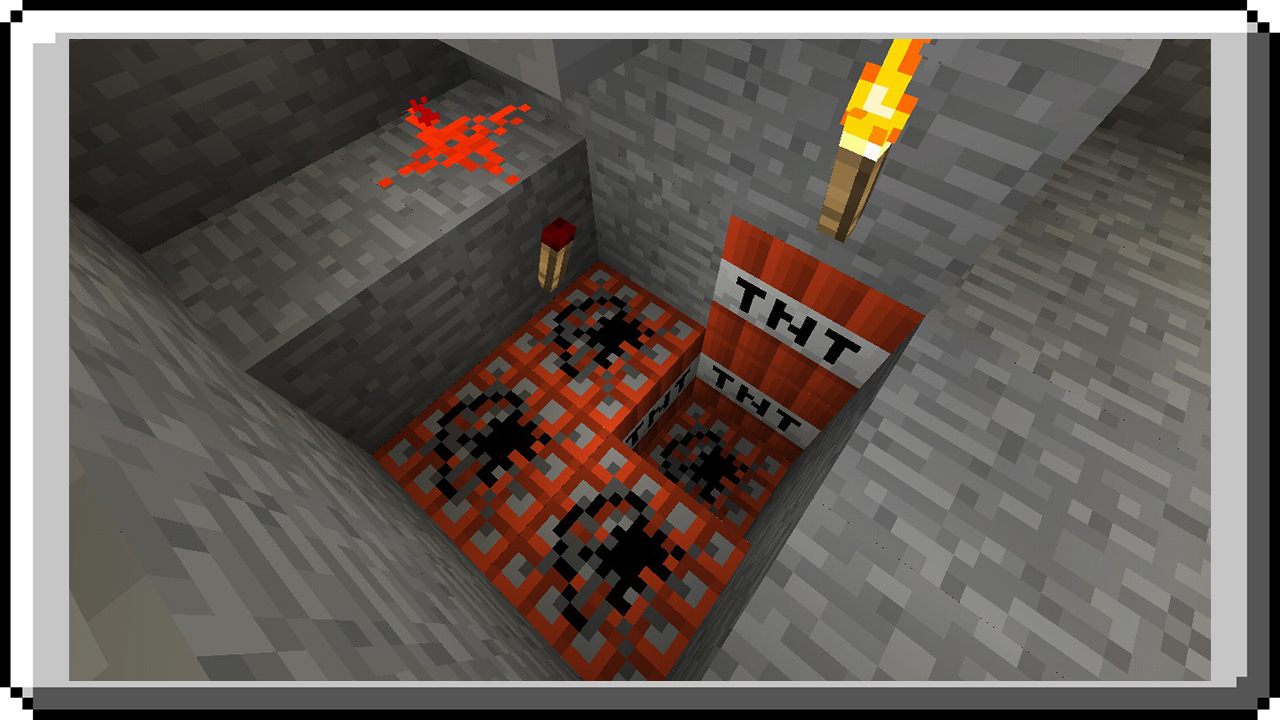
STEP 6: Cover the TNT and redstone component with stones, keep it look like naturally remove torches so player will think that there’s no one was here.
Cake TNT Trap
This trap will blown anyone who will eat a cake.
STEP 1: Dig a hole in ground any length and width and at least 2 block depth.
STEP 2: Fill a hole with TNT, you can place TNT as many as you want.
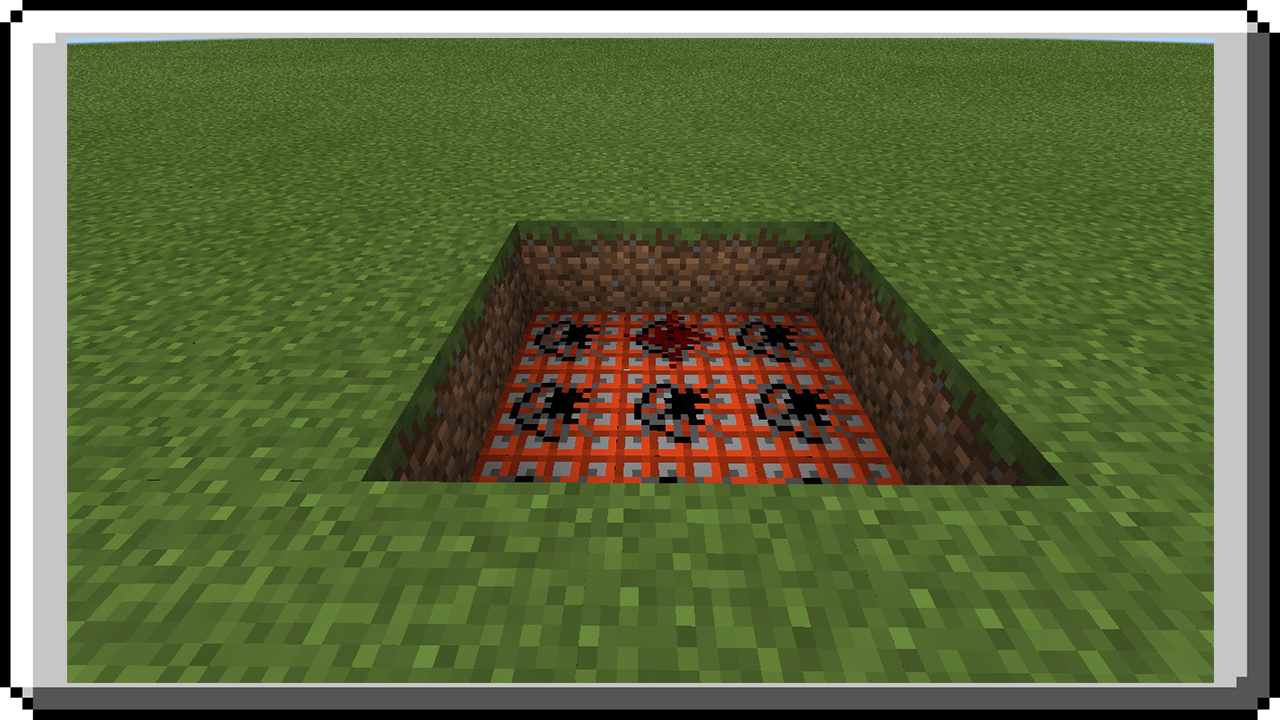
STEP 3: Place a redstone dust in top of tnt then on top it place a block for a cake.
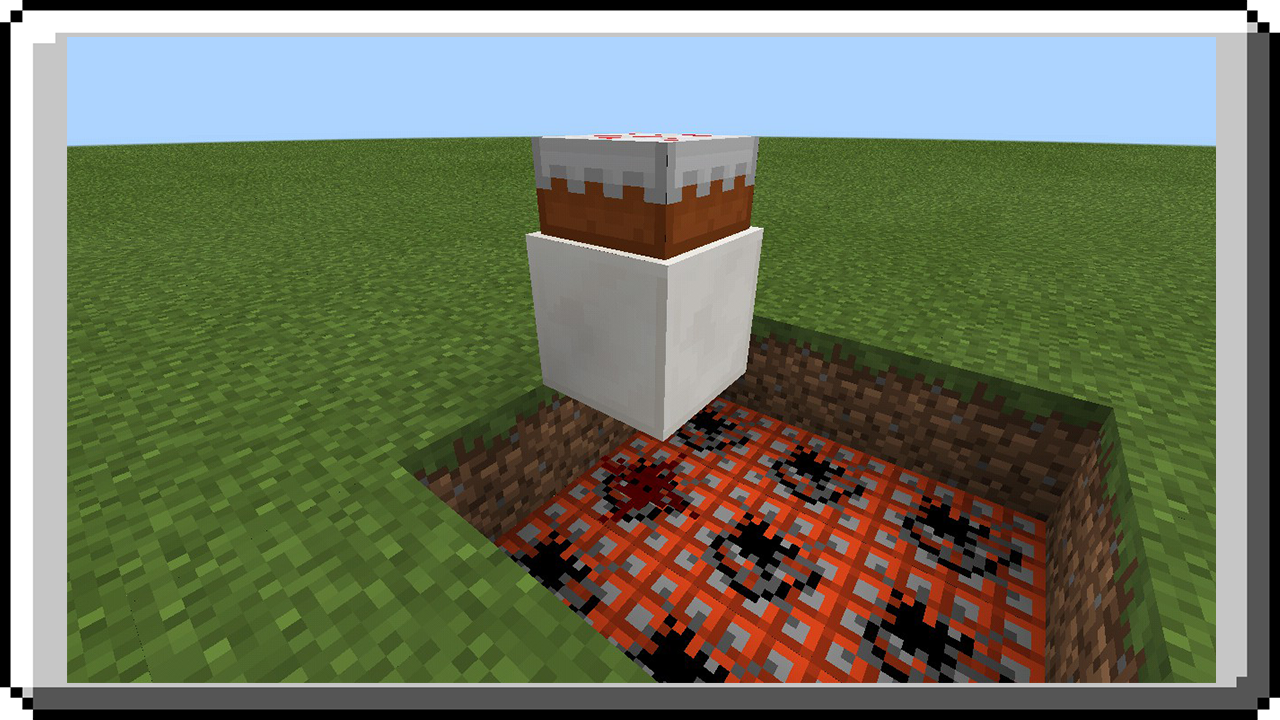
STEP 4: Now build this contraption, make sure the repeater is the last thing you place to prevent observer sending signals to repeater and activate TNT.
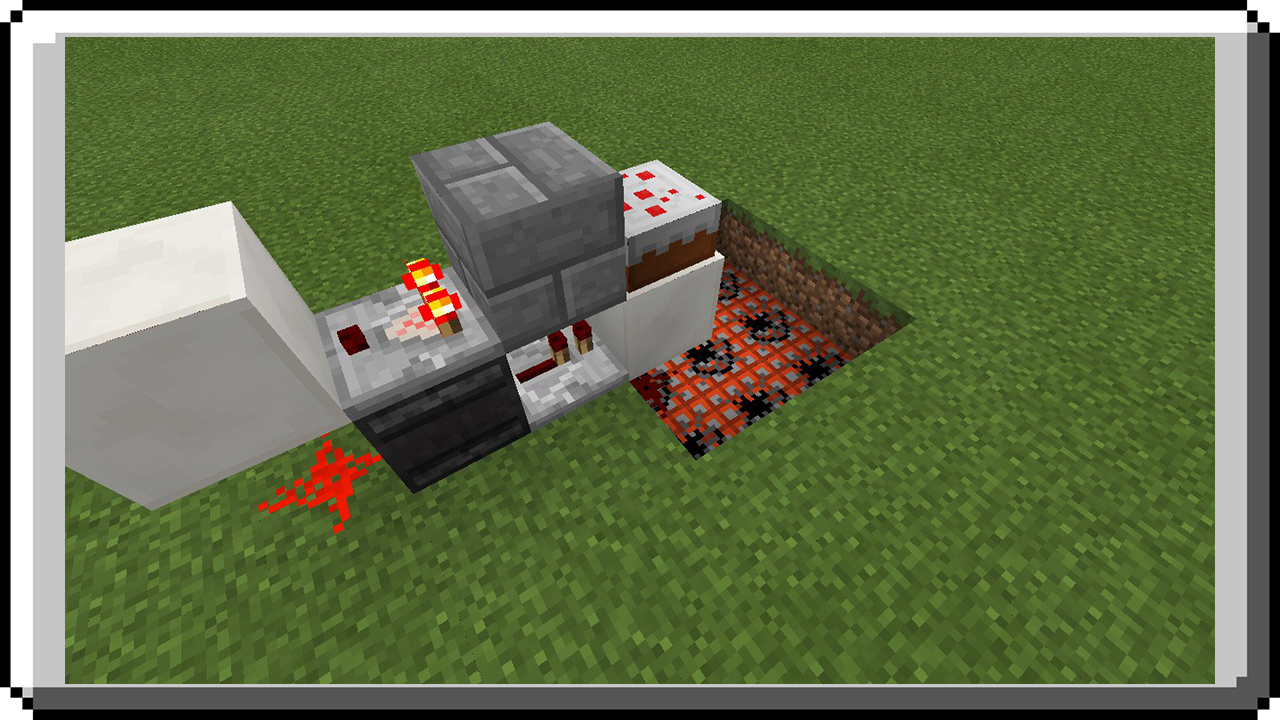
STEP 5: Cover the tnt with a block for floor.
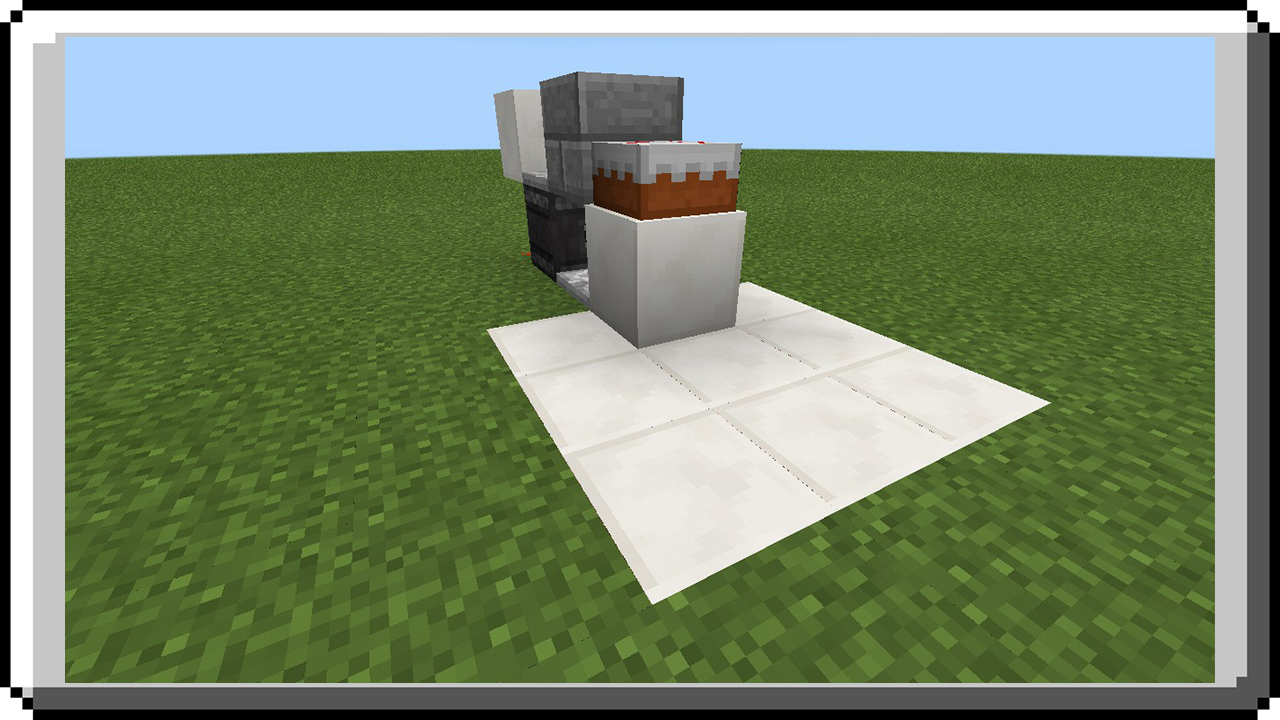
STEP 6: Build a wall to cover redstone components.
Multiuse Traps
Traps are a common mechanism in Survival Multiplayer built by players to kill other players or mobs automatically. The following is a list of basic traps that can be use many times with a short tutorial that often assumes the reader has a working understanding of the basic concepts required to build the trap.
Lava Pitfall Trap Chest
In this trap any player who open a chest will fell down in lava.
STEP 1: Dig down a hole 2 width 3 length and 3 depth.

STEP 2: On both side of hole dig another 2 x 3 hole and 1 block depth.
STEP 3: Place a sticky pistons facing at center in both of sides, then a block. And change a block at the end.
STEP 4: Place a trapped chest at the end of hole and place redstone dust one block depth behind a chest. Then repeater facing away at redstone dust then redstone torch on top of block where repeater is facing.
STEP 5: Pour a hole with lava. Here player will fall when chest is open.
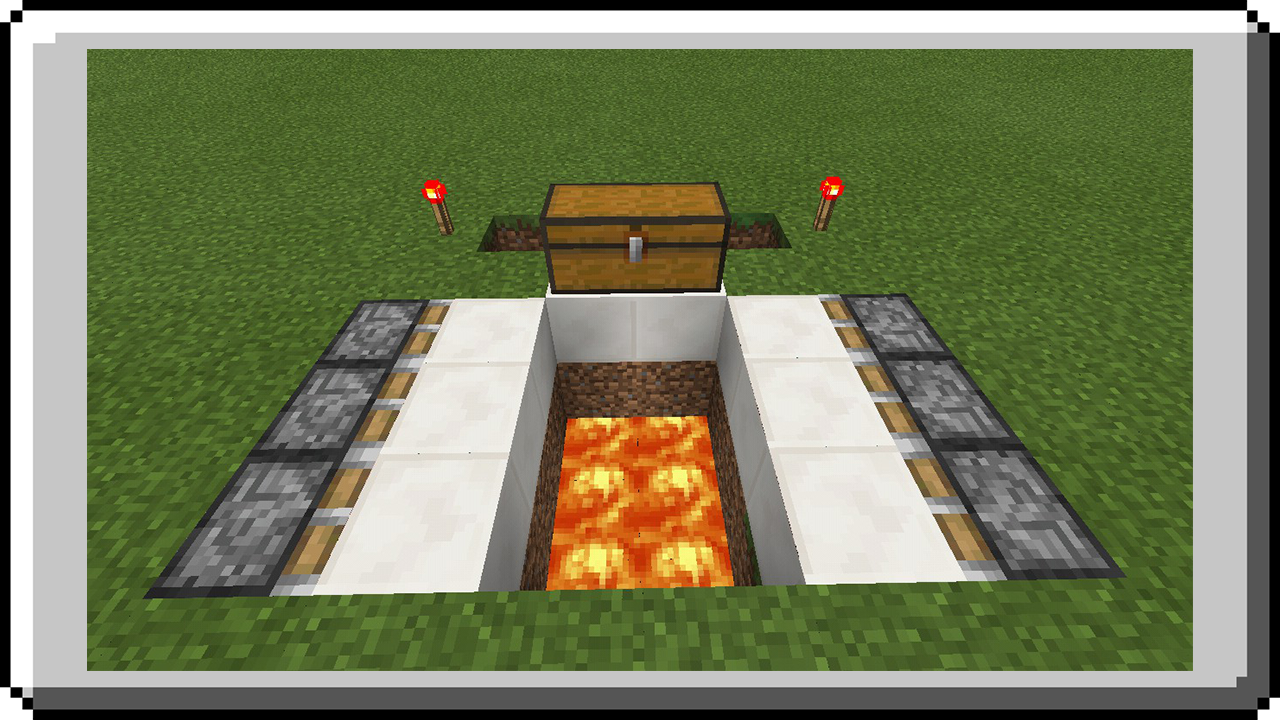
STEP 6: Connect redstone torch to all sticky pistons with redstone dust.
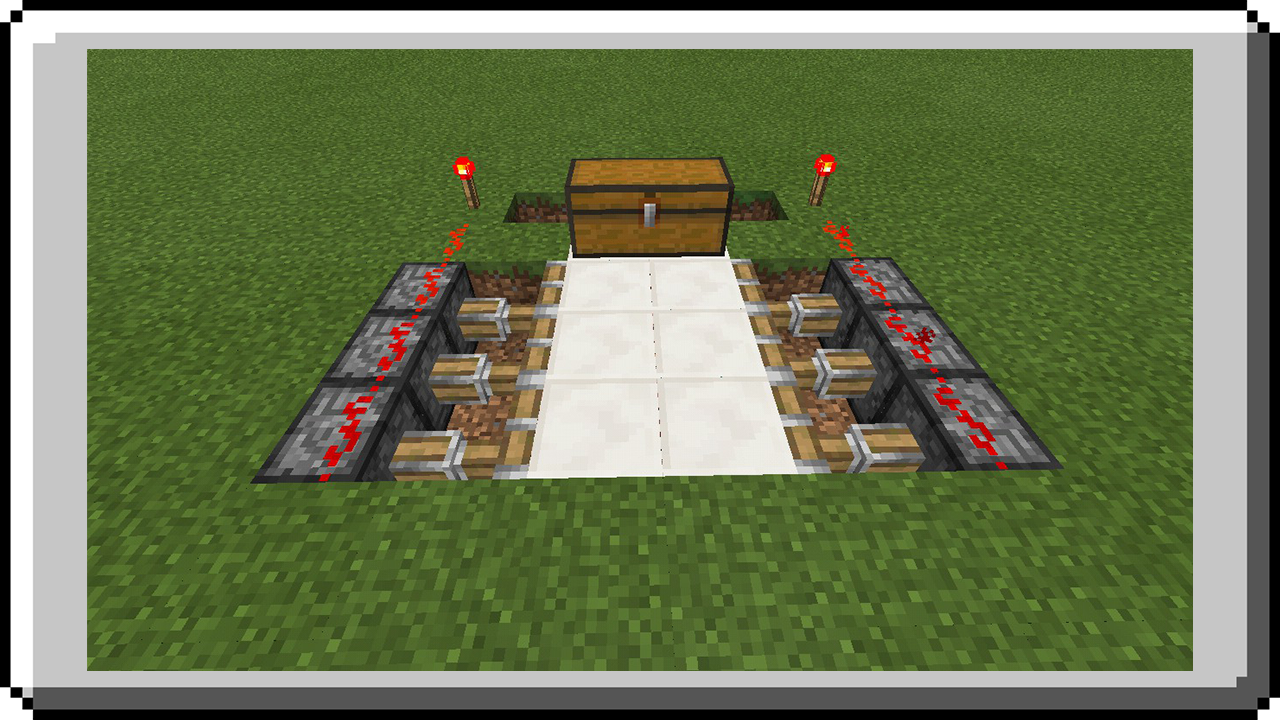
STEP 7: Cover the redstone components. Make sure nothing is visible.
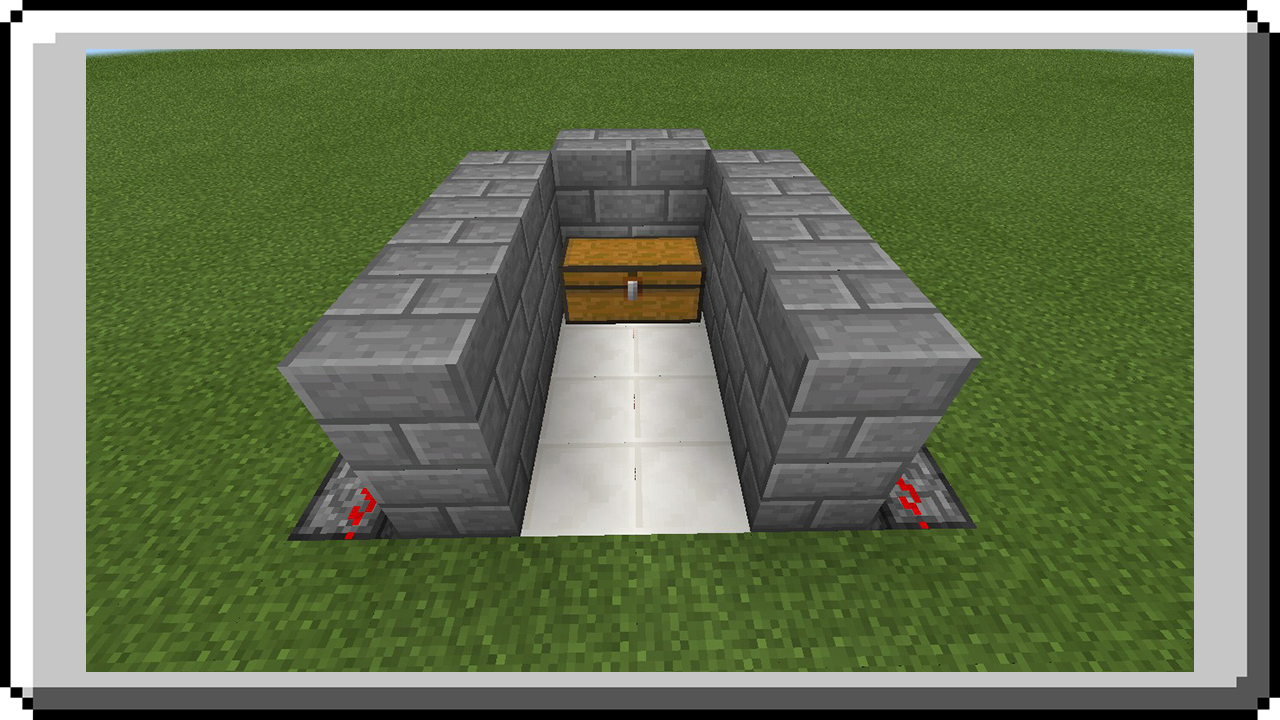
Automatic Mechanisms
Automatic Lights
The lamp post’s light is OFF during the day and turns ON when night.
To build this, place a fence how high you want (cobblestone wall at bottom is optional) then redstone lamp at the top, at top of redstone lamp place a daylight sensor and switch to night mode, and then place a trapdoor in all side of redstone lamp and close them.
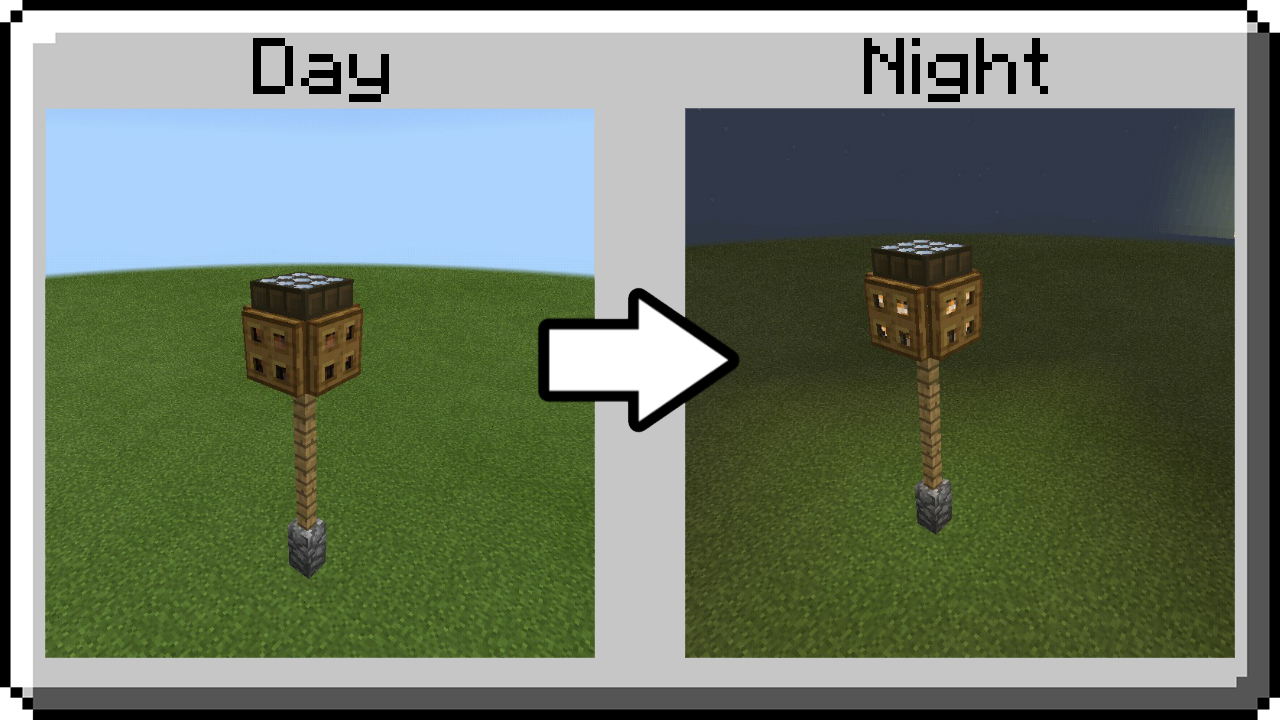
Auto-Cooker
Auto-Cooker is a mechanisms that will automatically cook or smelt item and stored on chest after it was cooked/smelted. If stack of item is done it will automatically take another stack items on chest and bring it on furnace to cook/smelt. If furnace runs out of fuel it will automatically take another from chest.
Auto-Cooker is a mechanisms that will automatically cook or smelt item and stored on chest after it was cooked/smelted. If stack of item is done it will automatically take another stack items on chest and bring it on furnace to cook/smelt. If furnace runs out of fuel it will automatically take another from chest.
STEP 1: Place a large chest and place a hopper behind it, connected to chest.
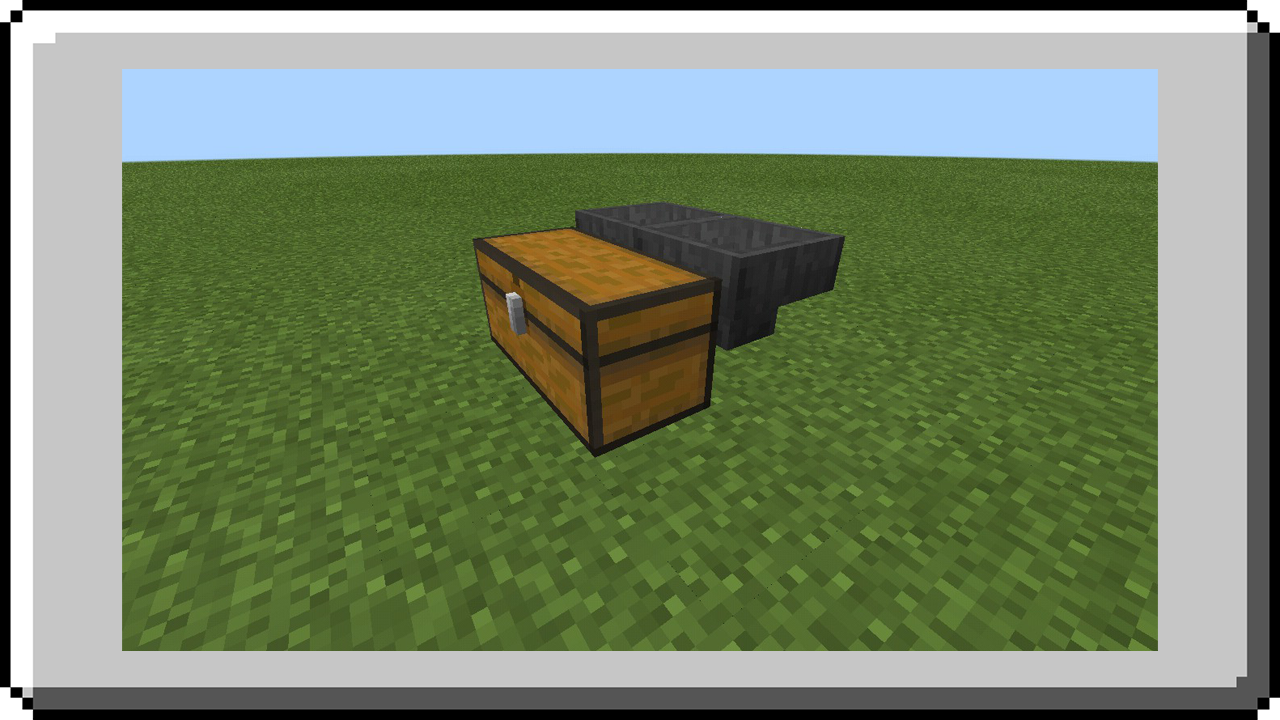
STEP 2: On top of hoppers place a furnace and then on side of furnace place a hopper in it’s side and on top in both of furnace.
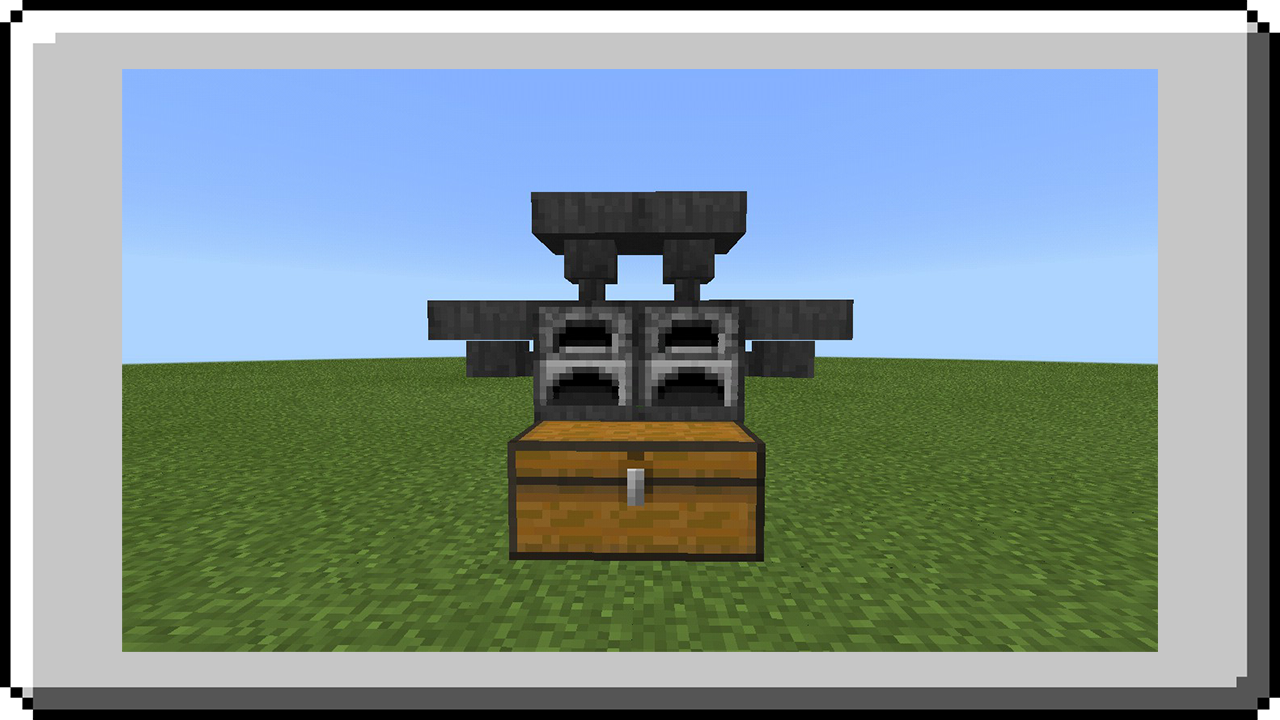
STEP 3: On the top of all hoppers place a chests.
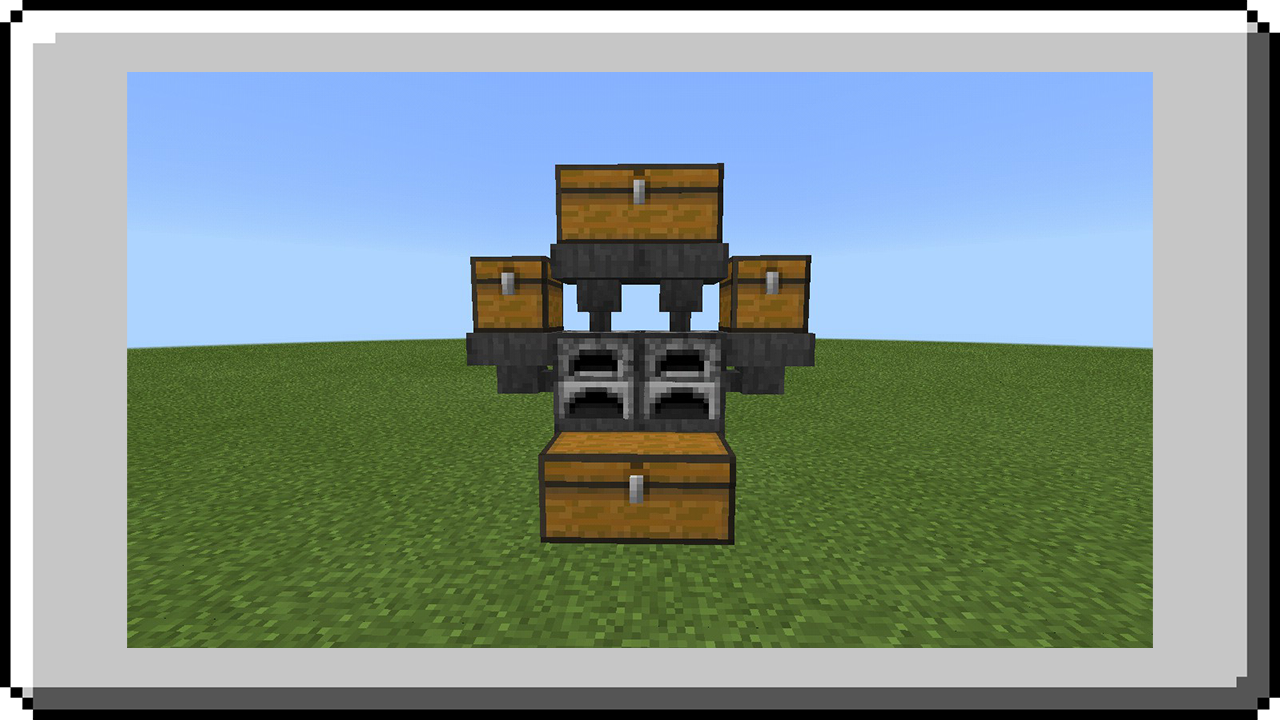
STEP 4: Cover it and make only furnaces and chests are visible. You can design if you want.
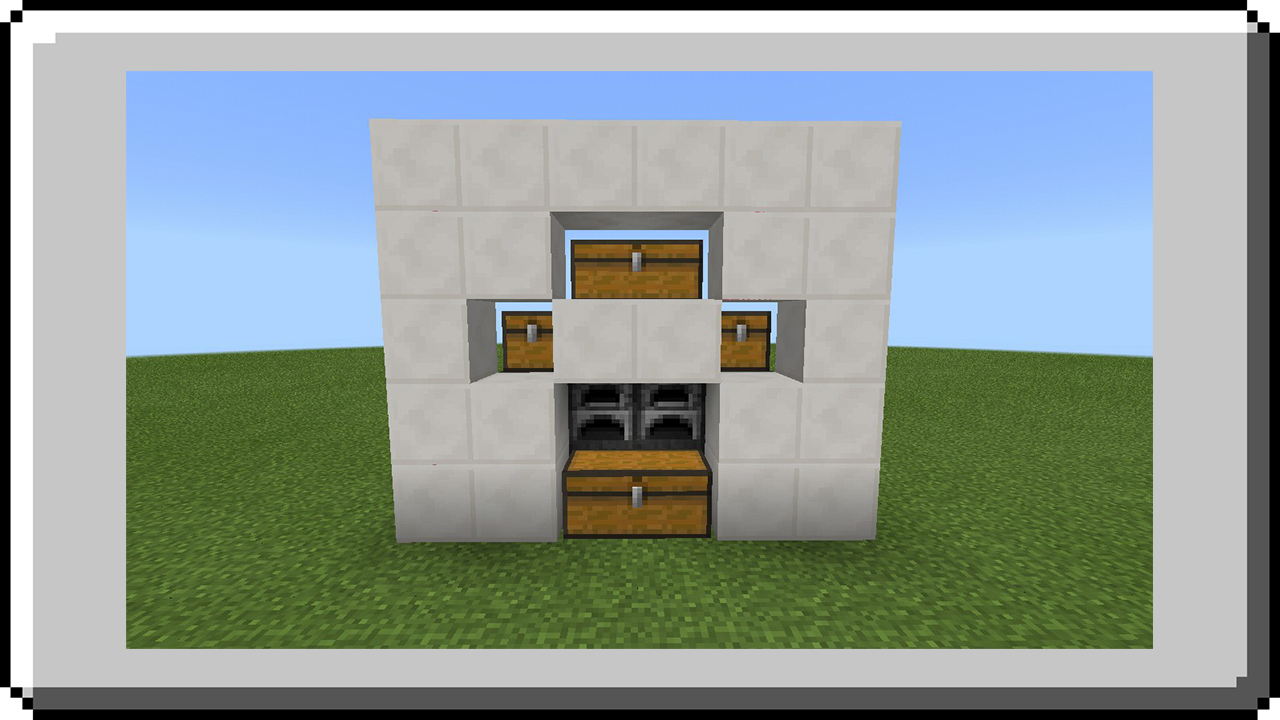
Now your auto-cooker mechanism is done. Below, here how it use.
TOP CHEST: Here are all items you want to cooked or smelt.
SIDE CHEST: Put here your fuels for furnace.
BOTTOM CHEST: If items was cooked/smelted it will automatically store here.
Variation: You can replace furnace with smoker or blast furnace depend on what you need for fast cooking or smelting.
Automatic Farms
Automatic farm can automatically harvest crops and collect, crops’s fruit (melon and pumpkin), can automatically cut sugarcane that make your work easier and faster.
Sugar Cane Farm
This farm will automatically cut a sugar cane when it reach a 3 block high.
This farm is very easy to build, just build what shown in the image below.
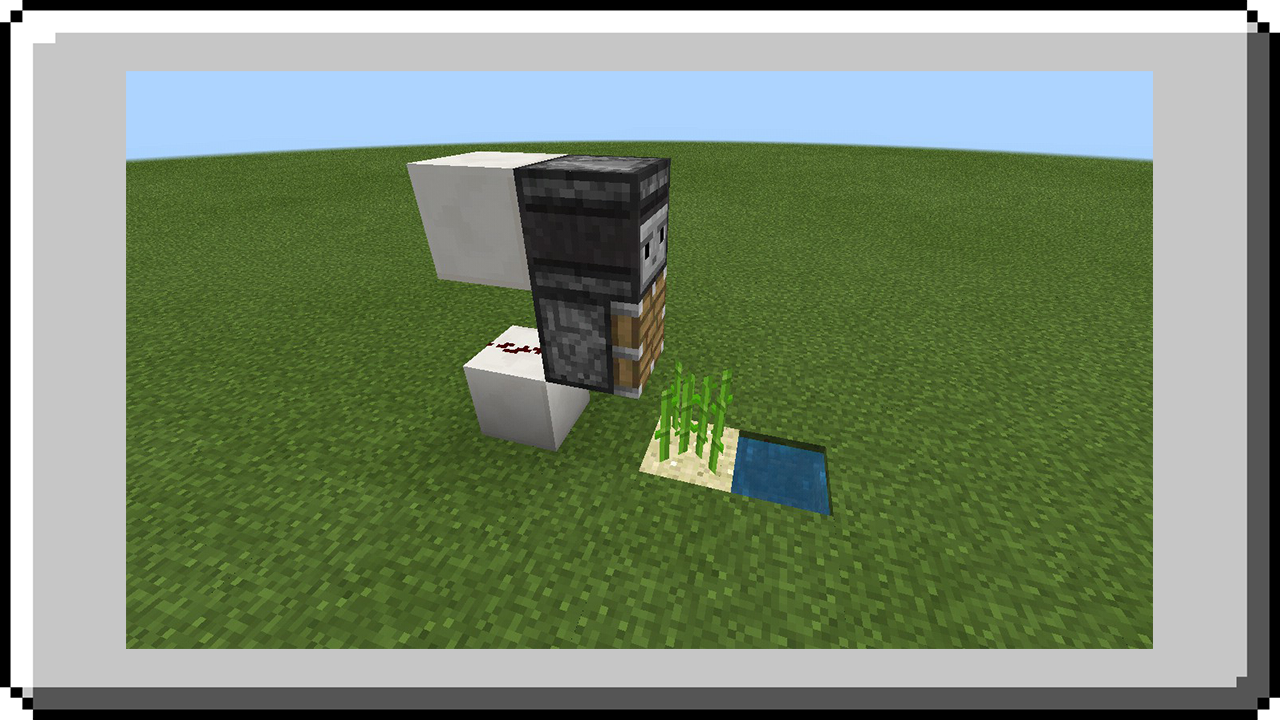
This is stackable you can build another directly next to other copies of itself to expand it.
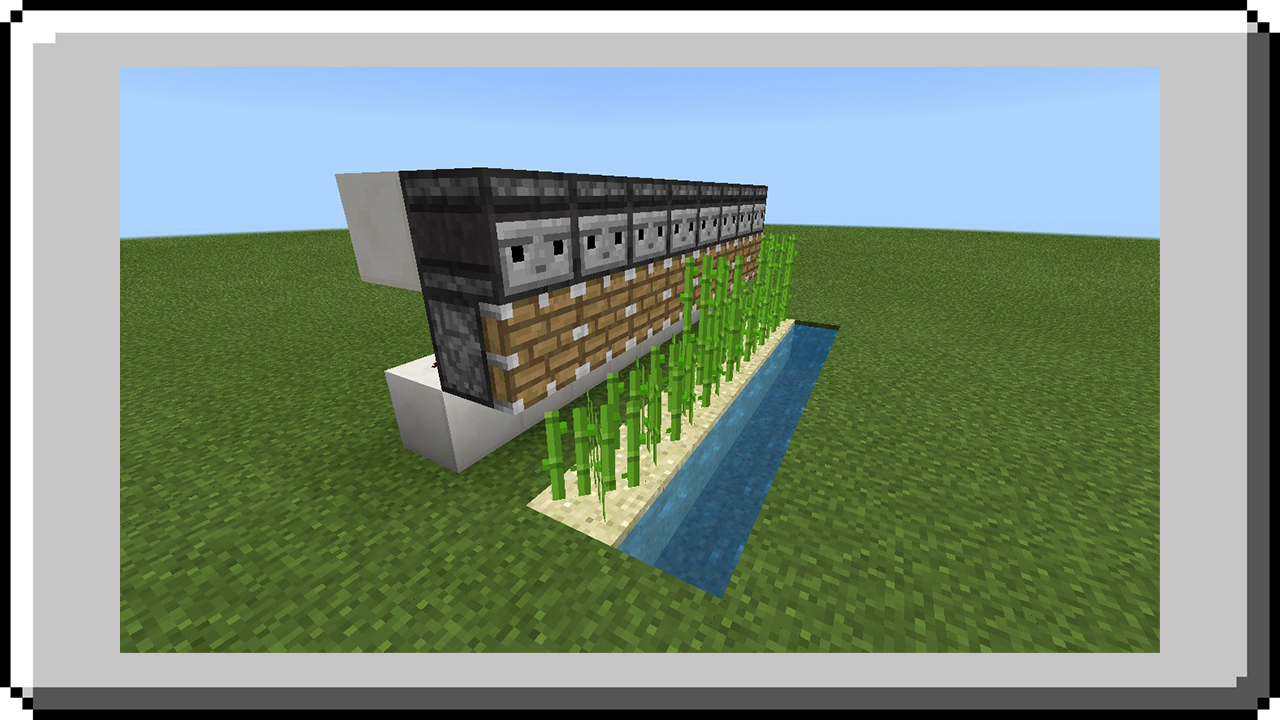
Wheat/Carrot/Potato/Betroot Farm
This is a semi-automatic farm. If crops is ready to harvest click button and it will automatically harvest and collect.
STEP 1: Build two 8 x 4 dirt with 1 block gap at center.

STEP 2: On either side dig a 1 block depth and place redstone dust along in hole with 1 repeater to extend the current of a redstone dust.
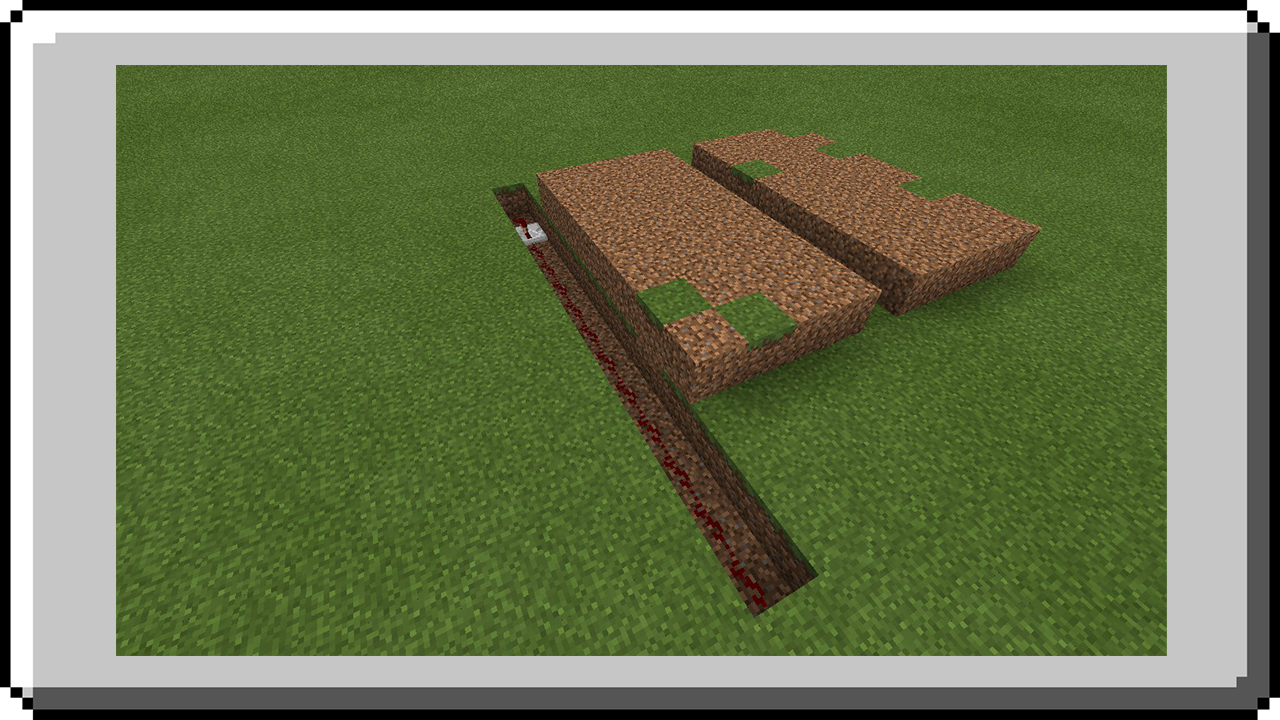
STEP 3: Cover it with blocks. And build a wall for your farm.
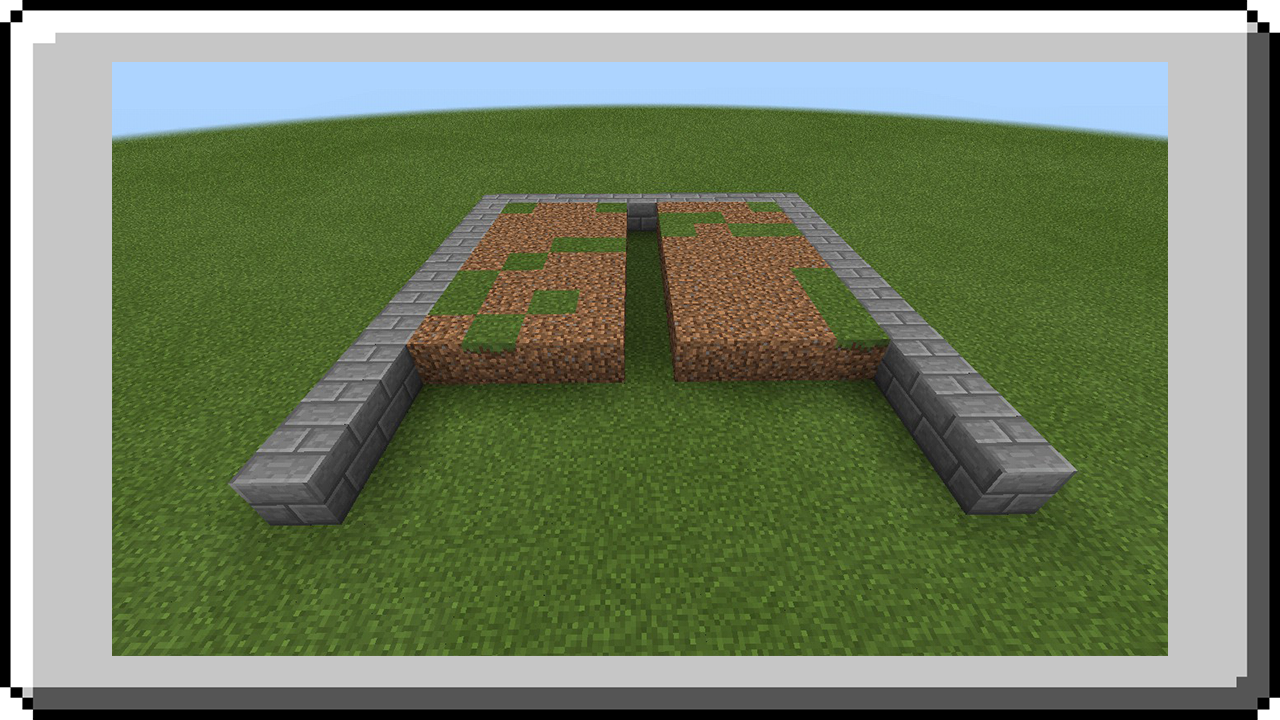
STEP 4: At the end place a dispenser and put one water bucket inside of each dispenser.
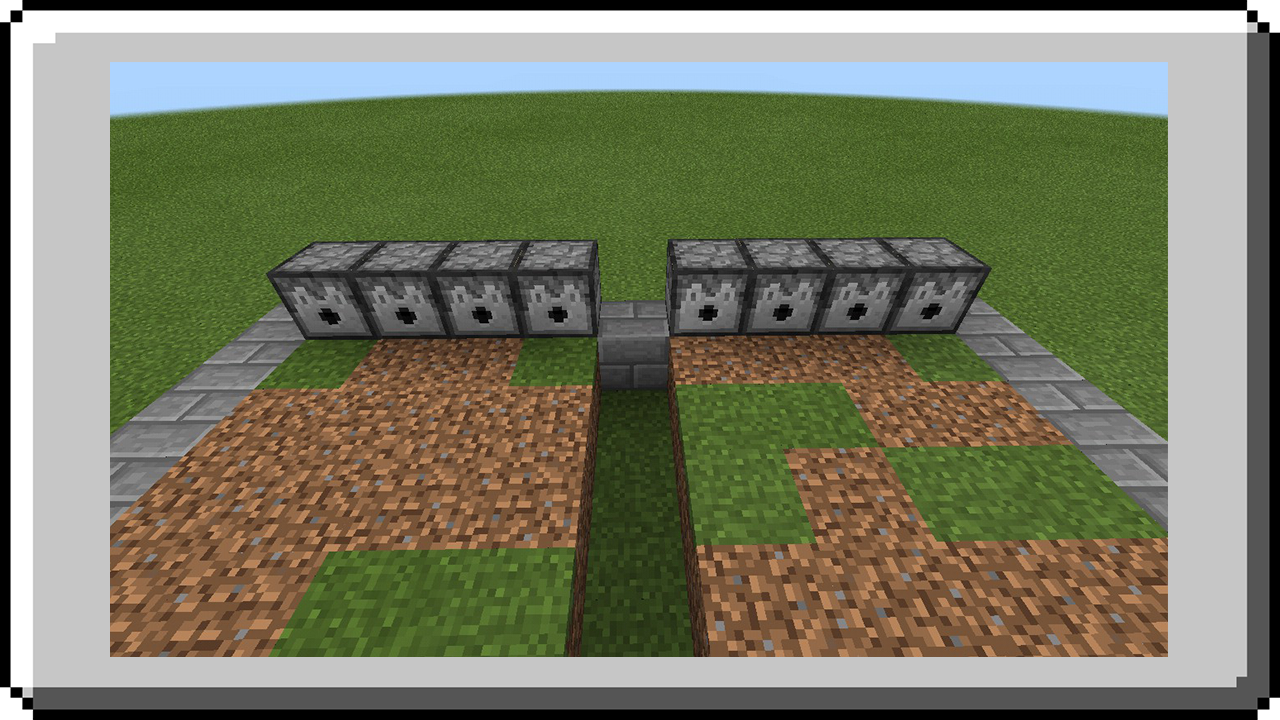
STEP 5: Continue building wall and design your farm.
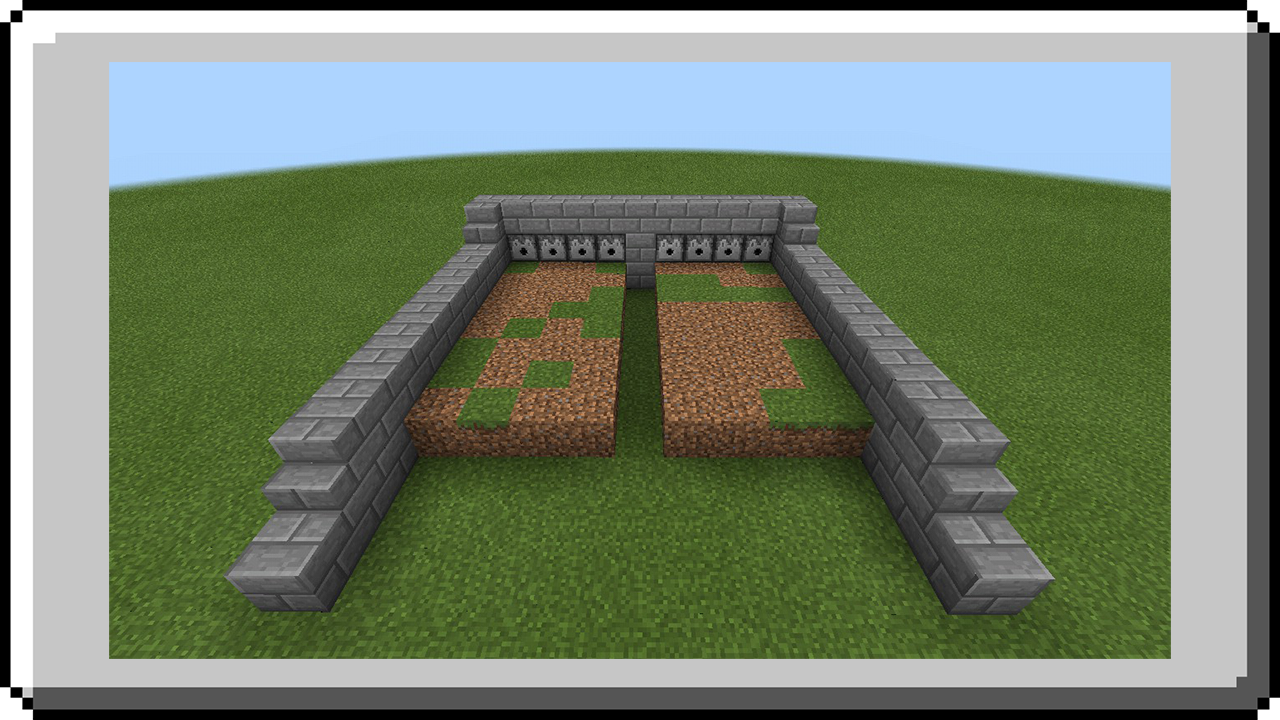
STEP 6: At the back place a repeater facing at dispenser then redstone dust.
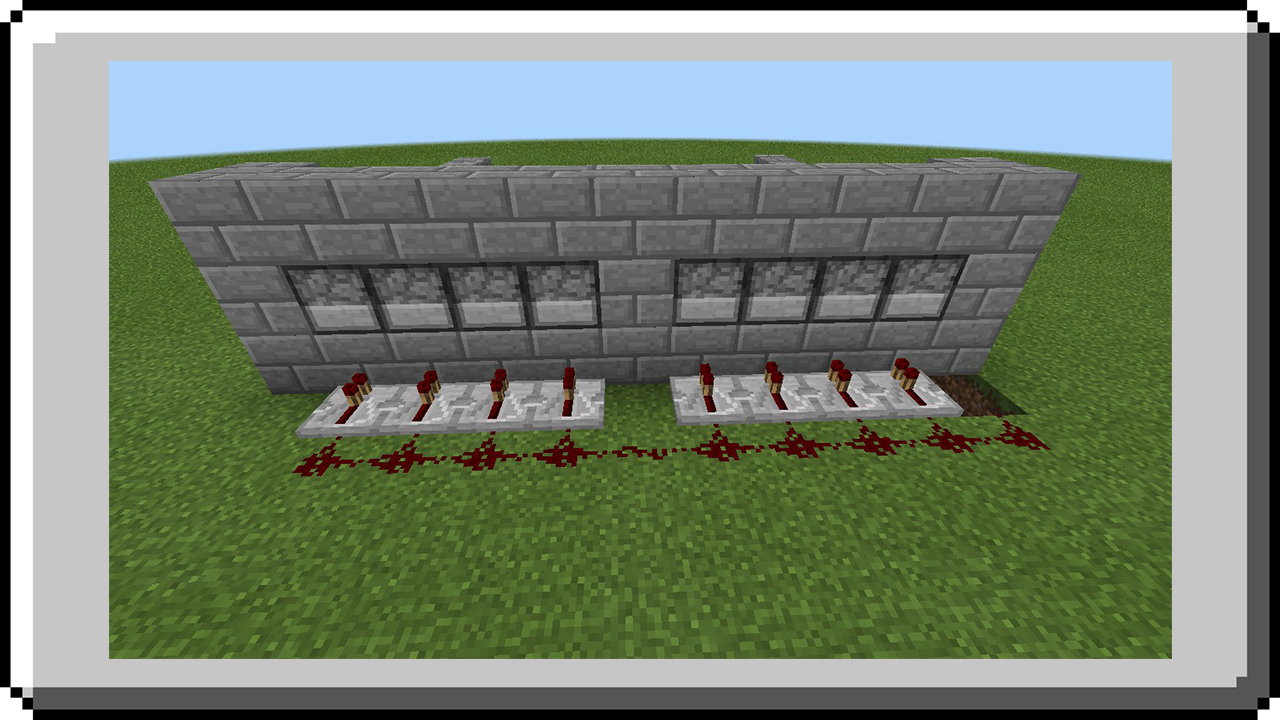
Make sure it’s connected from your output.
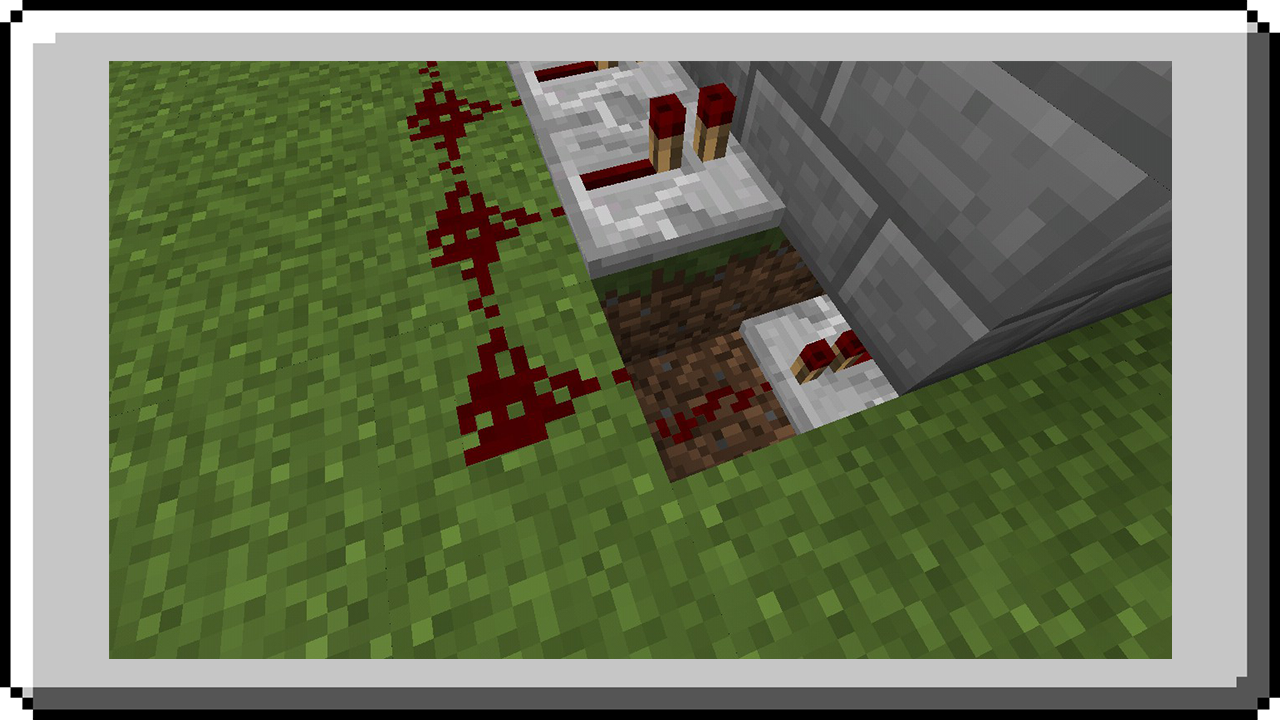
STEP 7: Place a chest at center 1 block away.
STEP 8: Place a hopper behind the chest connected to it.
STEP 9: Place a hopper in all front of dirt and connected all at center hopper, do it in both side.
STEP 10: Pour hole a water in the center.
STEP 11: Till the dirt with hoe to make a farm plot.
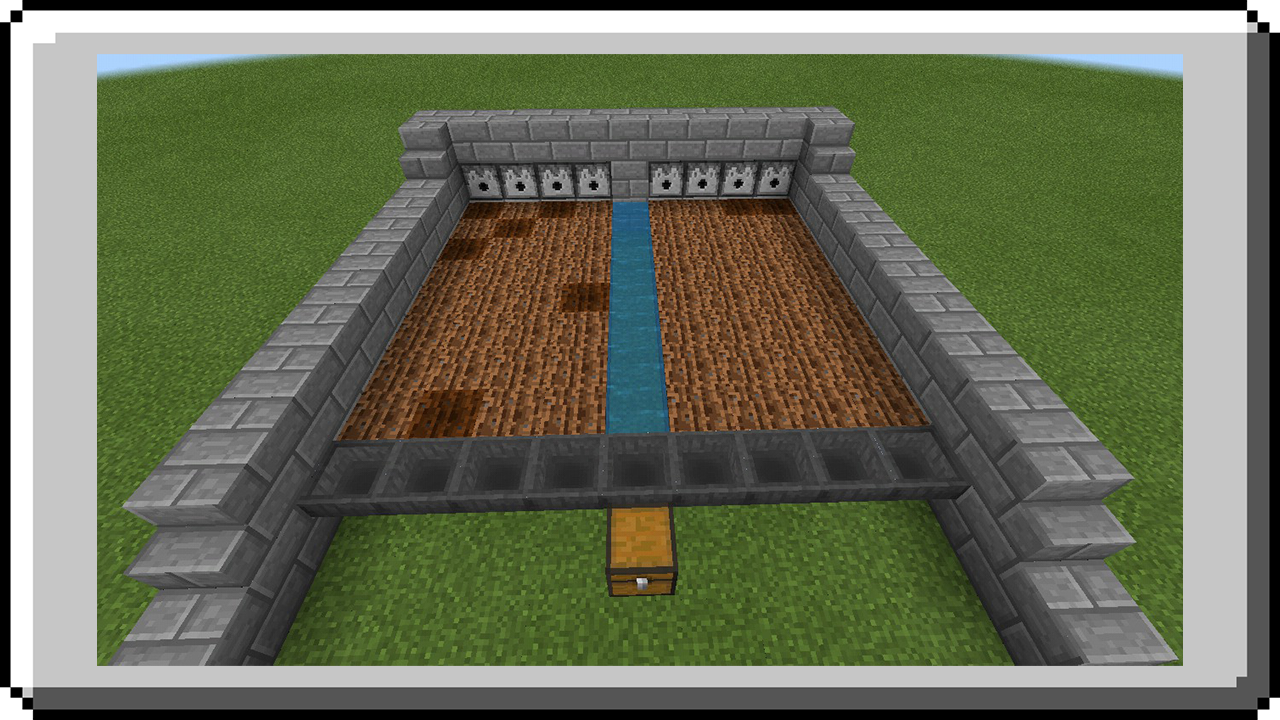
STEP 12: Place a button in your input.
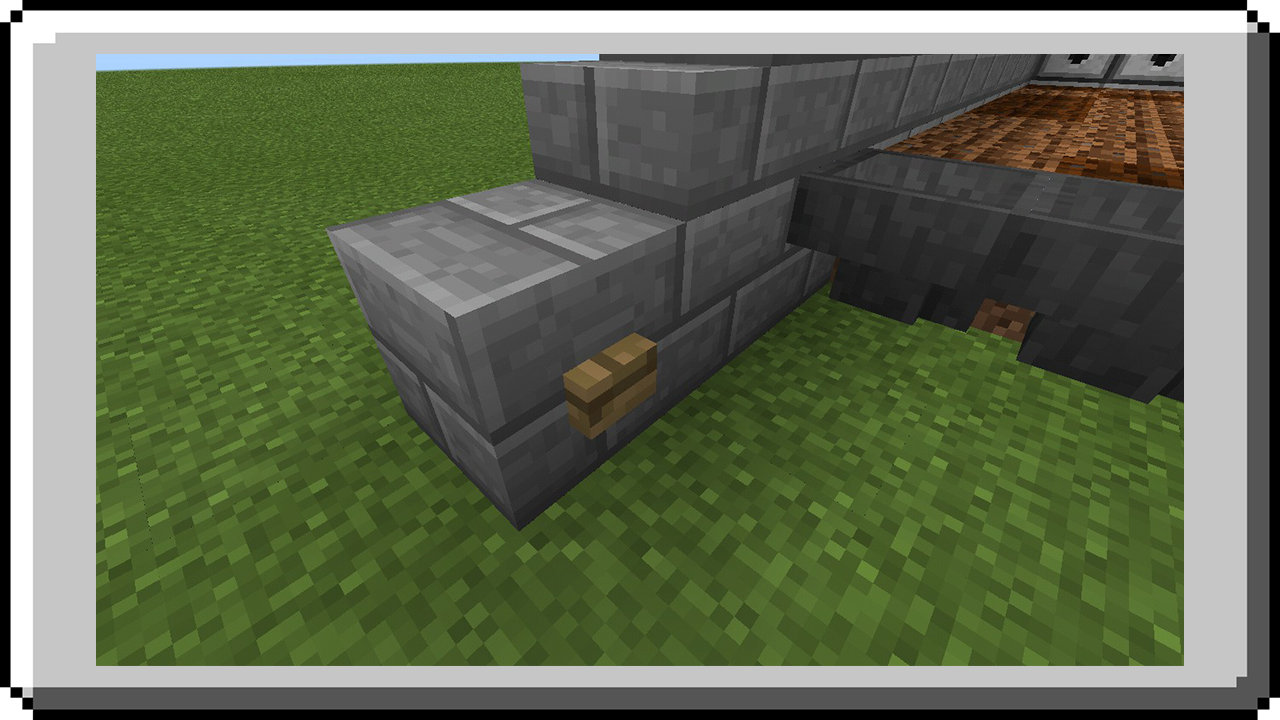
STEP 13: Cover the water at center with slabs or any solid blocks to prevent crops stucked in this water.
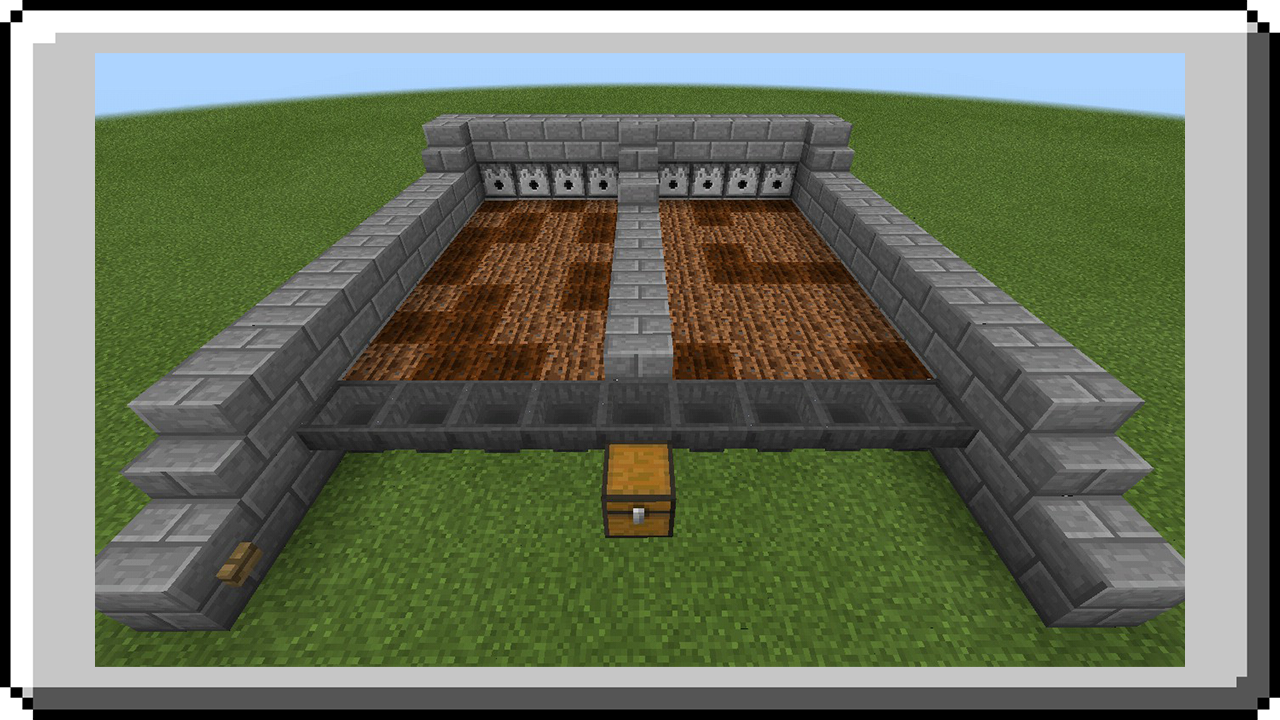
STEP 14: Build awall in front to prevent crops from falling.
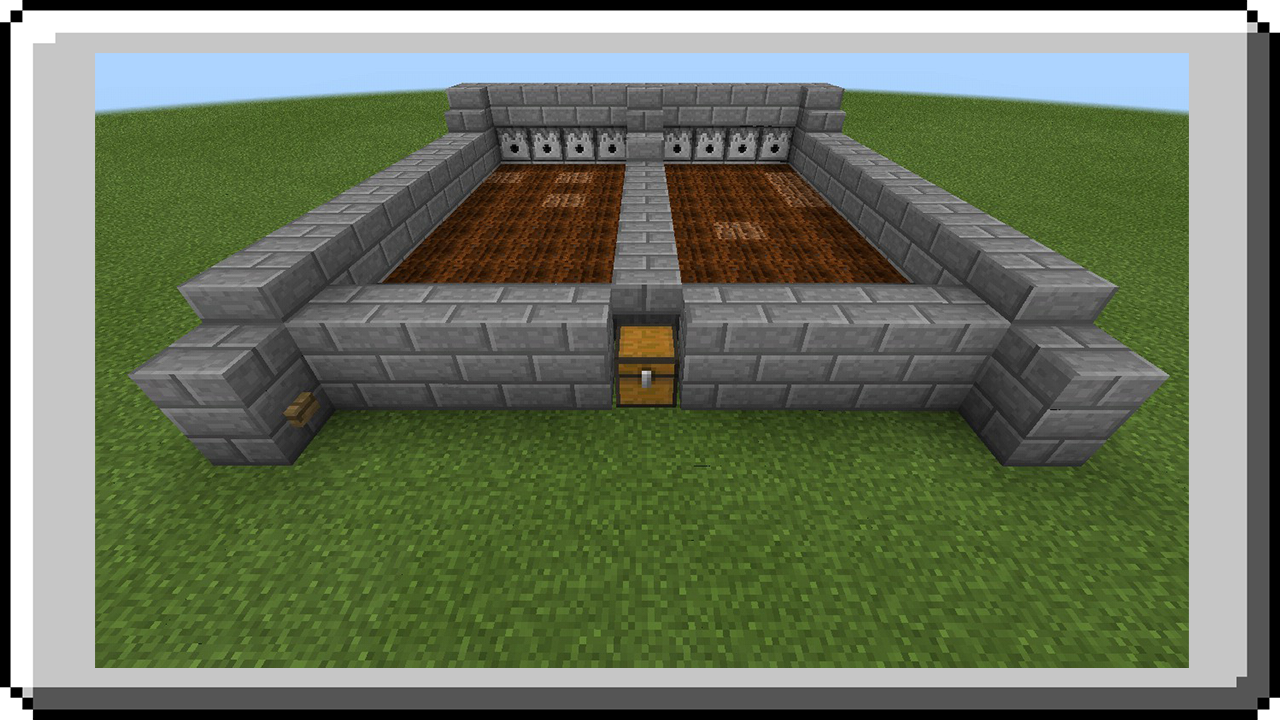
You can now plant a crops you can plant wheat, carrot, potato or betroot.
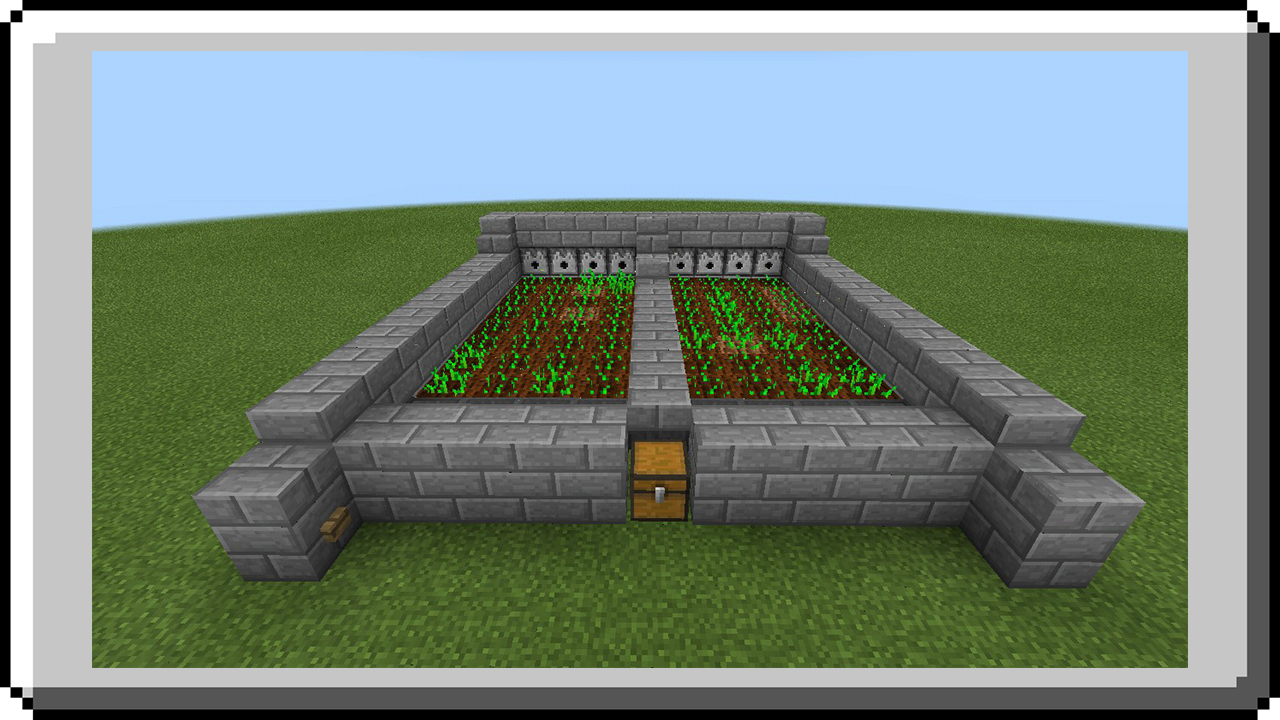
If crops is ready to harvest click button, then crops will automatically harvest and collect, all will stored at chest.
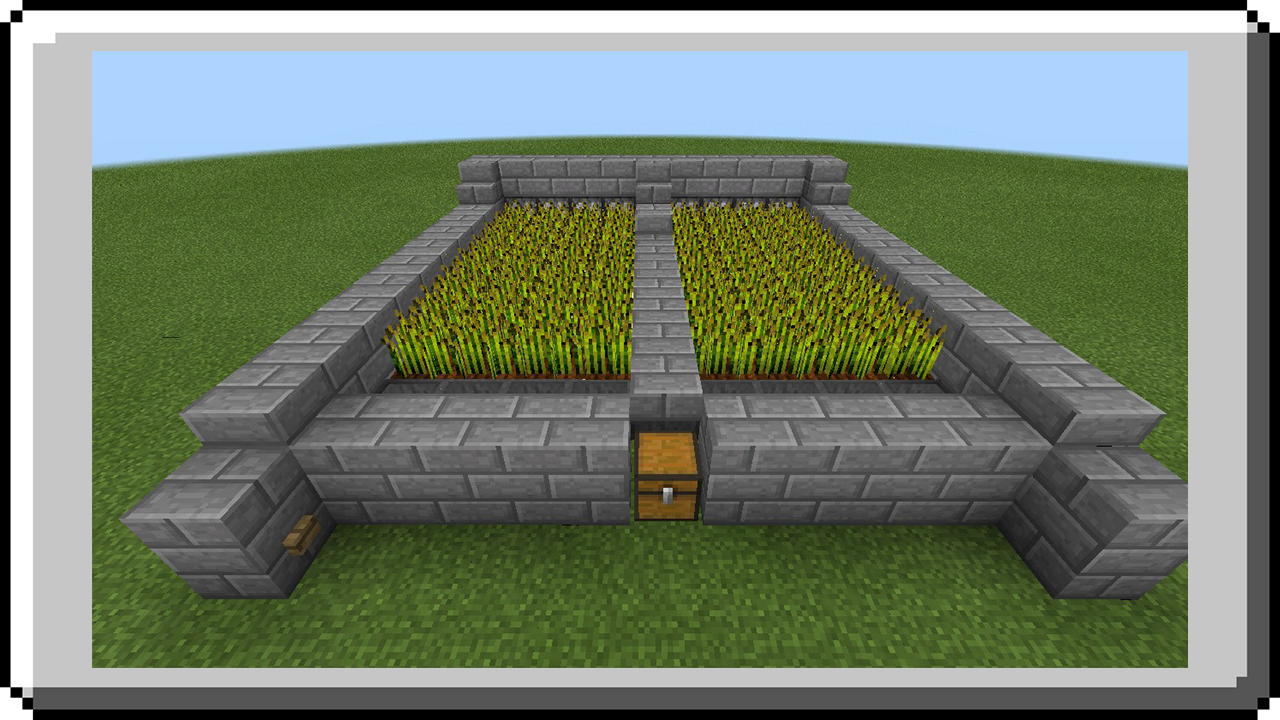
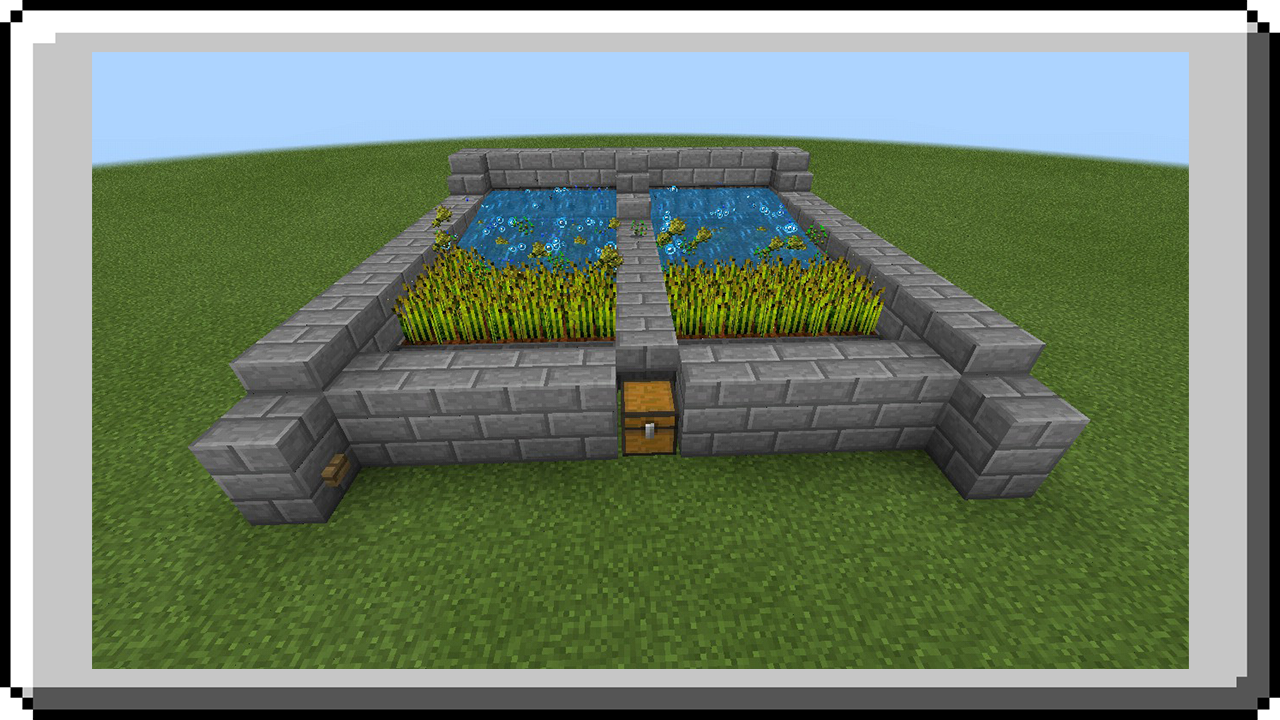
Click the button again to make dispenser get water and you can plant crops again.
Pumpkin/Melon Farm
This farm will automatically harvest melon instead of manually breaking them all one by one. By clicking button you can harvest them automatically and ready to collect.
STEP 1: Make a water cannal (any length) and till its two side with hoe.
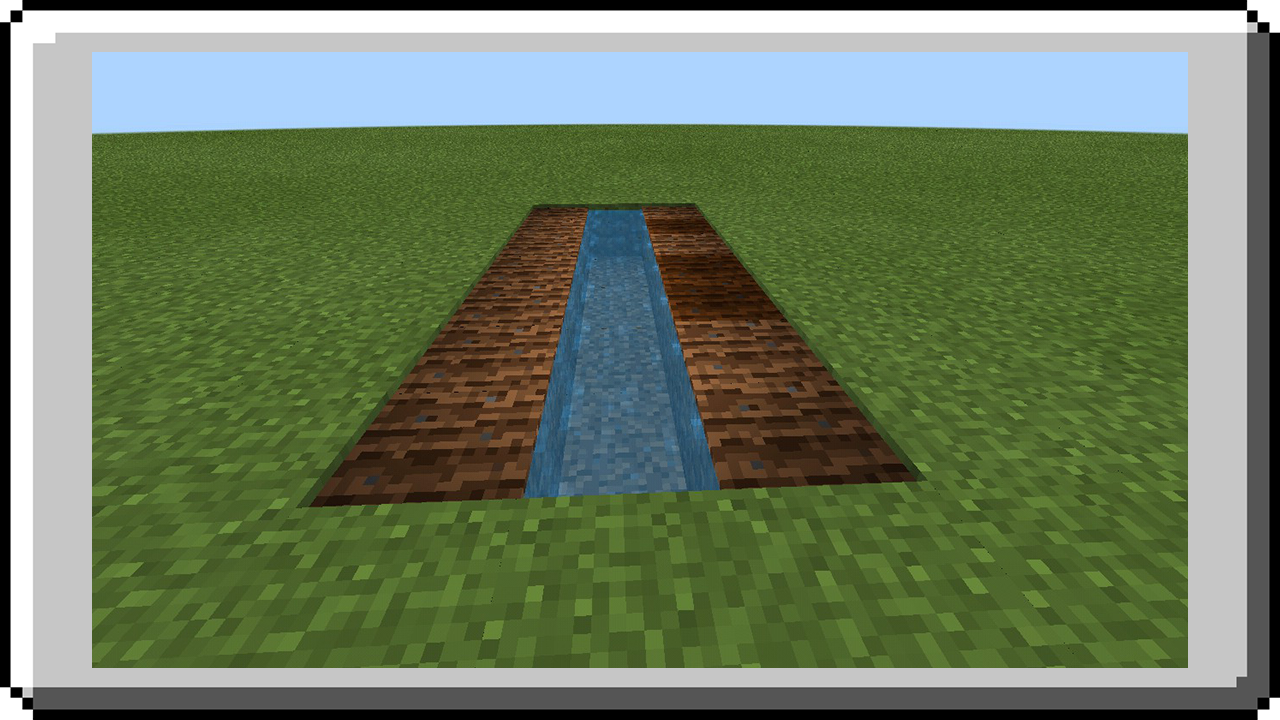
STEP 2: Dig the next two side with 2 block depth.
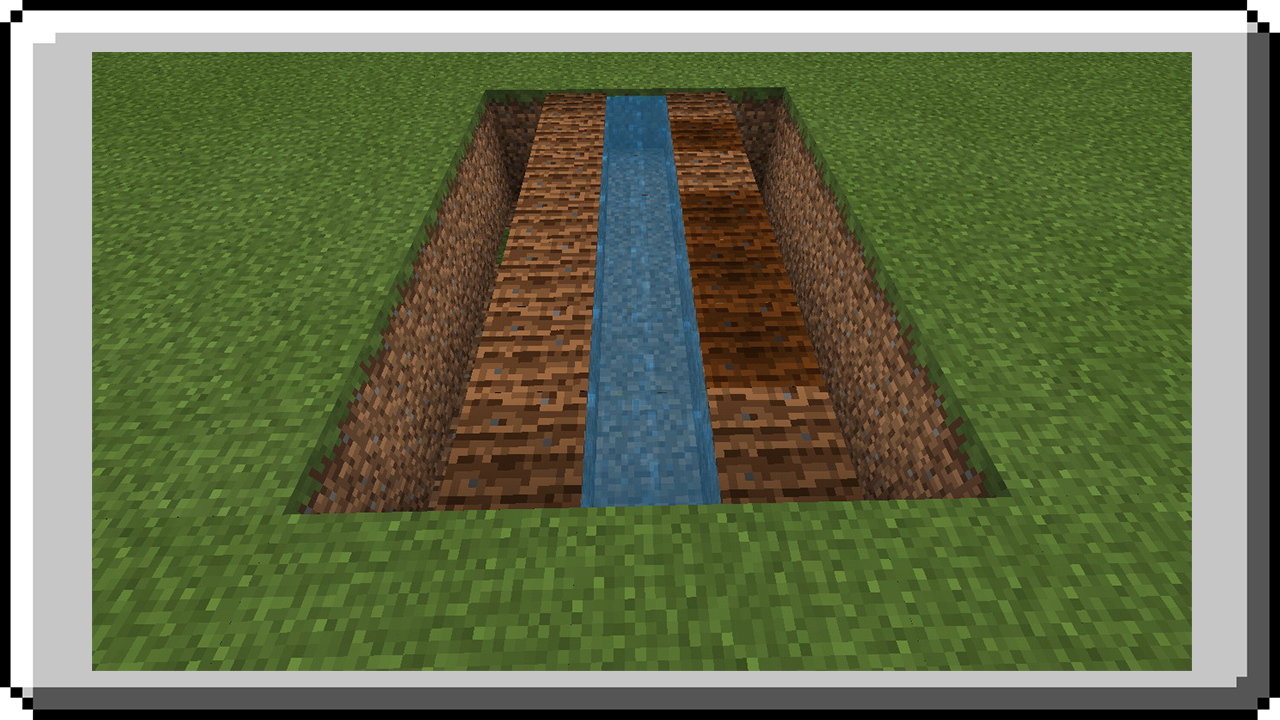
STEP 3: Place a sticky pistons facing upward in the hole.
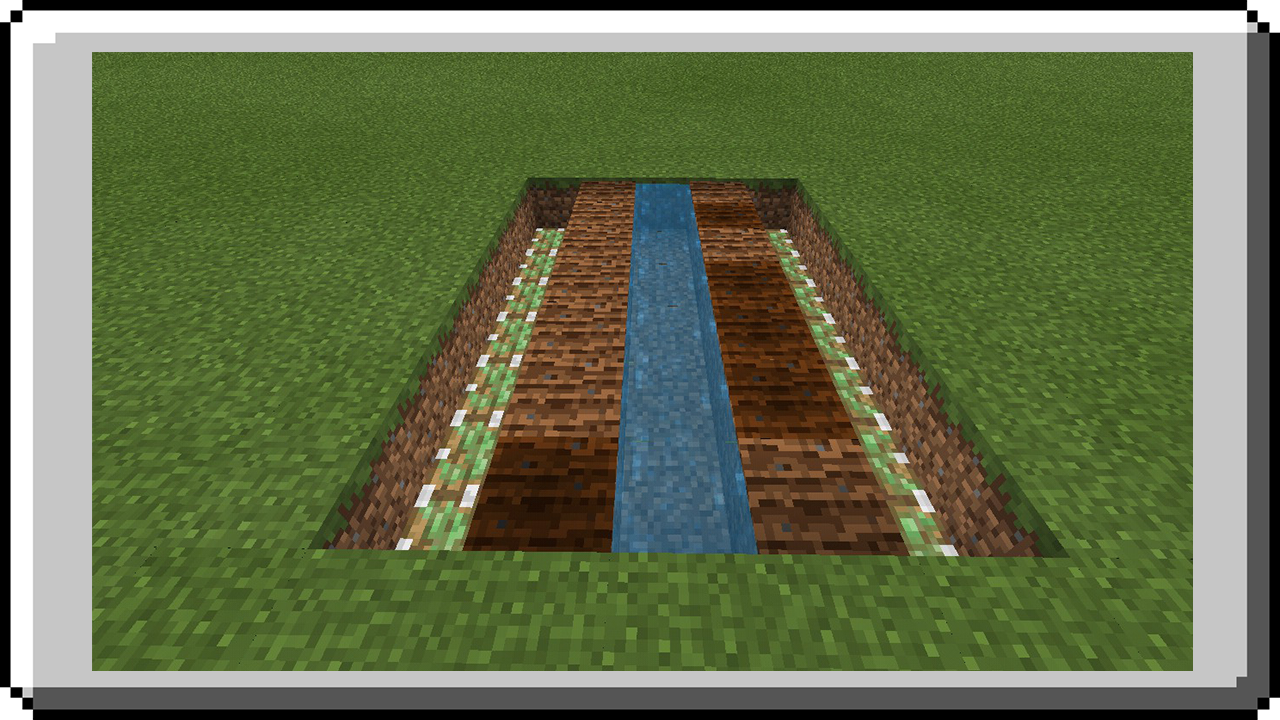
STEP 4: Cover the pistons with dirt.
STEP 5: Dig the next side with 1 block depth, extend 1 block in front and then place a redstone dust.
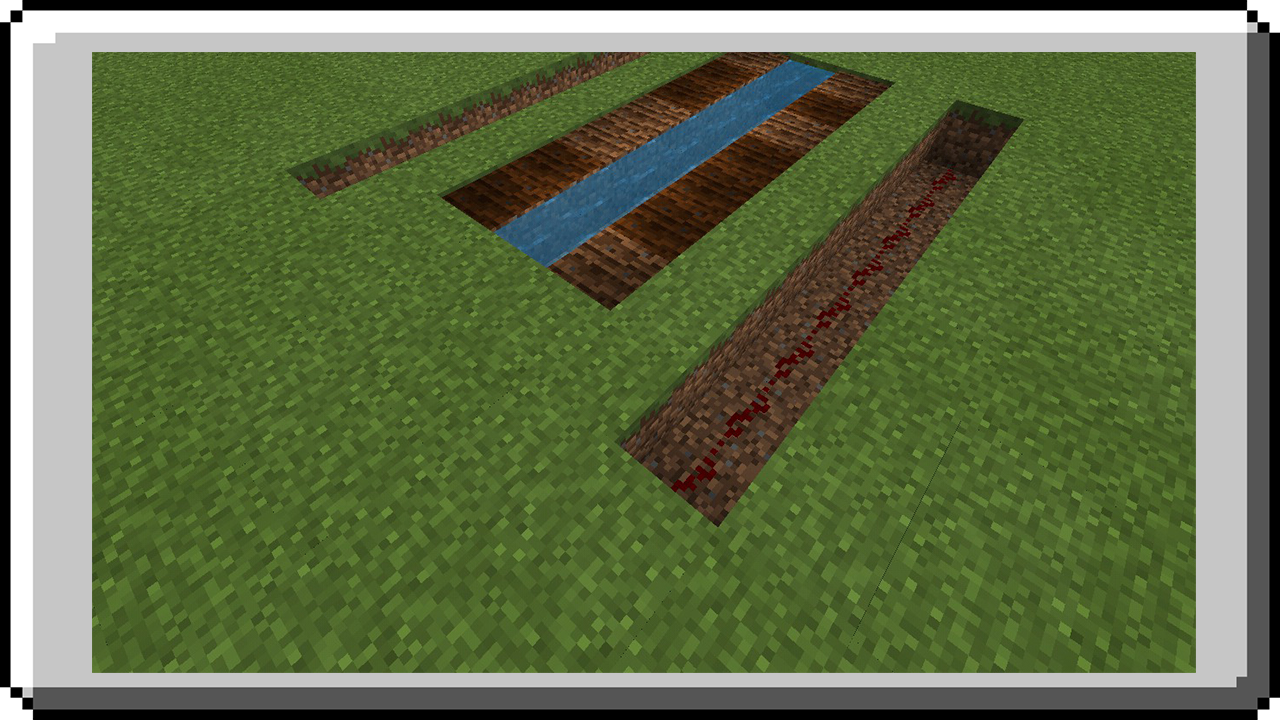
STEP 6: Cover the redstone dust with block and build a wall. And place two button in both side of wall.
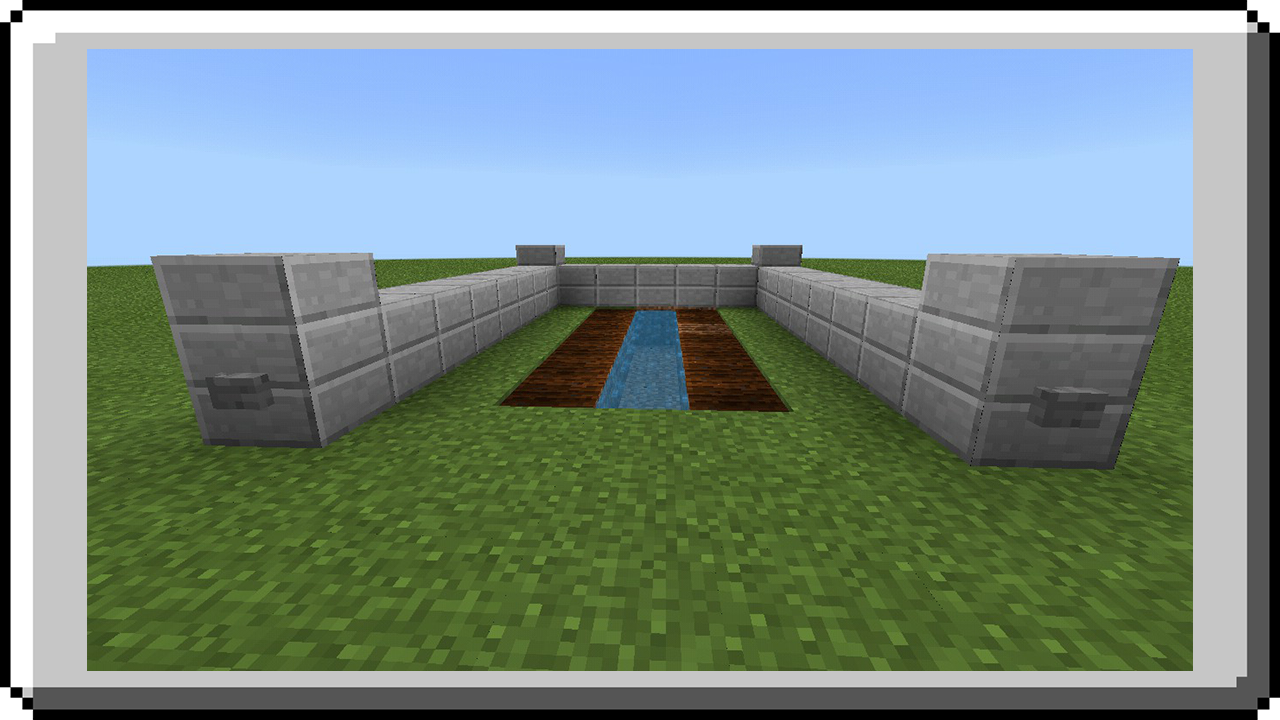
STEP 7: Place a wall, slabs or any other blocks in front of farm plot to prevent melon/pumpkin to bear fruit there.
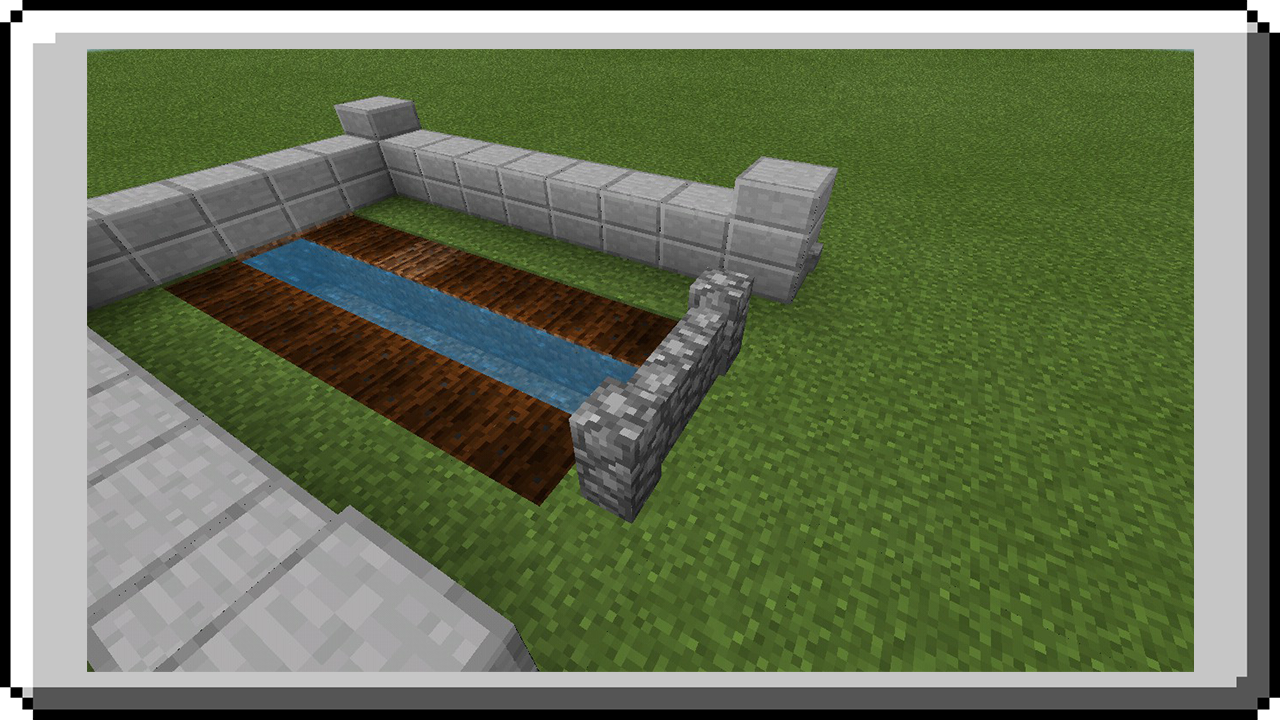
STEP 8: Now plant a melon/pumpkin seeds in all farm plot.

If crops bear fruits and ready to harvest click the button to automatically harvest them all.
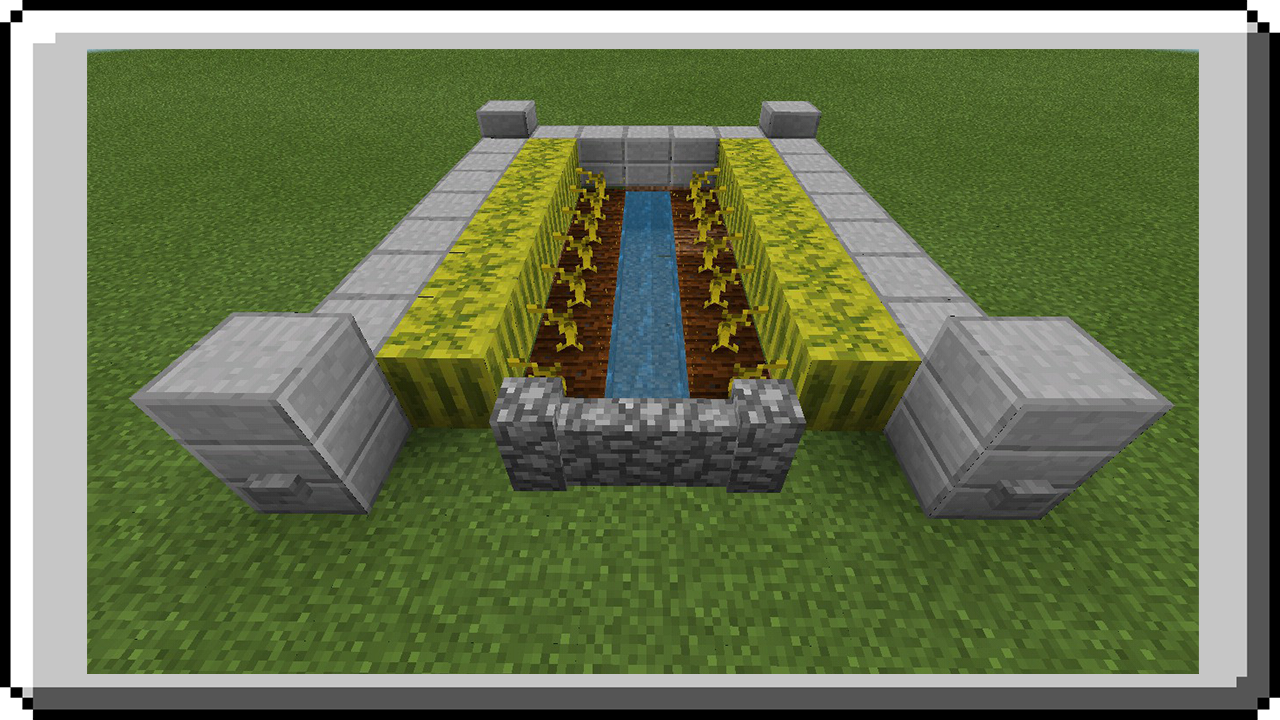
Auto-Refiller Cauldron
This mechanism will automatically refill cauldron with water when emptied (will become full if not full) with just one click. You can get unlimited water from cauldron.
STEP 1: Build a simple horizontal double piston extender like shown in picture with cauldron in front of piston.
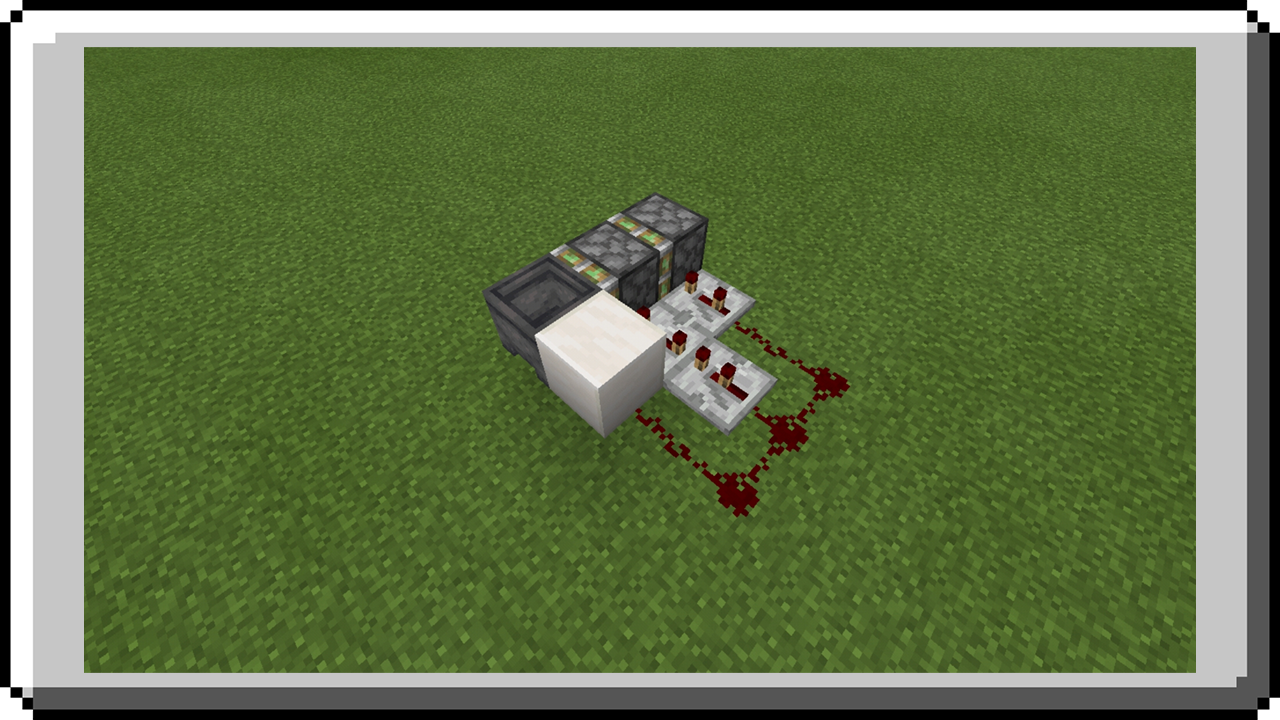
STEP 2: Build a wall in front of it and leave a hole in front of cauldron.
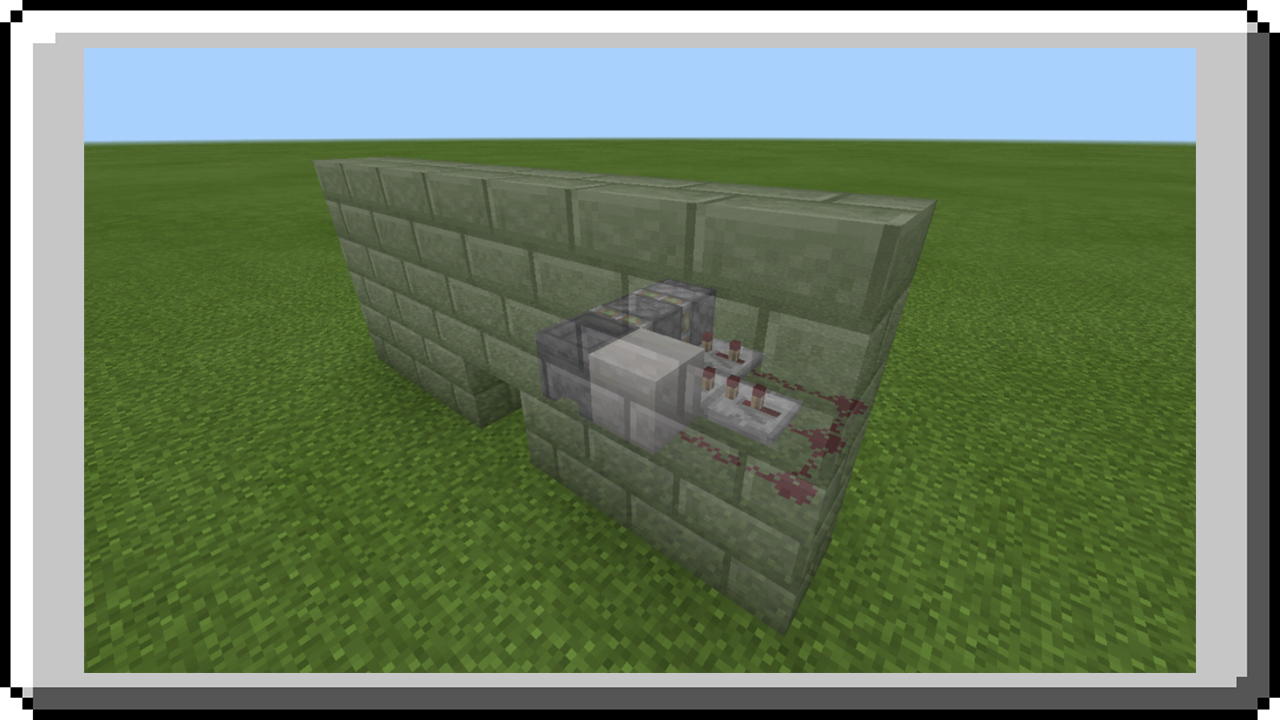
STEP 3: At the back, place a blocks that use to hold water at top of cauldron, then pour it a water.
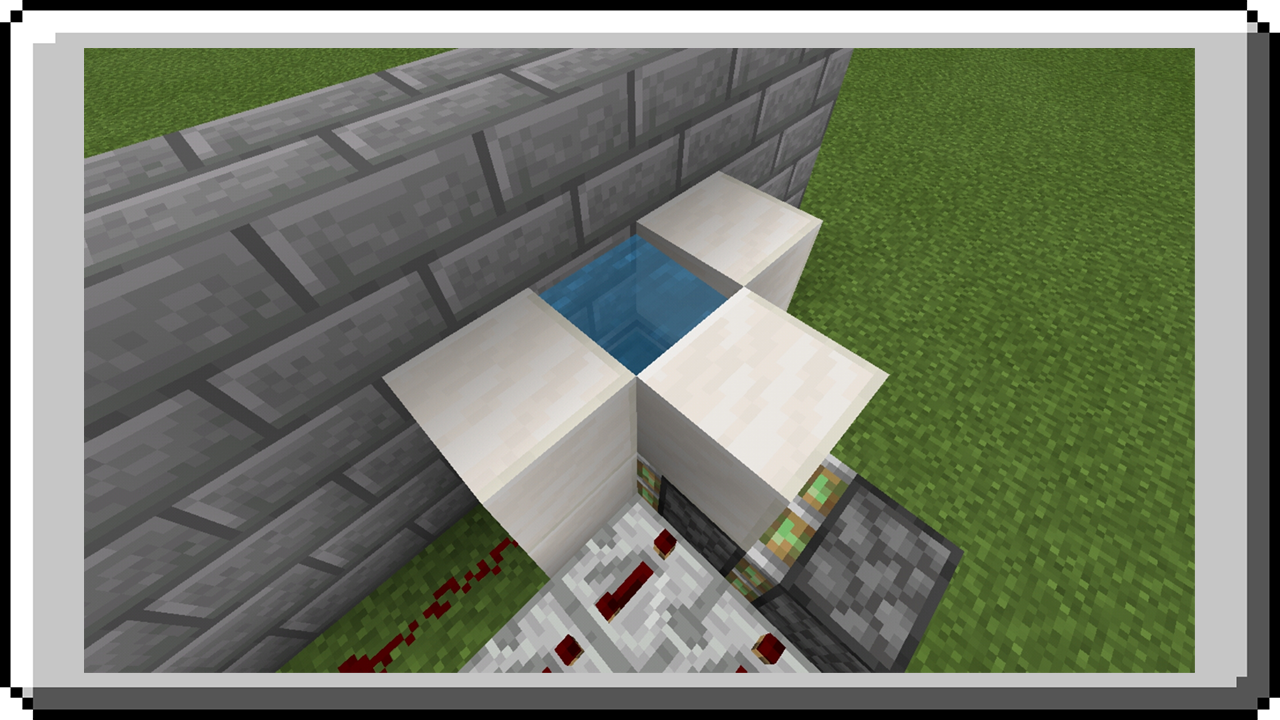
STEP 4: Place a redstone torch to power the extender, this will push out the cauldron in wall.
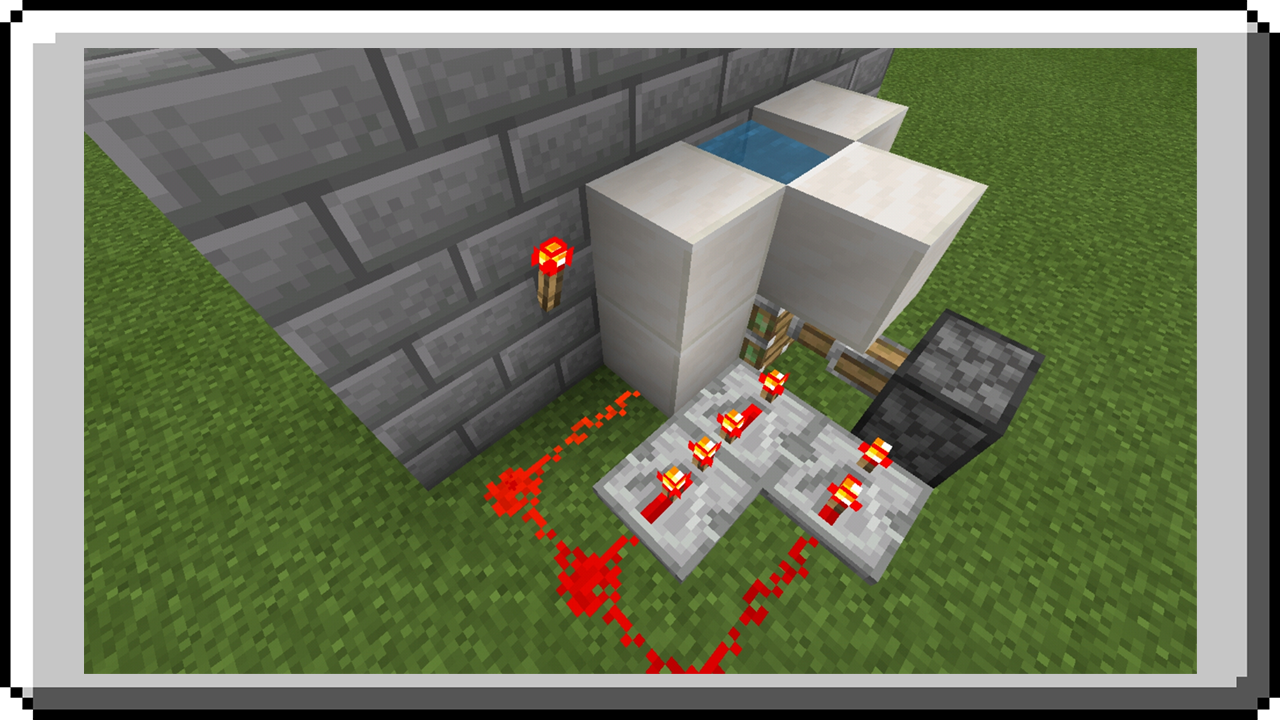
STEP 5: Behind where redstone torch is placed, place a button. You can optionally replace block where button is placed with different block for aesthetic design.

Hidden Mechanisms
Block Swapper
Block Swapper is a mechanism that can quickly swap the block: a two blocks that switch its location. Can be use for hiding bench such as crafting table.
Block Swapper
STEP 1: Build what shown in the picture below, redstone dust is your input.
IMAGE
STEP 2: On top of redstone torch at center place a sticky piston facing towards you. This will extend the arm of piston.
IMAGE
STEP 3: On front arm of sticky piston place a block then on it’s side arm (either left or right side). This two blocks which will swap when input is trigger.
IMAGE
STEP 4: Place a piston on top of redstone torch in both side, both are facing at sticky piston’s arm.
IMAGE
STEP 5: At the back, place a redstone dust at blocks where repeater is facing in both side.
IMAGE
STEP 6: Cover the redstone components and place a button on a block where input is.
IMAGE
Block swapper is done click the button to swap block.
Upward Vertical Block Swapper
This block swapper is like a previous one but facing upward.
STEP 1: Build what shown in the picture below, redstone dust on hole is your input.
IMAGE
STEP 2: On top of redstone torch at center place a sticky piston facing upward and then a block in front of it and place a block in its either left or right side of sticky piston’s arm. These two blocks which will swap when input is trigger.
IMAGE
STEP 3: In both side place a piston, both are facing at sticky piston’s arm.
IMAGE
STEP 4: A block in front of sticky piston, place another block in its side where input is, then a button in it. Then beneath this block place a sticky piston facing downward and then a redstone block.
IMAGE
STEP 5: You can now cover the redstone components.
IMAGE
Hidden Chest
Hidden Chest is a redstone mechanism that will hide your chest and you can reveal in just one click. You can use this to protect your items and prevent anyone accessing your chest.
In this tutorial I will use gold block in building this mechanism that represents to any opaque block and quartz of block represent as floor.
STEP 1: Place 2 sticky piston facing upward and then chest on top of it then block of your choice for floor in the left side then a regular piston facing to block and another piston on the right side 1 block away from chest.
IMAGE
STEP 2: At the back of lower piston place a block then a redstone torch attached to it and next a block on top of redstone torch and another redstone torch attached to it.
IMAGE
STEP 3: Place a block 1 block below from regular piston then a redstone dust following with repeaters like shown in the picture. This is a piston extender where redstone torch at the back is your input.
IMAGE
STEP 4: On the right side build like what shown in the picture a redstone dust placed next to repeater will be the input for extender. The two comparator in reversed direction uses to make redstone current stays a bit longer than usual.
IMAGE
STEP 5: At the back, place a redstone torch attached to a block where comparator is facing then a redstone dust connected to a redstone torch. This will extend the extender.
IMAGE
STEP 6: Build like what shown in the picture, the repeater has only 1 tick. This wiring is connected to left piston.
IMAGE
STEP 7: Going back to the front, place an observer facing down to the redstone dust then repeater on top of it going to redstone torch at the back.
IMAGE
STEP 8: This repeater on top is the input, now build a T-flip Flop here after placing item on upper dropper it will retract chest and swap to floor block.
IMAGE
STEP 9: That block of quartz is your ground floor level, now cover them with your chosen blocks for floor.
IMAGE
The input is the T-Flip Flop, place in either side of upper dropper a repeater facing to it and that is your input, connect your input in your chosen placed.
Hidden Door
This mechanism makes your room/house hidden, the door or entrance to your room/house is hidden you can use to protect your house from other players or hide something from others.
Jeb Door (2 x 1)
Jeb door is a hidden room in wall that uses a sticky piston to move a block and create a path to your entrance.
STEP 1: Build a frame of door then sticky pistons.
IMAGE
STEP 2: Place another sticky piston in front of sticky piston then a block.
IMAGE
STEP 3: Build a wall, this will be your path to go inside of your hidden room.
IMAGE
STEP 4: Place down a redstone wire this is your input.
IMAGE
STEP 5: Continue wiring going to the next sticky piston with 3 ticks of repeater.
IMAGE
STEP 6: Now cover the redstone components place lever in the left side at center and flicked it to close door.
IMAGE
If you want input isn’t visible you can make a hidden input contraption, see hidden input section.
Jeb Door (2 x 2)
STEP 1: Dig a hole with 5 width 8 length and 3 depth
IMAGE
STEP 2: Place a blocks just like in the picture below for redstone wiring.
IMAGE
STEP 3: Now place down redstone wire, redstone wire on center is your input.
IMAGE
STEP 4: Place a 2x2 sticky piston facing each other.
IMAGE
STEP 5: Place another sticky piston in front of sticky piston in both side.
IMAGE
STEP 6: Then place a block in front of sticky piston l, these blocks is your door.
IMAGE
STEP 7: Build a frame of your door.
IMAGE
STEP 8: At the back, build an upwiring circuit with glass going to the top, make sure redstone dust is directly at piston below.
IMAGE
STEP 9: Cover all of the redstone components, set up your input try to activate input to see how it work. You can build hidden input see “Hidden Input” section for tutorial.
IMAGE
Door and Gate Mechanisms
Piston Door
2x2 Piston Door
STEP 1: Place a sticky piston with blocks of your choice like shown below.
IMAGE
STEP 2: Connect them using redstone dust above them.
IMAGE
STEP 3: Then finally build a wall to cover the redstone components in both side. In any those redstone dust can be your input.
IMAGE
Castle Gate
STEP 1: Build an upward double piston extender with 4 wide. In case you don’t know how to build or how it work see piston extender section under contraption category.
IMAGE
STEP 2: Place a 4 x 4 Fences directly at sticky piston.
IMAGE
STEP 3: Build a frame for your fences and place 2 rows of pistons that facing downward.
IMAGE
STEP 4: Power the input of your piston extender to extend the fence and push it upward.
IMAGE
STEP 5: Build a frame again like shown in the picture below, also at the back.
IMAGE
STEP 6: On top of it build this, this is back view, but it doesn’t matter if you do it in either front or back.
IMAGE
STEP 7: On its side build a torch tower like show in the picture.
IMAGE
STEP 8: Now at bottom part build this like shown below, the red block represent as your input. (In front of lower observer has repeater with 4 ticks)
IMAGE
Lava Door
Lava Door is a mechanism where it uses lava as barrier of the door. When lava is about to flow and closes the door it will retract piston below the ground so there’s a hole for lava to catch it. Then will extend piston after lava disappear.
STEP 1: Dig a hole with 2 block wide 4 length and 2 block depth. Then place 3 sticky piston facing upward with a redstone dust and redstone torch in side of it like what shown in the picture. This use to catch lava
IMAGE
STEP 2: On the right side of the hole dig another hole. 2 more blocks in front, 3 blocks at the back, with 5 blocks width and 2 blocks depth.
IMAGE
STEP 3: Build Ethonian Hopper Clock on the side of hole.
IMAGE
STEP 4: Place a block in front of hopper with redstone torch attached to both side and repeater facing to it then another block in back of repeater with redstone on top. This will be the input of ethonian hopper clock.
IMAGE
STEP 5: Put any 30 items inside the hopper.
IMAGE
STEP 6: Dig a hole again like shown in the picture, it’s going to redstone torch to the sticky piston from redstone torch in input of ethonian hopper clock.
IMAGE
STEP 7: Place down redstone dust in this hole including on top of block near the sticky piston. Place a block where redstone dust attempt to connect above to separate the signal.
IMAGE
STEP 8: Build a farme of door, its 7 block high including a block submerged in the ground. It is require that you have atleast 1 block submerged in the ground correspond to sticky piston, so when sticky piston is retracted lava will not spill in that hole.
IMAGE
STEP 9: Continue building the frame of door. Leave a hole in center.
IMAGE
STEP 10: Cover the floor of door with your chosen block that couldn’t burn. As you see in the picture in the middle is 1 block below because it’s attached to sticky piston.
IMAGE
STEP 11: At the top of door place dispenser in the hole facing down with bucket of lava in each of dispenser.
IMAGE
STEP 12: At the side of door, build a thing like this. This will be your input.
IMAGE
STEP 13: On the block of input place a repeater facing away to it then build a T-Flip Flop next to it. Put one item in lower dropper. It is required that item is placed in lower dropper otherwise the lava and retracting of piston will not met a certain condition we wanted.
IMAGE
STEP 14: Place redstone torch attached to block of output of T-Flip Flop then a redstone dust below connected to repeater.
IMAGE
STEP 15: From your input connect it to dispenser above with torch tower.
IMAGE
STEP 16: Now it’s done! Design your door, replace ground with blocks of your choice.
IMAGE
STEP 17: Now place a button in front and back of the door. Click the button to close the door with lava.
IMAGE
NOTE: Don’t click button too fast and don’t click while lava is flowing because everything is well timed, this may not cause error to contraptions but may cause lava to spread on ground. Also, after you close the door don’t immediately open because lava is slower to flow when disappearing, at that moment items in ethonian hopper clock is still transferring so after it closes wait another few seconds before you open it again.
Transport Mechanism
Item Elevator
Item Elevator is a mechanism which is use to automatically transfer your items from bottom to go up.
STEP 1: Dig a hole with 3 length, 4 width and 1 block depth.
IMAGE
STEP 2: On the corner of the hole place a dropper facing upward, how tall you want.
IMAGE
STEP 3: Then place a chest on top of dropper.
IMAGE
STEP 4: Dig 2 block to the front of dropper.
IMAGE
STEP 5: Then place a hopper connected to lower dropper.
IMAGE
STEP 6: Then place a chest in top of hopper.
IMAGE
STEP 7: Now build this.
IMAGE
STEP 8: Place an alternatiing block start from where repeater is facing, going to the top.
IMAGE
STEP 9: Then place an alternating redstone torch going to the top. Now the item Elevator is done.
IMAGE
STEP 10: You can now build a wall to cover redstone components. Store item/s in lower chest and it will automatically transfer to top chest.
IMAGE
Elevator
Elevator is a redstone mechanism that allow player or mob to transfer from bottom to top or from top to bottom.
The step by step tutorial for building redstone elevator is not yet currently finished, because it has a lot of steps. You can watch it in Vechrozilator’s channel for tutorial in building this redstone elevator. The tutorial in this guide for building elevator will be added soon.
To watch the video search his channel on YouTube “Vechrozilator” then go to playlist redstone creation and find it or simply search Vechrozilator’s elevator.
You can visit this link: https://youtu.be/o4krM-8HVDs
Lock Mechanism
Keycard Lock
A keycard lock is a lock that required a right keycard to control the door. A paper is use as your keycard, it should need to insert in order to control the door, only your keycard is accepted to control the door.
STEP 1: Dig a hole with 2 width, 4 length and 2 block depth.
IMAGE
STEP 2: Place a redstone dust at end and repeater facing to a block and place redstone torch attached to block.
IMAGE
STEP 3: Now on top of redstone torch place a block and then an iron door.
IMAGE
STEP 4: Build a wall and leave 1 block hole.
IMAGE
STEP 5: At the hole place a dropper facing inside. (Picture below is in inside view)
IMAGE
STEP 6: Place a hopper facing to a dropper.
IMAGE
STEP 7: Place a comparator facing away from hopper and build what shown in picture.
IMAGE
The hopper is powered by redstone torch, this will deactivate a hopper (stop transferring item).
STEP 8: Get four 64x stackable items then renamed them using anvil into random name, each need a different names.
IMAGE
STEP 9: After you named them all place it in slot of hopper, leave the first slot.
IMAGE
STEP 10: Get 19 pieces of paper and also renamed them using anvil but all papers should have same name. Renamed the paper in a word you want, this is like your password.
IMAGE
STEP 11: Place all papers you renamed in first slot of hopper. This should transfer 1 item into dropper, get that paper in dropper and that is your keycard.
IMAGE
The comparator will measure the block state of hopper, a four 64x stackable item and 19 pieces of paper a total of 23 items (all are 64x stackable items) is enough to give power level 2. If power level 2 is reached the repeater will powered causing the redstone torch to OFF and unpowered the hopper so hoper will transfer item. Then after one item is transferred, its now only have a total of 22 items, it is not enough to give power level 2 so the redstone torch will ON again and stop hopper from transferring items. That’s how it should work!
Note: The four items that was renamed into random letters is used to make other item can’t transfer into hopper because of hopper is full. You renamed it into random letters to make other item like this won’t stack in same slot, basically it is use to block other items to transfer in hopper.
STEP 12: At outside place a button on dropper, here on dropper will you insert your keycard to control door.
IMAGE
STEP 13: Place a redstone dust connected to a redstone torch and place a redstone torch attach to a block where redstone dust is placed (it’s need to invert signal) next to it place repeater and dig 2 block in front of repeater.
IMAGE
STEP 14: On this hole build Grizdale’s T-Flip Flop, place a dropper facing upward and a hopper connected to dropper. Then put one item in dropper, any kind of item is allow.
IMAGE
STEP 15: Place another dropper on top of first dropper then a comparator facing away from dispenser.
IMAGE
STEP 16: Place a block in front of comparator and connect the output of T-Flip Flop into door.
IMAGE
STEP 17: Build a wall and place a button you can make block differ in wall where button is place, this is use to control door inside.
IMAGE
STEP 18: At the back place 2 repeater and place a repeater in side of dropper facing to it. It uses a repeater to prevent redstone dust to power.
IMAGE
STEP 19: Place a block in top of comparator and in it’s side to connect the two repeaters to repeater facing in dropper.
IMAGE
STEP 20: Your keycard door lock is done, now cover the floor.
IMAGE
To use it, at outside open a dropper and insert your keycard then click the button to control the door while your keycard is inside the dropper you can close and open the door you can’t also close the door if keycard is not there. At inside the button there you can control the door to open and close. After you open the door don’t forget to get your keycard indside the dropper before you enter.
NOTE: If some players know the name of your paper they can make another paper to renamed, the same to the name you made and they can use it to your keycard door lock. So keep your paper safe and private don’t let other knew it.
Lever Passcode
Lever Passcode needs a specific combinations of input in order to trigger the output (ONLY Gate). This work exactly same as ONLY Gate (see Logic Gates section) but have more inputs. You can use it on your door to forbid anyone to enter.
STEP 1: Build 8 x 4 wall and make inner block different from the outer, for aesthetic design. That is optional the important is you build a wall.
IMAGE
STEP 2: Now place a levers at inner part (6 x 2). Then set up any combination you like.
IMAGE
STEP 3: At the back, place a redstone torch in all blocks where levers are placed.
IMAGE
Let’s use 2 different color to make you easily understand it.
- Red: All components place here has to be changed in order to change the password. The components that placed here depend on the combination you set.
- Lime: All components place here doesn’t need to change once it placed.
STEP 4: At the top of higher redstone torch place a row of red blocks, then another 2 row of red blocks diagonally going down. And the lastly place a row of red blocks 1 block away below the 3rd row of red block above.
IMAGE
STEP 5: Now for the lime block, place a row of lime blocks like shown in picture.
IMAGE
STEP 6: Place a redstone dust in top row and bottom row of lime blocks.
IMAGE
STEP 7: At the inner lime blocks place a repeater facing to the red block.
IMAGE
STEP 8: Connect the redstone dust like shown in picture.
IMAGE
Now for setting up the password on top.
STEP 9: Place a repeater directly behind in all of the ON levers at the top of 2nd row of red blocks.
IMAGE
STEP 10: Place a redstone torch in all OFF levers attached to a 1st row of red blocks.
IMAGE
Now for setting up the password at the bottom.
STEP 11: Again in all OFF levers place a redstone torch attached to a 3rd row of red blocks.
IMAGE
STEP 12: In all ON levers place a redstone dust on top of 4th row of red blocks. Your done in setting up the password, let’s head with the door.
IMAGE
STEP 13: In the side dig a hole like shown in the picture with 2 block depth, 2 width and the length is from lime wool going to the wall.
IMAGE
STEP 14: Build shown in the picture, the redstone torch is your output.
IMAGE
STEP 15: Cover it with any of your chosen opaque blocks.
IMAGE
STEP 16: Place 2 iron door at the top of 2 redstone torch.
IMAGE
STEP 17: Build a frame of your iron door.
IMAGE
Your password door is done, your door is close because iron door is the last thing you place so the door doesn’t update with redstone torch below. Try to ON then OFF or OFF then ON one of the levers and your door will open.
Turn OFF all the levers to make your password isn’t visible.
IMAGE
You can now cover redstone components and start building your house.
Item Frame Lock
WIP - COMING SOON
This is what I have so far
Item Frame Lock is a redstone mechanism that uses the combination pattern of item frame for door locking.